Internet Explorer is not supported. Please upgrade to a more modern browser.
Wiki
Rules
Rules
No swearing/cussing, improper language, or mature topics
AutCraft has many younger players so chat must be kept family-friendly at all times. The following list includes a few examples of topics that ARE NOT ALLOWED, but it is not an extensive list. If a staff member asks you to stop saying something, please stop immediately.
Game Play Guidelines
The following are not allowed and may result in punishment:
- Abusing glitches – duplication glitches, economy or plugin glitches, etc. are not allowed on AutCraft. All glitches or server glitches should be reported immediately.
- AFK and Flying machines – Any machines or builds that move the player to avoid being kicked or to travel are strictly forbidden.
- Unapproved mods & Clients – No unapproved mods or clients may be used on AutCraft. Please review the approved mods list for a list of mods that are allowed.
Protections
AutCraft protects the builds of players to prevent others from damaging them, the following guidelines must apply to all builds in order to be protected:
- Builds must be at least 30 blocks away from the nearest build belonging to another player.
- The corners of a protection must be marked to receive a protection. If a build is underground, the “markers” MUST be placed above ground.
- You can have up to 6 other players on a protection.
- Group builds (towns, hotels, etc.) will be protected like any other base (1 owner, 6 members) and must follow the guidelines mentioned above.
- Builds MUST be in a build world to be protected.
- No building anywhere outside of your protection, this includes no paths, roads, railways, canals, bridges or minecart tracks across the build worlds.
No Griefing
Griefing refers to the intentional, unapproved editing or damaging of another player’s property. This is not acceptable behavior for any reason. To report griefing, please type “/modreq I was griefed” and a staff member will assist you.
Griefing is:
- Damaging another player’s build, even if it is not protected.
- Killing another player’s pets or mobs.
- Stealing items from unprotected chests.
- Protecting builds, chests, or doors that do not belong to you.
Family Friendly Builds Only
We hope that everyone on Autcraft uses good judgment about building things appropriate for use in minecraft on a family friendly server. If while exploring you find an inappropriate build, please type '/modreq inappropriate build' while standing nearby. An admin will take a look as soon as possible and remove it if necessary.
We will remove builds that we deem inappropriate, including but not limited to: Any symbol, emblem, or shape that represents an intolerant or hateful group. Any representation of male or female private body part(s). Any swearing or hateful words spelled out with blocks, on signs, or in books.
Please do not build "adults only" establishments, including casinos, bars, and nightclubs. References to alcohol or drugs in builds or item names are not allowed on Autcraft.
Skins and Banners
If your skin or banner is used with intent to scare, annoy, harass, or impose a view or position on to other players, a helper or admin may ask you to change your skin and/or remove the banner before returning to gameplay. Skins and Banners need to be family-friendly including but not limited to:
- No Herobrine, Creepypasta, or Five Nights at Freddy's skins.
- No blood or gore of any kind on skins.
- No indecent exposure or naked skins.
One Account Per Player
Alternative and shared accounts are not allowed for any reason on AutCraft. Alternative accounts will be removed from the white-list and shared accounts will be handled accordingly by staff.
Trapping/Killing Players
The intentional trapping or killing of a player on AutCraft will not be tolerated. Traps will be removed and the player responsible will be punished accordingly.
Public Builds
If you decide to make a build for community use, it is your responsibility to maintain it. Public builds will be protected following the previously mentioned Protection Guidelines.
Redstone
Staff reserves the right to request any build be removed if it is too demanding of the server. All redstone builds MUST abide by the following:
- No continuously running redstone clocks or machines
- You can have a maximum of 100 hoppers per loaded area. The area that gets loaded in is 10 chunks, we recommend a radius of 15-20 chunks between hopper-heavy areas.
Pet Ownership
As a large survival server with hundreds of different players on each day, we must limit the number of pets each player can have in order to reduce lag. The follow limits have been set for the benefit of the entire server.
You are allowed to have 10 of each animal type with the following exceptions:
- Sheep: You may have 32 total sheep, of any color combination (two of each color)
- Villagers: You may have 15 villagers
- Wolves: You may have 18 wolves (2 of each variety)
- Cats: You may have 22 cats (2 of each variety)
These limits are per loaded area. A loaded area is defined by a radius of 10 chunks around any player location. We recommend spacing large groups of mobs at least 20 chunks apart to prevent them from being loaded at the same time.
Sheep and wolf limits are to allow two of each variety, however you are welcome to mix and match however you choose, including having all the same color, as long as they remain within the stated limit.
There are more than 15 villager occupations. This means that if you want to have a villager trading area for books or materials, you must have separate areas to ensure no more than 15 villagers are loaded at any one time.
Tamed animals:
- Do not leave any pets sitting in any area that is not yours. Admins will not know who they belong to and they will be removed and you will not have the opportunity to get the animal back.
- Pets are not damage-proof! If you take them out of your area, they may not be safe. Wolves and cats are damaged by arrows and flames and wolves can take fall damage.
- We recommend you keep pets safe at home.Take care of your pets in the game as you would a pet in real life.
Chat Guidelines
No Cheating/Hacking
- No swearing, do not swear or attempt to bypass the swear filter in any way.
- No religious or political discussions, AutCraft is not the place for controversial discussions.
- No mature media, including but not limited to, TV shows, movies, videos, and games. Please note that Roblox has recently changed its age rating as is no longer appropriate for Autcraft.
- No taunting/name-calling/harassment, Autcraft strives to be a safe haven from bullying. Unkind words and actions will not be tolerated.
- No dating or romantic relationships, these subjects are not appropriate for younger players and will not be tolerated.
- No violence or threats, including but not limited to, guns and other weapons, murder, threatening to hurt yourself or others, even jokingly.
- No vulgar acts or “potty talk”, we do not need to know about any illnesses or bodily functions.
- No horror, creepypasta, or other topics that may upset players.
No Spam
Sometimes chat is going really fast! It is okay to say it again later if you feel no one heard you but you don’t need to say it a lot of times in a row.
- No repeated letters or characters, like this: ‘Nooooooooooo!’ or ‘No!!!!!!!!!!!!!!!!!!!!!!!!!!!!!!!!!!!!!!!!!’
- No countdowns, like this: ‘5’ ‘4’ ‘3’ ‘2’ ‘1’
- No gibberish, like this: ‘wkejhrlwkjebdlwkjebrlwiuer’
- No Ascii or Unicode symbols, like this: ‘☺∑۞♥♫♯ '
- No repeating chat lines, like this: ‘I need wood’ ‘I need wood’ ‘I need wood’
No Harassment
You should not, in any way, harass, annoy, bully, or otherwise inconvenience any players. This includes name-calling and other forms of insulting others. If somebody asks you to stop something, please do so immediately. Harassment or bullying of any kind will not be tolerated on any AutCraft platform.
No Personal Information
Privacy and security are of the utmost importance to us here at AutCraft. Because of this, seeking out personal information of other players is strictly forbidden and will be handled accordingly. Please consult this general guide on internet safety for guidelines and advice.
- DO NOT share identifying information, such as last names, school names, city names, etc.
- DO NOT share contact information, such as emails, phone numbers, discords, social media, etc.
- DO NOT request or seek out personal information of others in any way, this is considered a bannable offense.
- DO NOT share other server names or IP addresses for anywhere outside of Autcraft
English Only
We understand that English might not be your first language, but AutCraft is an English speaking server only. We will help you in any way that we can, but we ask that all communication on AutCraft platforms are in English.
No Advertising
There will be no advertising of any other servers in any form. No talking about other servers, discords, games, etc. on any AutCraft platforms.
Changing Usernames
Usernames should not:
- Mimic or put down other players
- Be inappropriate in any way
- Make players think you are staff (copying names of Helpers, SrHelpers, Admins)
You will be removed from the whitelist until you change your name back.
Roleplay Reminders
We know some of our players have active imaginations and are fantastic storytellers. Chat channels are available for any players who want to participate in extended roleplays. All roleplay chat needs to be contained in a channel and need to follow all of AC's Chat Guidelines. Sr. Helpers and Admins monitor all chat channels.
Forum Rules
- No posting links to download files. Due to the inherent danger of downloading unknown files off the internet, we cannot allow this.
- All content posted, including, but not limited to, images, song lyrics, art, stories, venting, random chatter, *must* be Autcraft friendly and appropriate for all ages.
- All previously stated server rules apply to the forum
Consequences
On Autcraft we try to be fair and understanding. We have several tools to help us maintain a safe and family-friendly environment. What tool is used is at the discretion of the staff member online at the time. In most situations, there will be one or more verbal warnings in public and/or private messages.
If you or your child experiences any of these consequences, you can contact any staff member in game via private chat, /helpop, or the Facebook page. Please include the player’s username when inquiring via email or Facebook. We advise all parents to frequently check the emails provided in the whitelist application for updates concerning the player.
Mute
Mutes prevent the players from speaking in chat or channels and are generally reserved for chat violations. You will usually be messaged concerning why you were muted and can often respond via a book or signs. Admins can also be contacted with /helpop.
Jail
Jail is a room that players cannot leave or interact with other players. Jail is typically, but not exclusively, reserved for violations of gameplay rules. Players may be held there until staff can contact their parent or guardian.
Ban
In extreme cases, players who repeatedly make poor choices will be temporarily unable to access the Autcraft server. The timeframe is at the discretion of the admins, however, some players will remain banned until their parents can be contacted to help us help the player better understands the rules.
Whitelist Removal
Rarely, but sometimes, players are removed from the whitelist and given a chance in the future to apply again. This is used for players who are continually destructive or show signs that they are not ready to participate in a multiplayer server.
Note to Players
This is not an extensive list of the rules and behaviors expected of AutCraft players. If a staff member asks you to stop a certain behavior, you are expected to respect their request. If you disagree with a staff member or their request, you should contact an admin via private message, do not argue with staff members.
Store
Store
Description
The Autcraft Store is where players can buy ranks, permissions, and other items to enhance game play. To access the store, visit click here, or click the "Store" tab on our website menu.
Currency
Items can be purchased using real money, or with credits. Players can earn credits by signing up for in game jobs and then converting earned job points to store credit.
Jobs
Players can have up to three jobs at a time. Visit /warp jobs to see available jobs and their descriptions. After choosing jobs, simply do activities that earn points. For example, Miner job gives points for mining stone, ores, deepslate, and other blocks. Choosing activities that are enjoyed and frequently done while playing Minecraft will make earning points quick and easy.

Converting Job Points
IMPORTANT Players must have registered at Autcraft.com beginning April 2022 or later before converting any job points. If you have not updated registration to our new website, your job points will be lost during conversion.
When a player is ready to use their job points, they can convert the points into credits with the command /jobs shop
The blocks on the shop GUI represent the increments of points that can be converted into credits. Hovering over each block will provide the conversion information. Players must have a free inventory space in order to convert points.
Note: These blocks do not represent ranks or any other item. They are only placeholders for the conversion options.

Dirt Conversion - 10,000 job points = 1 store credit
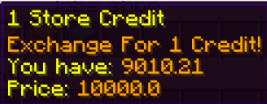
Iron Conversion - 100,000 job points = 10 store credits

Gold Conversion - 500,000 = 50 store credits

Diamond Conversion - 1,000,000 job points = 100 store credits

Using the Store
After points have been converted to credits, players can visit the store by clicking the link on the menu bar at the top of our website. Please make sure that there is enough inventory space in the game for the player to receive the items purchased.
![]()
Items are added to the store manually. As our store is newly opened, please be patient during the process. As of the most recent update of this page, only Ranks are available for purchase. Other items will be added.
Select the category of the desired item. At this stage, there will be a field to enter the username of the player the item will be sent to. This can be you, or it can be a different name if you wish to donate a rank to another player.
Note: The store no longer displays your current balance until you get to the checkout page.

For information about each item, click "Buy"
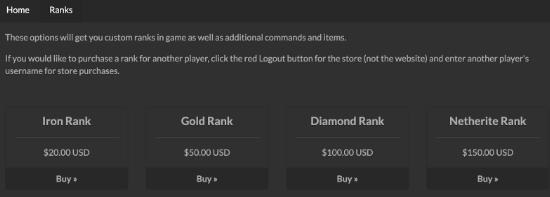
A description of the item will pop up. To continue with the purchase, choose "Buy"
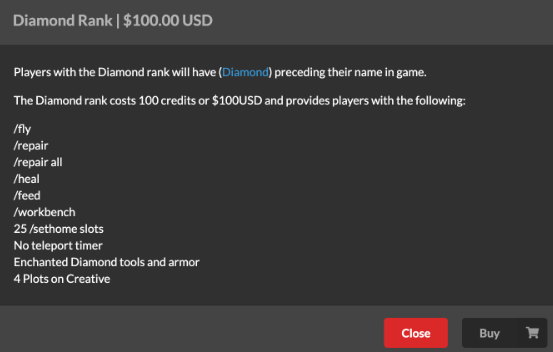
On the checkout page, there is an option to use the available credit balance, or pay with real money through PayPal. Make sure to check the box at the bottom agreeing to terms and conditions of the purchase. To finalize this sale, click "Purchase."
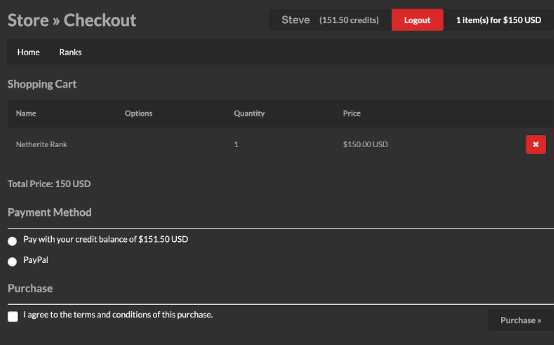
Frequently Asked Questions
- How do I get to the store?
- Visit out website and click "Store" from the menu at the top of the page.
- Where did all my points go?
- Points from the old store have been recorded. They will be converted to the new store and manually added to player accounts. Please be patient while staff completes this huge task.
- I had so many points on the old store! Why do I have so few now?
- Our new credits hold more value than the old points. 1 credit = 100 enjin points
- Items in the store cost the same value as the old store. They have been adjusted to match credit value. Job points required to purchase items will remain the same.
- Why are there only a few things in the store? I want particles.
- Each item in the store has to be added manually. Cost must be converted to match the new system. More items will be added as soon as possible.
- How do I donate a rank to another player?
- When you get to the store, there is a place to enter a username. Enter the name of the player you wish to donate a rank to and finish the purchase. All items purchased in that transaction will be given to the listed player. To buy something for yourself, log out of the store and enter your username to start a new purchase.
- How do I see how many credits I have?
- Type /credits
Approved Mods
Approved Mods
Mods are modifications to the Minecraft game that make it behave differently. Sometimes they're small, like a minor graphical change; sometimes they're big, like adding new blocks and items; and sometimes they're unfair, like x-ray. In an effort to ensure that Autcraft is a safe and fair place to play, where everyone has similar experiences and opportunities, only some mods are allowed.
This is a list of all of the mods currently allowed to be used on the Autcraft server. If a mod you want to use is on this list, please read the entire section for that mod so that you can see if there are any parts of that mod that are disallowed. If there is a mod that you want to use that is not on this list, please see if it has been suggested before and if not, suggest it on the forums and don't use it unless it is put on this list.
Note: If a mod on this list requires another mod to work, that mod is also allowed.
Mod Loaders
Most mods use either the Fabric/Quilt or Forge mod loader. To use a mod, you'll usually have to install a mod loader first.
How to Install Fabric
- Download the Fabric installer from fabricmc.net/use. Use the Windows/.EXE method if you are on Windows, or the universal jar method if you're on another platform (or don't like the SmartScreen warning). Note that to open the .jar file, you'll need to install Java first which you can do from adoptium.net.
- Open the file that you downloaded. If done correctly, the installer window should appear.
- Select the Minecraft version you want to use.
- Click "Install".
- Open the Minecraft launcher (closing it first if it was already open).
- A new Fabric installation profile should appear. Select it, put the mods you want to use into a "mods" folder in your Minecraft directory (instructions on how to find it here), and you're ready to play!
Quilt
Quilt is a fork of Fabric, compatible with most Fabric mods (though that's one-directional compatibility - Fabric cannot load Quilt mods). The QuiltMC website has installation instructions if you want to use Quilt.
How to Install Forge
- Download the installer for the version of Forge for the Minecraft version you want to use from files.minecraftforge.net. Note that clicking on the download link will take you to an ad page before letting you download the file, do **NOT** click on *anything* on that page except for the "Skip" button at the top-right! If you did that correctly, you should get a file named
forge-<minecraft_version>-<forge_version>-installer.jar. - To open the .jar file, you'll need to install Java first which you can do from adoptium.net.
- Open the file that you downloaded (with Java). If done correctly, the installer window should appear.
- Click "OK".
- Open the Minecraft launcher (closing it first if it was already open).
- A new Forge installation profile should appear. Select it, put the mods you want to use into a "mods" folder in your Minecraft directory (instructions on how to find it here), and you're ready to play!
A word of safety: NEVER download mods or mod loaders from websites you don't trust! At best, this can lead to installing malware and viruses; at worst, you can lose your Minecraft account. For your safety (and everyone else's), only download mods from the websites listed below unless you are sure you know what you're doing.
OptiFine
OptiFine is likely the most popular and most downloaded mod for Minecraft. It's been around since Minecraft Beta 1.7.3, and was originally a great mod with many optimisations, features, and quality of life improvements. However, in recent years, it's benefits have dwindled and causes many incompatibilities with other mods due to it replacing large amounts of code and being closed-source. In the modern Minecraft modding era, with the Fabric/Quilt mod loader and community, open-source mods exist to replace most of OptiFine's features. Other mods that optimise the game more than OptiFine exist too, and they work in a way that's more compatible with other mods.
It's not recommended to use OptiFine anymore, but it is allowed as long as Options -> Video Settings -> Performance -> Fast Math is set to OFF (reason why here). OptiFabric is a mod which allows you to use OptiFine on the Fabric mod loader (it isn't supported natively), and is also allowed, though not recommended.
How to Download OptiFine Safely
- Go to the download page on optifine.net.
- Find the version you want to download in the versions list.
- Right click the "(mirror)" button link to the right of the "Download" button for the version you want to download.
- A context menu should have appeared. In it should be an option called something like "Open Link in New Tab". Click it.
- You should now be on the page with the download link. Click it. There are ads here, so be very careful to click on the right link.
- You should get a file called something like
OptiFine_<minecraft_version>_HD_U_<letter><number>.jar.
How to Install OptiFine Standalone
- Open the installer .jar file. To do this you'll need to install Java first, which you can do from adoptium.net.
- Click "Install".
- Open the Minecraft launcher (closing it first if it was already open).
- A new OptiFine installation profile should appear. Select it, and you're ready to play!
Allowed Mods
Performance
Despite being a simple-looking block game, Minecraft can actually be quite difficult to run because it is incredibly unoptimised. Luckily, the community have recognised this and created mods to help. These mods don't affect gameplay, and exist to improve performance, and so are okay to use on the server.
Note: Any performance enhancing mod that does not affect gameplay is approved to use on Autcraft. See examples below. If you have a question about if a mod is okay, please ask on the suggestions forum.
- Sodium - Rendering engine and client-side optimisation mod, usually even better than OptiFine.
- Indium - An addon mod for Sodium adding Fabric Rendering API compatibility (which is required for some of the mods below to work with Sodium).
- Lithium - Optimises many server-side things, though provides some benefit when installed on a client only.
- Phosphor - Optimises the lighting engine.
- Starlight - Replaces the lighting engine with a significantly more optimised alternative. Generally performs better than Phosphor, though isn't compatible with Phosphor and is generally less compatible with other mods than Phosphor. NOTE: No longer updated
- FerriteCore - Reduces memory usage.
- LazyDFU - Reduces start-up time by not compiling DataFixerUpper rules until they're actually needed.
- Dynamic FPS - Renders Minecraft at 1fps (or not at all) when unfocused, as well as improving background performance.
- Enhanced Block Entities - Optimises block entity (such as chests) rendering by rendering them as normal blocks until they need to animate.
- Entity Culling - Optimises entity rendering by culling entities hidden behind walls using asynchronous path-tracing. Not perfect, but can increase performance when there's lots of entities around.
- Exordium* - Rendering the GUI at a lower framerate to increase available rendering resources to the world rendering. There's little point in rendering the hotbar at 100+ fps.
- ImmediatelyFast* - Optimises "extra" rendering - maps, particles, entities, text, etc.
OptiFine Alternatives
While OptiFine is not recommended to be used, you can still use most of its features by using a mod from this list that adds the feature you want to use.
- Iris - Supports loading OptiFine format shaders. It's compatible with Sodium, allowing for much better performance when using shaders compared to OptiFine.
- Canvas - An alternative shader and optimisation mod, incompatible with Sodium and Iris. Uses it's own shader format.
- Kappa - Lets you see OptiFine capes without using OptiFine.
- Logical Zoom - Adds a simple zoom mimicking OptiFine's zoom.
- Ok Zoomer - Adds a configurable zoom.
- Zoomify - Also adds a configurable zoom, with different (more?) options.
- WI Zoom - The zoom from the Wurst hacked client as a dedicated mod.
- LambDynamicLights - Adds dynamic lights. If you hold a torch, the area around you lights up!
- Continuity - Adds efficient MCPatcher/OptiFine format connected textures. Includes a resource pack adding some connected textures (like glass and bookshelves), and another resource pack to fix glass pane culling.
- LambdaBetterGrass - Recreates OptiFine's better grass and snow features with extra customisation.
- Fabrishot - Lets you take large screenshots.
- Cull Leaves - Recreation of OptiFine's "Smart Leaves" feature. If playing on fast graphics, this won't change visuals, but will still provide a performance increase in forested areas (see: MC-179383).
- CIT Resewn - Recreates OptiFine's Custom Item Textures feature, allowing for items to have different textures or models depending on some information about the item such as its name.
- Chime - An alternative Custom Item Textures mod using its own format.
- Nuit (formerly FabricSkyboxes) - Recreates OptiFine's "Custom Skies" feature, but using its own format.
- Entity Textures Fabric* - Recreates OptiFine's Random/Custom Entity Textures feature, allowing resource packs to specify custom textures for entities to use based on several properties such as spawn biome or name.
- Entity Model Features* - Recreates OptiFine's Custom Entity Models feature, available in both Fabric and Forge.
- OptiGUI - Recreates OptiFine's Custom GUIs feature, giving resource packs way more control over GUI textures.
- Animatica - Recreates OptiFine's Animated Textures feature, allowing almost any texture to be animated instead of only items and blocks.
- Colormatic - Recreates OptiFine's Custom Colours feature, allowing resource packs to change the colours of things that are normally hardcoded by vanilla such as the experience levels number, dyes, the sky, arbitrary blocks based on biome, and lightmaps.
- Puzzle - Adds configs for a few mods that re-implement OptiFine features to one central place, and adds a few extra resource packs features of its own.
- Sodium Extra - Adds lots of OptiFine's smaller settings, like whether certain animations, particles, or details render, and an optional fps information overlay like OptiFine has.
- Reese's Sodium Options - Changes Sodium's options menu to fit more on the screen, recommended to use with Sodium Extras due to the amount of extra options it adds.
- MCPPPP - Runs a conversion tool on startup converting OptiFine/MCPatcher format resource packs into newer formats (most notably for FabricSkyboxes).
Visual Changing Mods
- Item Model Fix - A small graphical enhancement mod that fixes the tiny gaps in item models.
- 'Slight' GUI Modifications - Allows you to customise some parts of the GUI that are normally hard-coded and adds some new animations for things like taking screenshots.
- Quilt Loading Screen - A tiny mod that changes the loading screen to have several patches from the Quilt logo falling like snow (with an optional pride mode).
- First-person Model - Enables the third-person model in first-person, so you can see the game from the player's real perspective. Do not enable FirstPerson Settings -> Cosmetics -> Change camera height.
- Not Enough Animations - Adds some missing third-person animations that play in first-person and modifies some existing third-person animations to make them more accurate to how they're rendered in first-person.
- Skin Layers 3D - Renders the usually flat second layer of player skins as a 3D model.
- CapeTweaks - Allows you to disable capes and slightly modify how they behave.
- Wavey Capes - Makes capes be wavey!
- Clear Skies (forge version) - Removes the lighter-coloured band around the horizon.
- Blur (forge version) - Lets you customise the normally transparent black GUI background shown when in inventories or in the pause menu by changing its colour, making it a gradient, or blurring what's behind it.
- Falling Leaves - Adds little particle leaves that fall from trees and move in the wind.
- MinecraftCapes Mod - A cape mod letting you add custom capes to your Minecraft character.
- Hat List - Always shows the hat layer of Minecraft skins in the tab player list.
- Chat Heads - Shows player heads next to chat messages depicting the sender of the message.
- Semitranslucency Fix - Allows resource packs to use semi-transparent pixels instead of only either fully transparent or fully opaque pixels in GUI/HUD textures.
- Seamless Loading Screen (1.19.2 fork) - Takes a screenshot when you leave a world or server, and shows it as the loading screen background when you rejoin.
- Fullbright (Forge)- This mod provides 4 brightness levels which can be cycled through by tapping the keybind
- GammaUtils (Fabric) - This is a fully configurable and client side gamma/brightness utility mod.
- Caxton - Adds proper TrueType/OpenType font rendering support, allowing for perfectly smooth vector font rendering like in web browsers instead of using bitmaps. This can make chat easier to read, especially when scaled to certain values.
- No Weather Effects - Introduces a new component into the game by disabling all of the game’s weather effects, including precipitation, storms, and snowfall, resulting in clear skies at all times.
- Do a Barrel Roll - A lightweight, fully client-side mod for Fabric that changes elytra flight to be more fun and semi-realistic. It achieves this by redesigning movement with a completely unlocked camera orientation in mind, allowing for full pitch, yaw and roll control in flight. Note: check required dependencies
- Simple Armor Hud*- Displays the armor currently being worn above the hunger bar, along with a damage bar.
- Dynamic Surroundings* - Alters the visual and audio experience by adding more effects to the game.
- Traveler's Titles* - Displays biome names in the center of the screen as you enter each biome. Size, color, location, and more are customizable.
- RP Renames* - Adds a menu to anvils showing all textures that are linked to item names within a resource pack.
- Better Third Person* - Allows the user to change the camera angle when in third person view.
- Bobby* - Increases the apparent render distance for the player, allowing for better screenshots and more expansive views.
- PatPat* - Adds animations allowing players to pet mobs.
Utility Mods
Note: Any mod with the sole purpose of allowing controller use in Minecraft is approved. Any non-vanilla features, such as reach-around, must be disabled. If you have questions about a specific mod, please ask in the suggestions forum.
- Mod menu - Adds a "Mods" button and provides a list of mods and a way to access their configs in-game.
- ShulkerBoxToolip - A mod allowing you to see everything that's inside a shulker box by hovering over it in an inventory instead of only seeing a small text list.
- AdvancedChatCore - A base mod that other AdvancedChat module mods rely on, that also adds a few basic features such as chat timestamps and duplicate message stacking.
- AdvancedChatLog - Adds a searchable chat log of many previous messages that you can access with a keybind or button.
- AdvancedChatFilters - Lets you filter incoming chat messages and replace their contents, change colours, play a sound, and many other things.
- AdvancedChatBox - Adds some configurable features to the chat box area that you type in, such as a spell checker and in-chat calculator.
- AdvancedChatHUD - Lets you separate different types of chat messages into different chat windows (known as "tabs"), as well as colour them and move them wherever you want.
- MiniHUD - Adds a customisable "mini-F3" screen, with many additional render options showing things like light levels or holographical spheres. If you use this mod, you are not allowed to use the debug water renderer (enabled with Config -> Renderer Hotkeys -> debugWaterEnabled).
- Item Scroller - Adds many new shortcuts for inventory GUIs allowing you to move items around much quicker than usual. Note: Autcraft has a packet rate-limit and your client will get auto-kicked if it sends too many packets too quickly, which can happen when using certain shortcuts too many times too quickly. You can enable Config -> Generic -> rateLimitClickPackets and adjust the Config -> Generic -> packetRateLimit setting if you would like to prevent this from happening, however that can cause your shortcuts to take a while to execute and so this is not required.
- No Strip - Adds a toggle to being able to strip logs.
- Amecs - Allows you to have more control over your keybinds.
- Extra Sounds - Adds configurable sounds to the Minecraft UI for actions that are normally silent (such as changing hotbar slot or a message appearing in chat).
- Xaero's World Map and Xaero's Minimap (Fair-Play Edition) - Map mods that work together. They map out the area around you in real-time and let you set waypoints to remember locations. Note: Only the Fair-Play edition of Xaero's Minimap is allowed, please make sure you don't use the full edition. Also, remember to disable the minimap and don't use the world map while in competitive minigames such as H&S.
- Vivecraft - Lets you play Minecraft in Virtual Reality!
- Roughly Enough Items (and Just Enough Items) - Offers a clean, simple way to view blocks and items, along with their recipes.
- multiconnect - Allows your client to fake the Minecraft version its running so you can join older servers with newer clients.
- ViaFabric (and ViaForge) - Adds ViaVersion packet translation to the client, allowing you to join older servers in newer clients (similar to multiconnect). Autcraft has server-side ViaVersion packet translation, so this mod isn't necessary there, but it's allowed anyway.
- ViaBackwards - Like ViaFabric, but the other way around. Allows you to join newer servers in older clients.
- Not Enough Crashes - Improves Minecraft crashing. Instead of closing the game immediately, it shows you a list of mods possibly involved in the crash and returns you to the main menu. Sometimes a crash is unrecoverable, or a crash corrupts the render engine, in which case a restart is required.
- Inventory Control Tweaks - Adds a few useful inventory shortcuts, like swapping an elytra in your hand with the chestplate you're wearing with right-click (normally you can only do this if you're not already wearing the chestplate).
- Language Reload - Only reloads language data when swapping languages instead of all resources from all enabled resource packs. Also allows you to have multiple languages enabled at the same time, similar to resource packs.
- Distant Horizons - Adds a Level Of Detail (LOD) system to Minecraft, allowing for much higher effective render distances by rendering far-away chunks as blocks of colours instead of detailed block models. On multiplayer servers, it will only load LODs for chunks that you've seen before. If there's a gap in the areas you've been, there'll be a gap in the world, which you can see through to see things underground you wouldn't be able to normally (although not in much detail). Remember, intentionally x-raying in any way is not allowed. Please do not abuse this.
- Force Close Loading Screen - Fixes a bug where the "loading terrain" screen shows longer than it needs to.
- Enhanced Searchability - Adds a search bar to the resource pack, server, and data pack selection screens.
- PingList - Replaces the ping bars in the player tab list with coloured numerical values.
- microDurability - Adds durability bars above the experience points level number showing the durability level of your armour/elytra.
- One Click Crafting - Makes it faster to use the recipe book by making it craft stuff on click instead of just preparing the recipe.
- ChestTracker - Remembers the contents of containers you open and allows you to search through its memories to highlight containers containing the item you want.
- Colorful Subtitles- Categorizes subtitles into hostile, peaceful, and other areas to assist with awareness of surroundings. Colors are assigned to each type of sound.
- Mouse Tweaks - Replaces the default dragging mechanic to allow for quickly selecting identical blocks when moving between inventories.
- World Edit CUI - provides a client-side user interface for the WorldEdit plugin allowing you to see your selected region in-game in real time.
- Craftify - Allows you to control the Spotify app while in Minecraft. You can choose to have chat notifications when a new song begins, display album art, and other options. Please note that this mod does require fabric-language-kotlin
- Jade - Displays information about what you are looking at. Option to add narration. Dependent on Just Enough Items.
- DarknessUtils - Adds an outline to the bosses in Darkness and Wither fights to make them easier to locate in the arena.
- DarknessUtils 1.20.4 Fork - An updated fork of the original player-made mod.
- Chat Patches - Adds time stamps to each message. Config file can be edited to adjust time format as well as color (converted to decimal). Requires Yet Another Config Lib and Mod Menu.
- Notes - In-game note pad for all your base planning needs.
- Sounds Be Gone - Adds ability to permanently mute specific sounds heard in game.
- Untranslated Items - Displays item names in English(US), regardless of the current language setting. If the item has a translation in the current language, it will be shown at the same time.
- CalcMod* - Make Minecraft-specific calculations right in your chat window!
- Status Effect Timer* - Displays the remaining time for status effects in the upper right corner of your screen.
Client-Specific Mods
We do not have the time to review every possible mod or client, however as needed, we will sometimes review third party client mod lists to ensure players continue to play fairly on Autcraft. Any pre-installed mods that are already on our approved mods list are automatically approved for use with third party clients. Most "mods" that are included with these clients function as resource packs or are changes easily accessible through vanilla Minecraft options. If you use a third party client and do not see a mod that you are interested included on this list, please ask for approval before using. Make sure to scroll up and check that it is not already listed as an approved mod. The following list includes currently approved third party client mods.
Note: Replay Mod is not allowed on Autcraft and must be disabled.
Any mod that allows voice chat or communication outside of Autcraft is strictly prohibited.
- Armor Status
- Block Overlay
- Block Info
- Boss Bar (may conflict with Autcraft during wither fights or The Darkness)
- CPS
- Chat
- Chunk Borders
- Clear Glass
- Clear Water
- Clock
- Combo Counter
- Coordinates
- FPS
- Crosshair
- Direction
- Enchant Glint
- FOV Changer
- FPS
- Hit Color
- Hitboxes
- Item Counter
- Inventory Blur
- Item Info
- Item Physics
- Keystrokes
- Light Overlay
- Memory
- Minimap
- Motion Blur
- Pack Display
- Particles
- Ping
- Player Count
- Potion Status
- Protection
- Reach Display
- Saturation
- Server Address
- Shiny Pots
- Stopwatch
- Time Changer
- Waypoints
- Weather Changer
*asterisk means the mods is a recent addition.
AAC
Description
Augmentative and Alternative Communication, or AAC, refers to any form of communications besides talking. Augmentative means to add, while alternative means to be used in place of something. AAC can be as simple as using facial expressions, drawing pictures, using hand gestures, or pointing to pictures and words. It can also be special programs on tablets or using a computer to speak for you.
Autcraft's AAC

Our AAC plugin utilizes Minecraft items that represent helpful phrases. A list of current options is at the bottom of this page. If there are additional options that you would like to see included, please make a post on our suggestions forum.
To open the ACC GUI, type /acc get
Open the green book to view the options.
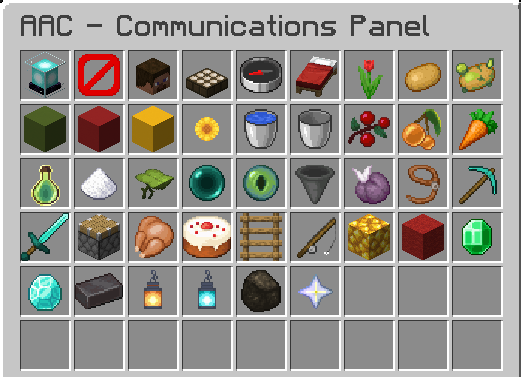
Hovering over any of the displayed images will pop up a word or short phrase.
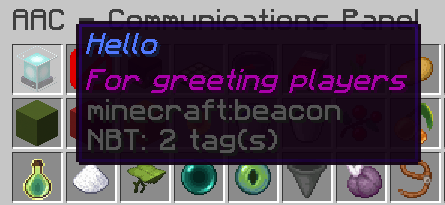
Clicking an item will immediately send the attached word or phrase into chat.
Current Options
This list will be updated as more options are added to our AAC. The list is current as of 26, March, 2024
- Hello
- Goodbye
- Welcome
- Good morning
- Good afternoon
- Good night
- How are you?
- I am fine
- I am not fine
- Yes
- No
- Maybe
- Okay
- I know
- I don't know
- Please
- Thank you
- You're welcome
- That is good
- Sorry
- No problem
- Be right back
- I'm back
- Welcome back
- Come here
- Follow me
- Go mining
- Mini-Games
- Move
- Hungry
- Birthday
- Need help
- Go fishing
- How to go to spawn?
- how to protect base?
- Emeralds
- Diamonds
- Netherite
- I like it
- I don't like it
- What's wrong
- Finished
Tour Guide
Tour Guide
Description
Players who log into Autcraft for the first time should always be offered a tour. This guide provides helpful information on the areas to show each player and some simple wording for each area. Please always offer a personal guided tour. The tour coaster has been created for when there is no one available to give a tour so the new player can still get started. https://www.autcraft.com/forum/topic/204-tour-guide/
For a simpler version of this guide, please visit the Tour Guide forum.
Who Can Give Tours
Any player can give a tour! Please explore Spawn to learn where things area. Review the basic rules of Autcraft so you can answer questions. Don't be afraid to ask for help if you don't know the answer to a question. Ask to shadow a tour led by an experienced tour giver, such as a Helper or Buddy.
Tour Behavior
- Stick to the important topics (portal room, shops, info center)
- New players do not need to see your base or learn about your head collection. There is plenty of time to do that after the tour.
- If you need to leave before the tour is over, do not just say goodbye and leave. Always find someone to take over the tour. Introduce the new player to the person finishing the tour, then say goodbye.
- Do not start playing a minigame during the tour. Let the player know they have time to play games when the tour is over. Help them set a home in build world, request protection, and lock a chest for their items before starting any games.
- Always tell the player how to leave the channel after the tour and make sure they have left the channel before you leave. Welcome them to Autcraft back in main chat.
Areas to Cover
- Portal Room
- Please explain the purpose of each world instead of only announcing where each portal leads, as they are already labeled.
- Explain the purpose of resource worlds and that they reset each month.
- When you get to the minigames portal, explain that they must empty their inventory before joining a game. Show the new player where the enderchests are. Let them know to ask in chat when they want a friend to join them in a game.
- Jobs
- Use the button wall, walk, or use /warp jobs
- Explain that doing jobs in Autcraft will earn them join points and jobs $ (/bal)
- They can have up to 3 jobs at a time and can change jobs at any time.
- Give the player time to choose their jobs.
- Shops
- Walk, or use /warp shops
- Show The Bank and explain how to exchange jobs $ (seen with /bal) for emeralds. If you are feeling generous, grab some emeralds to give them.
- Take them to one of the shops and explain how to right click a shopkeeper to see what is for sale.
- If you gave them emeralds, let them buy something.
- Take the new player to the Trades area and let them explore what is available.
- Lost and Found
- Return to /spawn
- Walk the player to Lost and Found
- Explain that important items that are found can be returned here.
- Show the player the anvils and ask that they name important items with their use name so items can be easily returned.
- Info Center
- Walk up the stairs Info Center
- Commonly used commands are displayed in this room.
- Players can check here or ask in chat is they have any questions
Optional Areas to Cover
These are other important areas to show new players, but they are not required if the new player seems bored or in a hurry to get to playing.
- TAO
- Talking About Others
- Explain that we like to share when players are being kind and helpful
- Show the book dispenser and the hopper
- Birthday Island (Birthday Boardwalk)
- Tell the new player that they can let us know about their birthday!
- Birthdays can be added using the /birthday <day> <month> command. This automatically informs staff about upcoming birthdays which are announced at Player of the Week and displayed on the Birthday Board at /warp bday.
But There is So Much More To See!
Less is More. Too much information makes it hard to remember it all. Stick to the important places and leave the rest for the new player to discover as they play.
- If the new players asks to see a specific area, show them!
- Wait to show player shops, the emerald farm, or any other builds until the tour is complete.
I'm Not Giving a Tour. How Can I Help?
- If someone else is giving a tour and you are not part of it, please wait until the tour is over before interacting.
- Please do not send the new player any TP requests. New players may not understand the commands and they need to learn Spawn first.
- Let the player giving the tour lead our new friend around.
- Wait before inviting them to play games, visit your base, or anything else on the server. Let them finish their tour.
- Please wait before throwing gifts at new players
- Give the new player some space. Logging in for the first time can be very scary.
- Wait until the tour is over and then ask if they would like any armor or gifts. Some players like to earn things on their own
- Do not join the tour channel unless you are giving a tour or shadowing to learn how to give one in the future. The channel is only for the new player and tour giver.
- If you are shadowing a tour, please just watch and listen. Save any questions you have for after the tour, or message a staff member for help.
The New Player is in a Hurry to Get Started! What is the Shortest Tour I Can Give?
- Show the player the portal room
- Explain the difference between build worlds and resource worlds
- Let them choose which world they want to build their first baes in
- Guide them through finding a place to build, setting their first home, and submitting at /modreq for protection
- Tell them to ask in chat if they have any question.
- Let them know they can have a full tour at any time if they want one.
Wording Suggestions (great to copy/past into chat!)
- Resource versus Build
- The resource world is for mining, hunting, getting wood, and other things. The world resets each month.
- The build world is where we have our bases and keep our things. It does not reset.
- Minigame Inventory
- Always empty your inventory, including any gear you are wearing, before joining a minigame. You may use the enderchests in the portal room or in the minigames lobby.
- Info Center
- This is where you will find answers to many common questions. You can also ask in chat if you need any help.
- How to /sethome
- Please give each home a unique name like "base." Please type /sethome base
- Let's test your set home. Walk over here and type /home base
- Marking Protection Corners
- Use the wool markerblocks to mark the corners of the area you want to claim. Make sure they are easy for the admins to see.
- Modreq
- Please type /modreq please protect
- Lock Chest and Sign Placement
- You can lock a chest to just you by placing a sign without shift/crouch.
- (Place a double chest and give them a sign if you are able)
- How to Leave the Channel
- Do you have any questions before we end the tour?
- To leave the tour please type /chan leave
- (Make sure the player understands how to leave the channel before you leave)
- (in main chat) Back from chan with (new player name). Welcome to Autcraft!
Other Useful Information
If you are giving a tour with more than one tour guide, take turns sharing information and explaining areas. An easy way to do this is one person explains the portal room. The next person explains the jobs area, and so on.
Please try to keep the tour brief. New players are eager to start playing. Show them what they need to know to get started and help them get playing as soon as possible. A complete tour can take as little as 10 minutes.
Online Safety
Description
Staying safe online includes protecting your mental health. There are tools available to help us avoid unnecessary stress from online bullying, harassment, general annoyance, and an over-connection to social media. Knowing how to ignore and block specific players, adjusting notification settings, and having a way to contact admins in an emergency will greatly improve your online experience.
Autcraft
Ignore
If a player is bothering you, you have the option to stop their messages from appearing on your screen with the command /ignore <player name>.
Example: /ignore username1
You can keep the player ignored forever, or for a short amount of time to take a break.
To stop ignoring a player, use /unignore <player name>
Teleporting
We always have the option to deny teleport requests with /tpdeny or /tpno but if you have Patreon rank you can also set all requests to automatically deny with the command /tptoggle
HelpOP
Another very important command to know is /helpop <message>
This is only to be used in emergency situations when there are no staff members online.
Always check Tab to make sure there are no Helpers, Sr. Helpers, or Admins online before using this command.
/helpop can be use used to immediately contact staff to alert serious situations, such as:
- Someone threatening the safety of you, other players, or the server
- Someone talking about suicide or self harm in real life
- Drama in chat that is causing stress
- The server is malfunctioning and needs attention
Do Not use /helpop for anything that can wait, such as a question for AutismFather, or to check on a modreq.
Discord
Reminder: You must be 13+ to have a discord account. For more information about this, read about COPPA on this page.
Safe Account Practices
On Discord, you get to choose the friends and communities you talk with. A key part of making this happen is knowing how you can set up your account.
For more information, visit Four Steps to a Super Safe Account.
Notifications
You are able to control notifications for entire Discord servers, as well as individual channels. To adjust settings for an entire server, head to that page and click the arrow next to the server name. Select Notification Settings and choose the options that fit your needs.
For thread notifications, visit the thread you wish to make changes to, and click the bell icon at the top. Here you have the option to temporarily mute the thread if you need to take a break, or you can choose a long term option.
Discord Safety Guide
Please visit Discord's Safety guide and read through everything to be sure that you are using the service as safely as possible.
YouTube
Managing Comments/Blocking Users
Follow this link for directions on how to block someone from commenting on your videos and livestreams
How to hold comments from review and block specific words can be found here
YouTube also offers the ability to block other viewers in live chats on streams you are watching
Safety Information
Safety Tips from YouTube
Staying Safe as a Teen Content Creator
Notifications
YouTube Notification Settings
Twitch
Managing Viewers/Blocking Users
In your account settings, under Security and Privacy there are options to:
- Block users
- Block whispers from strangers - your friend, someone you follow, someone you subscribe to, one of your mods, or one of your editors.
- Block the option for others to send gift subscriptions from channels you don’t follow
- You can change these settings here
Notifications
You also have the ability to update your notification settings
Legal Information
COPPA
The Children’s Online Privacy Protection Act has been Federal law since 1998. It exists to restrict how websites, apps, and other online groups can collect and use children’s data. Due to these restrictions, many apps and websites do not allow children under 13 years of age to create accounts. If they are found to knowingly allow underage children to use their services, steep fines may be imposed, which have reached millions of dollars in past cases. This is why so many websites and other online services have a minimum age requirement of 13.
Autcraft History
Autcraft History
Description
Autcraft was created on June 23, 2013, in response to autism parents online searching for a safe place for their children to play without fear of bullying, teasing or harassment. Stuart Duncan created an autism blog titled Autism From a Father's Point of View in May 2010 and and got to know many people throughout the autism community.
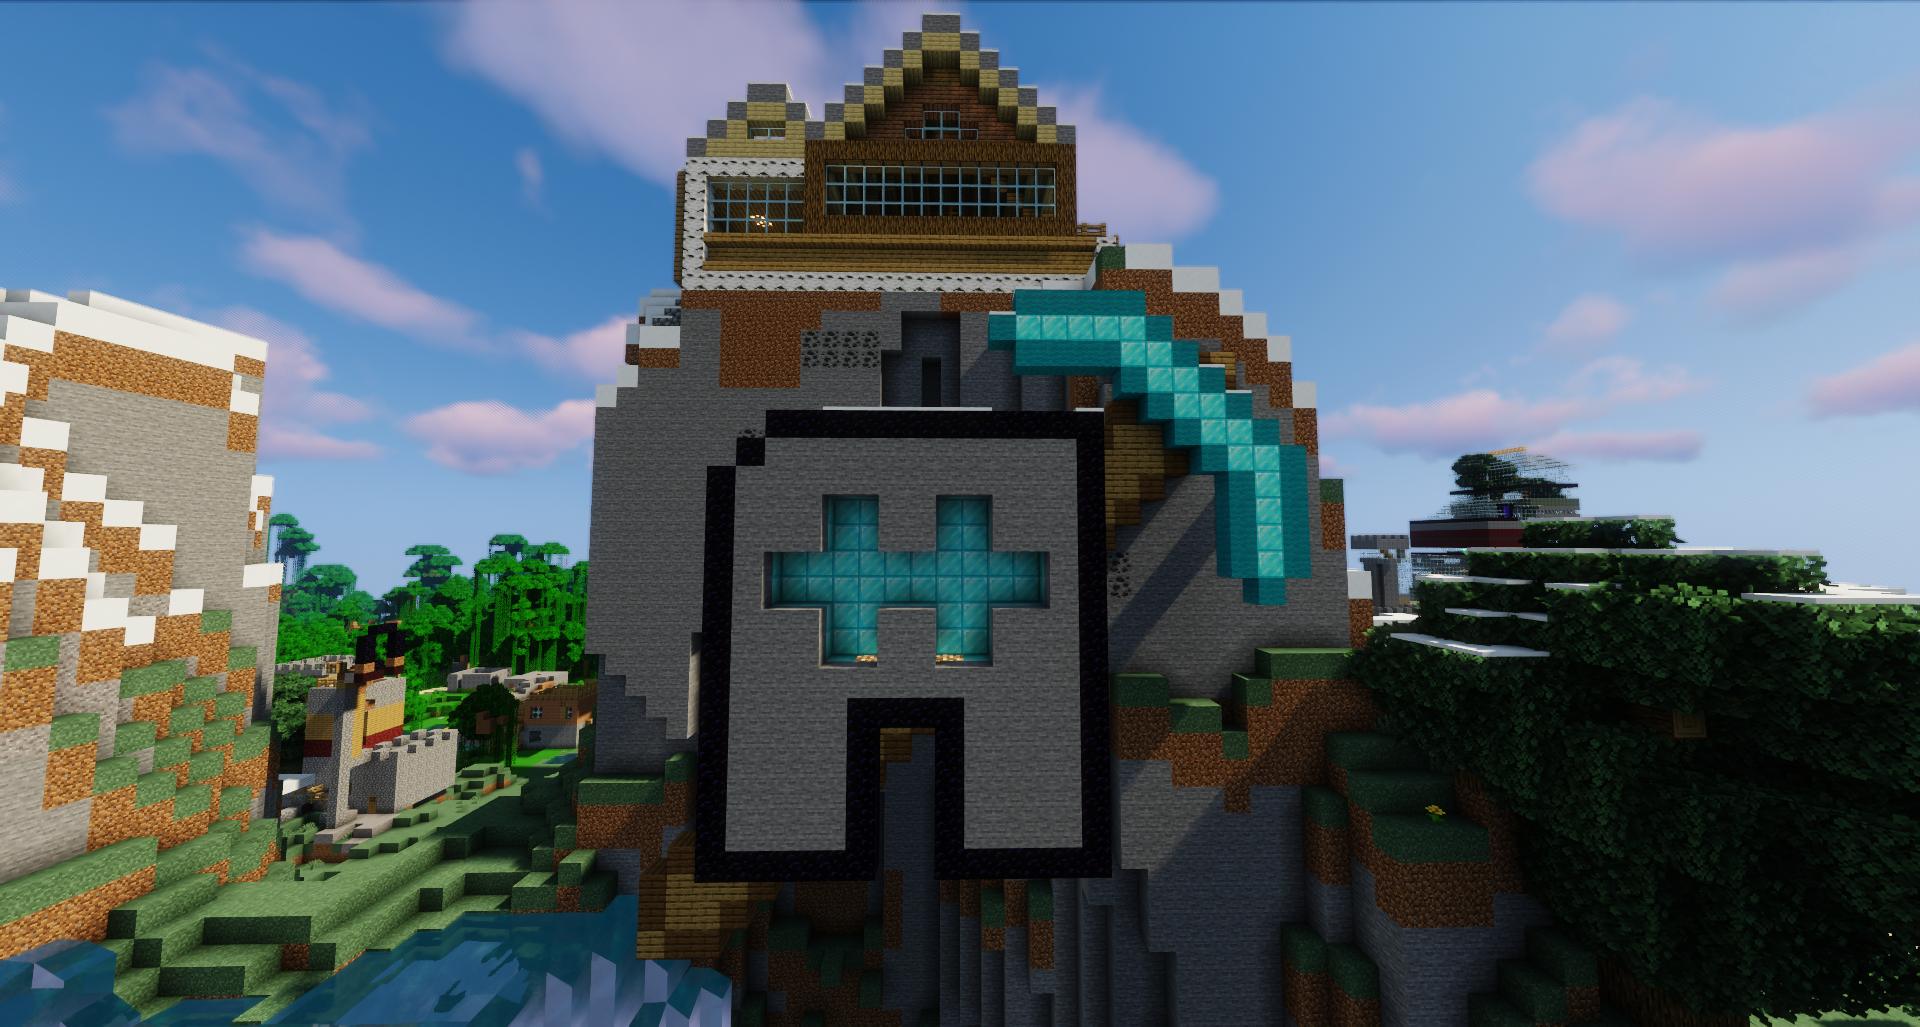
Autcraft's original logo with the first Lodge at Spawn 1
Creation
As the popularity of Minecraft grew, he began to notice more and more parents of autistic children reaching out to one another in hopes that their children could play apart from the public servers where bullying ran rampant. Witnessing this for several months, Stuart Duncan felt like he could help. From a modest $2.50 investment, Autcraft was born.
Reception
From just a simple Facebook post going out exclusively to friends, not publicly, the reach went viral within the autism community as word spread from autism parent to autism parent. Stuart was quoted as saying "within 2 days, I had received over 750 emails."
Within 48 hours of announcing the launch of the server, Stuart Duncan's ISP (Internet Service Provider) disabled his access to their email server citing the reason being that the traffic volume of emails resembled that of a business and was not allowed for a residential account.
Within 8 days of the server's launch, the price of renting the server hardware went from $2.50/m to $85/m having upgraded 8 times from the bottom tier package to the top tier.
Currently, the server has over 20,000 players on the whitelist with an average of 1,200 unique players on the server each month.
AutismFather
AutismFather
Bio
Stuart Duncan is the founder and owner of Autcraft, the first Minecraft server exclusively for children with autism and their families. He is also the creator of Autism From A Father's Point of View, one of the first and few blogs discussing autism by a father. His oldest son (Cameron) has autism while his younger son (Tyler) does not. Stuart is a work from home web developer with a background in radio. He does his best to stay educated and do whatever is necessary to ensure that his children have the tools they need to thrive. He shares his stories and experiences in an effort to further grow and strengthen the online Autism community and to promote Autism Understanding and Acceptance.
AutismFather currently has the rank of Admin.
Family
- CameronBallZ
- TylerFAL
Things to Know
- AutismFather does not cheat. Don't ask him to use creative to get items, or suggest using command blocks to make things easier. He absolutely refuses to cheat or to cheat for anyone else.
- AutismFather believes in everyone having the same opportunities. That might not always mean that people are treated equally since some people need more help than others to have the same experience. But it also means no special favours for individuals unless everyone can have the same thing.
- AutismFather lives in Canada
On The Internet
- Twitter: https://www.twitter.com/autismfather
- Facebook: https://www.facebook.com/autismfather
- YouTube: https://www.youtube.com/AutismFather
- Blog: stuartduncan.name
Abbreviations
Description
This list includes some, but not all, of the abbreviations used on Autcraft
Abbreviations
- AC - Autcraft
- ACC - Autcraft Creative
- ACO - Autcraft Obsidian (closed 2022)
- AF - AutismFather
- AFAIK - As far as I know
- AFK - Away from keyboard
- ASC - Autism Spectrum Condition
- ASD - Autism Spectrum Disorder
- ATM - At the moment
- AUT - Autcrafter
- BBL - Be back later
- BBS - Be back soon
- BC - Because
- BC - Broadcast
- BRB - Be right back
- CBA - Caught Being Awesome
- CBA - Can't be asked
- CYA - See ya, short for "see you later"
- GG - Good game
- GL HF - Good luck & have fun
- GN ST - Good night, sleep tight
- GR8 - Great
- GTG/G2G - Got to go
- H&S/H and S/HAS - Hide And Seek
- IDC - I don't care
- IDK - I don't know
- IIRC - If I recall correctly
- IK - I know
- IKR - I know right
- IMO - In my opinion
- JR - Junior, can also stand for Junior Helper (the old name for Helper rank)
- KOTL - King of the Ladder
- LTR/L8R - Later
- LEL - Laugh extra loud/laugh even louder
- LOL - Laugh out loud
- MA - Mob Arena
- NHIE - Never Have I Ever
- NP - No problem
- NRN - Not right now
- NTY - No thank you
- NVM - Nevermind
- OMW - On my way
- PB - Paintball
- POTW - Player of the Week
- PPL - People
- RLLY - Really
- RN - Right now
- ROFL - Rolling on floor laughing (laughing very hard)
- RP - Roleplay
- RQ - Real quick
- SMH - Shaking my head
- SOZ - Sorry
- SP - Single Player
- SR - SrHelper
- TAO - Thinking About Others
- TBA - To be announced
- TBH - To be honest
- THX - Thanks
- TL;DR/TLDR - Too long, didn't read (meant as a short summary of a longer piece of text)
- TY - Thank you
- TYSM - Thank you so much
- TYVM - Thank you very much
- U - You
- W/ - With
- W8 - Wait
- WB - Welcome back
- WDYM - What do you mean?
- WF - Wither Fight
- WYD - What are you doing?
- WYS - What are you saying?
- XD - A face that indicates a person finds something funny.
- YT - YouTube
- YW - You're welcome
- :P - A face used when telling a joke or using sarcasm. It is supposed to resemble a face with its tongue sticking out.
- :D - A happy face
- :) - Another happy face
- = ) - Another happy face
Ranks
Description
Ranks are used to show which players have various permissions in Autcraft. Ranks are also used to designate who is a staff member.
Autcrafter - Free! Everyone Starts Here
- All basic commands
- /back
- /tpa, /tpahere
Iron - $10.00 USD | 10 Credits | 100,000 Job Points
- /workbench
- /feed
- /kit (Iron)
Gold - $25.00 USD | 25 Credits | 250,000 Job Points
- /workbench
- /feed
- 15 /sethome slots
- No teleport timer
- /kit (Iron and Gold)
Diamond - $50.00 USD | 50 Credits | 500,000 Job Points
- /fly
- /repair
- /heal
- /feed
- /workbench
- 25 /sethome slots
- No teleport timer
- /kit (Iron, Gold, and Diamond)
Netherite - $75.00 USD | 75 Credits | 750,000 Job Points
- /fly
- /repair
- /heal
- /feed
- /disposal
- /enderchest
- /anvil
- /cartographytable
- /grindstone
- /loom
- /smithingtable
- /stonecutter
- /heal cooldown bypass.
- /kit (Iron, Gold, Diamond, and Netherite)
- Unlimited /sethomes!
Patreon - $10.00 or more per month at Patreon.com
- /fly
- /repair
- /repair all
- /feed
- /heal
- /enderchest
- /anvil
- /workbench
- /ptime
- /tptoggle
- /fw show
- /pweather
- No teleport timer
- Enchanted diamond tools and armor
- 2 Bonus Plots on Creative. for a total of 4 plots.
- Access to Patreon Discord Server (You must connect your Discord account to your Patreon account here. One MUST be over 13 to join. This is because the Terms of Service of Discord state that all users must be over 13)
- Exclusive Patreon logo head at beginning of a subscription
- Exclusive head each month
Read more about Patreon rank here
How Many Creative Plots do I have?
All players have access to two plots on Autcraft Creative. Players who help to support the server by becoming a Patron are given two bonus plots, for a total of 4 creative plots.
Patreon
Description
Patreon is a website where people can pledge monetary support for Autcraft. Your support is how Autcraft is able to stay online. Anyone who pledges to support the server at the $10 per month level or more will receive their name on a sign at spawn as well as Patreon rank in game which provides the following perks:
Perks
- /fly
- /repair
- /repair all
- /feed
- /heal
- /anvil
- /enderchest
- /workbench
- /ptime
- /tptoggle
- /fw show
- /pweather
- No teleport timer
- Enchanted diamond tools and armor
- Access to four personal plots on Creative
- Access to Patreon Discord Server (You must connect your Discord account to your Patreon account) One MUST be over 13 to join. This is a US Federal law that applies internationally)
- Exclusive Patreon logo head at beginning of the first subscription
- Exclusive head each month
For more information about how to join Patreon and support Autcraft, visit Patreon
Note: The Patreon Monument is updated manually and it may take time for your name to be added.
YouTube
Description
YouTube Rank is a rank on Autcraft given to players who have qualifying YouTube or Twitch pages and wish to promote their videos or livestreams in chat.
How do I get YouTube Rank?
To get YouTube rank you have to have done:
- At least 2 Minecraft videos (these do not have to be on Autcraft)
- New uploads regularly
- Family-friendly content; no words you cannot use on Autcraft, no scary, trolling, mean, or dare videos, no nudity, no discussion or mentions of topics that are inappropriate for young children
- No uploaded videos with games not approved for all ages, this means no Roblox.
- You must have a Nameless account (so we can keep track of our YouTubers!)
Will I get the YouTube tag on Autcraft.com?
Yes
Will I get the YouTube Rank on the Autcraft Server?
Yes, an Admin will give you the Rank.
Do I get more commands with YouTube Rank?
No, the rank just shows that you do YouTube and allows you to post links to your YouTube channel, your videos, and your livestreams, in chat.
Where can I apply?
You can apply >Here<
Netherite
Cost: $75.00 USD | 75 Credits | 750,000 Job Points
- /fly
- /repair
- /heal
- /feed
- /disposal
- /enderchest
- /anvil
- /cartographytable
- /grindstone
- /loom
- /smithingtable
- /stonecutter
- /heal cooldown bypass.
- /kit (Iron, Gold, Diamond, Netherite)
- Unlimited /sethomes!
Diamond
Cost - $50.00 USD | 50 Credits | 500,000 Job Points
- /fly
- /repair
- /heal
- /feed
- /workbench
- 25 /sethome slots
- No teleport timer
- /kit (Iron, Gold, and Diamond)
Gold
Cost - $25.00 USD | 25 Credits | 250,000 Job Points
- /workbench
- /feed
- 15 /sethome slots
- No teleport timer
- /kit (Iron and Gold)
Iron
Cost - $10.00 USD | 10 Credits | 100,000 Job Points
- /workbench
- /feed
- /kit (Iron)
Autcrafter
Description
Autcrafter is the first rank a player receives when joining Autcraft.
Commands
- /spawn - Teleports you to the spawn/main hub.
- /home [home name] - teleports you to your home with that name.
- /Sethome [name for home] - sets a home with that name.
- /Delhome [home name] - deletes your home set with that name.
- /Modreq - Fills a request for admins to get to; for example protecting your home/expanding protection/asking for help over lost protected house etc.
- /Helpop - gets the attention of online staff members, '''only use in an emergency'''.
- /Help -gives a list of other useful commands.
- /Warp [Location] - teleport to a location, e.g: the build worlds building.
- /splitchat - splits chat up with dashes, or a symbol of your choice) between each line of chat (these can be coloured).
- /channel create <name> - create a new chat channel.
- /channel join <name> - join an existing chat channel.
- /channel leave - leave the current channel you are currently in.
- /channel who - see which players are in a channel.
- /ach highlight <colour code> - changes what colour your username is when said in chat, e.g: <Autcrafter> SomeUsername1: Hi <span style='color:#239edd'>YourName</span> (YourName will be in whatever colour you choose)
- /msg <player> (message) - sends the player a message, which only that player, and admins can see.
- /r (message) - sends a message to the last player you sent or received a message from.
- /mail send <player> (message) - sends a player, who can be online or offline a message or "mail" which they can view by doing /mail read.
- /mail read - lists all the mail you have.
- /tpa <player> - sends a teleport request to teleport to another player's location.
- /Tpahere <player> sends a request for another player to teleport to you.
- /Tpaccept - accepts a tp request.
- /Tpdeny - denies a tp request.
Basic Commands
Description
Here you will find some commands you can do as an Autcrafter. Commands with multiple options will also have their own dedicated pages.
/ach - A command that uses various subcommands, and typing it will show a few of the main AC commands that are able to be used.
/afk - It will show up in chat and in tab that you are AFK (Away From Keyboard) but it is generally used as a term for being idle. You will be kicked after 15 minutes of being idle unless you are a Helper+
/autcraft - It's the same as /ach
/autcrafthelper - The same as /ach & /autcraft
/back - Will teleport you to the previous location you were at.
/bal - Shows your balance of money.
/balance - Same as /bal
/birthday <day> <month> - Set your birthday. For example June 23 is entered as 23 6
/bungee - Will show what BungeeCord Version we're running.
/chan - Will show different subcommands to use with /chan.
/channel - Same as /chan.
/chat - Doing /chat <message> will just send the message in chat, it is a way that people in channels send messages outside of the channel,
mostly used by Staff talking to people inside and outside of a channel.
/comment <status number> - Used to comment on modreqs.
/compass - Shows precisely what direction you're facing.
/coords - Shows what world you are in, what coordinates you are at, which way you are rotated and your head angle.
/craft - Allows you to open the crafting bench if you have Iron Rank+.
/credits - Displays the amount of store credits you have
/delhome <home name> - Allows you to delete one of your sethomes.
/done <status number> - Allows you to close one of your modreqs.
/eat - Refills your hunger and saturation bars if you have Iron Rank+.
/essentials:etpacancel - Executes the same command as /tpacancel or /etpacancel.
/essentials:tpacancel - The same as /essentials:etpacancel.
/etpacancel - Executes the same as /tpacancel, which cancels any tp-requests you sent.
/feed - Same as /eat.
/firework - Will shoot a random firework above you.
/fix all;hand - Allows you to repair what you're holding/everything in your inventory if you have Diamond Rank+.
/fly - Gives you the ability to fly, you have to either buy fly, diamond rank or patreon rank to use it.
/fw - Executes the same command as /firework.
/getpos - The same as /coords.
/hat - Allows you to put whatever item you're holding on your head and wear it. Some items are restricted from being used as a /hat though.
/head - Does the same as /hat.
/heal - This command will put you to full health, remove all potion effects and saturate your hunger bar. Diamond+ ability, however, Buddy Rank+ can /heal other players.
/helpop - EMERGENCY COMMAND If there is a serious situation with no staff members online, you can use this command to notify an Admin. FOR EMERGENCIES ONLY.
/highlight - change the color of your name and a sound that plays when pinged in chat.
/home - Allows you to teleport to one of your sethomes.
/hug <player/:hug/console/bessie/autcraft> - Allows you to hug another player or any of the other subcommands listed.
/ignore <player> - Allows you to ignore other players by blocking their chat messages for you, you cannot ignore a Helper+
/jobs - Will display all subcommands for the jobs plugin.
/linesplit - The same as /splitchat, it allows you to seperate the chat messages using any character of your choice.
/list - Will show all players online apart from staff members in vanish.
/lock - Will display valid subcommands for the lockette plugin, using signs to lock chests, doors and anything a player can interact with.
/lockette - The same as /lock.
/m - Short for /msg, which is used to message people.
/ma - Displays a subcommand for the Mob Arena plugin.
/mail - Displays all subcommands and how to use the /mail command to send mail to users who are offline.
/mobarena - Same as /ma.
/modreq <message> - Allows you to request an administrator to do something, modreqs take up to 2 days to be completed. Generally used for claiming & bug reports that aren't done on the forums, but many other things too.
/msg <player> <message> - Allows you to message other players who are online.
/near - Shows all near players within 200 blocks.
/pb - Shows all subcommands for the paintball minigame plugin.
/perms - Shows what group of permissions you have in bungee.
/pp - Opens the particles menu
/ppo - Management for particles plugin, for admins only.
/pronouns - select pronouns to display in front of your user name in chat
/r - Allows you to reply to the last person who messaged you.
/removecurseditem - If you have put on a cursed item you cannot remove, this will delete the item.
/repair all;hand - Allows you to repair what you're holding/everything in your inventory if you have Diamond Rank+.
/reply - Same as /r.
/rules - Displays server rules.
/seen - Allows you to view how long a player has been online or offline. This command is only available to Helper+
/server <survival/creative> - Allows you to switch from creative to survival without using the world portals.
/spawn - Teleports you to spawn.
/split <character> Allows you to divide chat messages up by any character of your choice.
/splitchat - Same as /split.
/splitline - Same as /split.
/stables - Shows valid subcommands for the stables plugin, which allows players to store horses within the plugin, however, it is very glitchy and be weary when using it.
/status - Allows you to view previous modreqs and their status numbers.
/t - Same as /msg, allows you to message other players.
/teammsg - The command is disabled on the server, but was added in a 1.14 snapshot because players could be added to certain teams in vanilla and this was a way of communication between those teams.
/tpa <player> - Allows you to request to teleport to someone else.
/tpacancel - Cancels all pending requests you have sent.
/tpaccept - If someone sent you a tpa or tpahere request, you accept it using this.
/tpahere - Allows you to request that someone else teleports to you.
/tpdeny - Allows you to deny a tpa or tpahere request you were sent.
/tpno - Same as /tpdeny.
/tpyes - Same as /tpaccept.
/unignore - Allows you to unignore someone who is on your list of ignored players.
/w - Shortened version of /whisper, allows you to message other players.
/warp <warp name> - Allows you to warp to any warps or to check the list of warps.
/warps - Shows list of warps.
/wb - Shortened /workbench or /craft, it opens a crafting table menu if you have iron rank+
/whisper - Same as /w.
/who - Same as /list, shows all players online except for staff members in vanish.
/workbench - Same as /wb.
Channel Commands
Description
Chat commands are tools players can use change which chat channel they are viewing. All /channel commands also work with /chan
Commands
/channel create <name> - create a new chat channel. Channel names must be one word with no spaces.
Example: /channel create private
/channel join <name> - join an existing chat channel
Example: /channel join spleef
/channel join - shows a menu listing all the available channels and the players that are in a channel
/channel who - see which players are currently in a channel
/channel close - close the channel so no one may join
/channel open - open the channel so players may join
/channel leave - leave the current channel and return to main chat
/chat <message> - send a message to main chat
Example: /chat Welcome to Autcraft, NewPlayerName!
Note: Admins and SrHelpers can monitor the chat channels to make sure the chat is appropriate.
Communication
Description
There are several ways in which players can communicate with each other both on and off the server.
Public Chat
To enter a message into public chat, press the T key on your keyboard to open the dialog prompt. A cursor will begin blinking within this prompt, indicating that it is ready to receive characters that you type into your keyboard.
Enter your message into this box and press the Return key on your keyboard to send that message. Everyone on the server (with the exception of those in Calming Rooms or Spam Rooms) will be able to see your message.
Private Messages
You also have the option to send a private message in which only one player will be able to receive it.
To send a private message, press the T key on your keyboard and begin your message with /msg. Press the spacebar next and then enter the name of the person to which you wish to send a message. Again, press the spacebar and then enter your message.
Example: /msg AutismFather Hi! How are you today?
To reply to a private message, you can follow the instructions above, placing their name in as the name of the person to which you wish to send a message.
Alternatively, you can shorten the command by using the /reply or /r command. In this case, you no longer need to include the player's name as it simply replies to the last person that sent you a private message. Be aware that if a player sends you a message while you are typing the reply, your message will reply to the most recently sent message.
Example: /r I'm doing great! Thanks. How are you?
Mail
The server also has an in game mail system so that you can send messages to players even when they are not online.
- Sending
- To send mail, press the T key on your keyboard and enter the command /mail send followed by a space and then the player's username. Place another space and then the message that you wish to send.
- Example: /mail send AutismFather I left something a gift for you at your house.
- Reading
- When you first sign onto the server, it will give you a message in chat if you have any mail messages to read. It will also tell you how many there are.
- To read your mail, press the T key on your keyboard and then type in the command /mail read.
- If you have a lot of mail, it may be split into multiple pages. To read beyond page 1, simply add a number to the end of the command to indicate which page you would like to read.
- Example: /mail read 2 (to read page 2)
- Clear
- Once you have read your mail (and responded if necessary), it is wise to clear your mail so that you know when new mail comes in.
- To clear your mail, press the T key on your keyboard and enter the command /mail clear
/balance
Description
This command will display a player's in-game balance.
Other commands
These commands show the same information:
- /balance
- /bal
- /money
How to earn in-game currency
Balance can be earned by completing actions that match a player's jobs, and by completing daily job quests. Quests can be seen with /jobs quests
How to use in-game currency
In-game currency can be exchanged for emeralds at The Bank at /warp shops.
/disguise
Description
Disguising became available on Autcraft in the RP World on March 18th, 2020.
The feature is provided by the plugin LibsDisguises.
Commands
- Disguise
- You can disguise as any mob or animal with the command:
- /disguise <mob>
- /disg <mob>
- Disguise Options
- You can add extra options such as a type, puffstate, display name and more by starting to type 'set' after the name and choosing the appropriate option from the drop down. Some examples:
- setPuffState
- setCustomName
- setGlowing
- Example: /disg cat setCustomName Snowball
- You can add extra options such as a type, puffstate, display name and more by starting to type 'set' after the name and choosing the appropriate option from the drop down. Some examples:
- Blocks
- You can disguise as a block using the following command:
- /disguise Falling_Block setBlock <BLOCK>
- You can disguise as a block using the following command:
- You can disguise as any mob or animal with the command:
- Undiguise
- You can undisguise at any time by typing in the command
- /undisguise
- You can undisguise at any time by typing in the command
/fly
Description
This command will allow players to fly around most of the server. Having /fly enabled also prevents fall damage.
How to Use
To enable, type /fly. Then press the space bar twice. Holding space will raise the player, and holding shift will lower the player.
Who Can Fly on Autcraft?
Players who first join the server will not be able to fly. This command is available to earn in a variety of ways. It is available for purchase as a command in the permissions section of the store. Fly for Life is available for 15 store credits (or $15 USD). /fly is also included with Diamond, Netherite, and Patreon ranks.
Where Can I Fly?
All players can use /fly at spawn, regardless of rank or purchased permissions. In contrast, no one is able to fly in any minigames. Players also have access to /fly in the Creative Server, however please be aware that individual plots may be set to survival mode and the command will not work.
/helpop
Description
The /helpop command is available to all players. It sends a highly visible message to all online admins from a player in the event of an emergency.
How to Use
Press T and type /helpop <your message here> then enter. For example:
/helpop A player is threatening me now by writing bad things on a sign!
When to Use
When an emergency is happening. Some example of emergencies are when you are being harassed (spammed teleport requests by one person, someone is at your unprotected home at that moment griefing it, a player won't leave your home after being asked, you are 'stuck' in one spot, or you are being threatened or made to feel uncomfortable in any way), or there is a threat to the server's stability.
When Not to Use
If you only want to talk or ask an Admin a question that isn't an emergency, or need anything usually done by submitting a modreq. This should not be used to chat with a vanished admin outside of an emergency.
/highlight
Description
The /highlight command allows players to choose options for when their name is mentioned in chat.
Options
- /highlight
- Brings up a menu showing available sub-commands, as well as a list of color codes
- /highlight setsound
- Allows players to choose an alert sound that will play when their name is mentioned in chat.
- Available sounds are
- Amethyst Block Chime
- Amethyst Cluster Place
- Burp
- Cowbell
- Creeper
- Screaming goat
- /highlight color
- Change the color of the player's name when mentioned in chat. The default color is blue.
- Available colors
- &0 black
- &1 dark blue
- &2 dark green
- &3 dark aqua
- &4 dark red
- &5 dark purple
- &6 gold
- &7 gray
- &8 dark gray
- &9 blue
- &a green
- &b aqua
- &c red
- &d light purple
- &e yellow
- &f white
/lockette
Description
In order to keep your valuables safe, you have the option to lock your doors, chests, furnaces or any other containers using a Lockette sign.
How to use
To use, place a sign without crouching (do not shift) on the door, chest or other container to be locked. The sign will automatically lock to the user who placed it. Another option is to place a signpost on the floor directly besides, or on, a chest or other container to be locked. Enter [Private] as the first line. The player's own name will automatically be entered on line 2 as the chest owner. Players can also type in the full names of two other users allowed to access the chest's inventory on lines 3 and 4.
Sometimes, a player might want to allow more users access than can fit on one sign. The owner of a container can add more users by placing additional signs beside the container with the heading [More Users] where lines 2-4 specify the names of the additional users. You can edit the users on previously placed signs by right clicking the sign and using the command /lockette <line number> <text> to change it.
Example: /lockette 3 username1
If you would like to allow everyone to access a container, you can add a line with [Everyone] to the sign. Keep in mind though, this means anyone can access the container!
Note: that this means that nobody can break the sign, even the person who placed the sign.
Doors
To protect a door, you can use the same method as protecting a container, the sign will attach to the door automatically. In addition, you can attach a [Private] wall sign to any side of the blocks just above or just below a door. For double doors only one side needs a sign.
Once a door is protected it will only open for someone listed as a user and will not respond to redstone power or switches unless [Everyone] is listed as a user. Iron doors which usually won't open from clicking will work just as wooden doors. In addition, double doors will open together automatically!
You can also use [More Users] signs as with containers, with the caveat that the sign cannot be placed on the block above the door if the [Private] sign is not above the door as well! (This is done to prevent a security uncertainty issue.)
Protected doors will be closed automatically if a timer is set. A timer can be set globally with a configuration option, or individually for each door by using the tag [Timer: #] on line 3 or 4 of the [Private] sign, where # is the number of seconds that the door should remain open. If the timer is set to 0, this means the door will never automatically close.
/modreq
Description
Sometimes the admins are busy or there isn't an admin on when you need them. To take care of this, we've implemented a "support ticket" system called '''Modreq'''. “Modreq” is an abbreviation for moderator (admin) request (objective your require help with).
At any time, whether admins are online or not, you can create a ''modreq'' indicating to admins that you need them for something.
Create a Modreq
Command: /modreq <your message here>
Example: /modreq please protect my home
It's important to remember that you must make your ''modreq'' in the place that you need the request done. For example, if you need a house protected, make the request in that house. Admins teleport directly to the location in which the ''modreq'' was created so it needs to be created where the work needs to be done.
View your Modreqs
Command: /status
This command will give you a list of all ''modreqs'' that you have created by their ID numbers.
View a Modreq
Command: /status <#>
By entering a specific ID number after the status command, you can view the details of that ''modreq'' including admin's actions and comments.
Note: You can only view the status of a ''modreq'' you submitted.
Comment on a Modreq
Command: /comment <#> <message>
Example: /comment 1234 write the comment here
In some cases, you may want to add more information to your modreq, or perhaps there wasn't enough room on the command line to include all of the information you wanted.
By entering the comment command followed by the ID number of the ''modreq'', you can then place an additional comment after, providing the admins with all of the information they need.
Note: You can only comment on a ''modreq'' you submitted.
Close a Modreq
Command: /done <#> <message>
Example: /done 1234 the problem has been fixed
Sometimes you might want to close a Modreq, such as if you created one by mistake or you no longer need help.
By using the done command followed by the ID number of the Modreq, you can close the Modreq immediately, even if Admin haven't replied yet.
Note: A Closed Modreq can't usually be re-opened later. If you need to re-open a Modreq, it may be easier to create a new one.
How Long Until a Modreq Is Completed
Admins do modreqs in the order they receive them and can take up to 1-2 days to complete. We thank you in advance for your patience.
Have a Question About Your Modreq?
Please check the status of your modreq before asking an admin.
/pronouns
Description
The /pronouns command allows player to have their personal pronoun displayed alongside their user name in chat.
Command
- /pronouns - Brings up instructions
- "Set your pronouns by doing something like /pronouns They/Them"
- Available Options
- Alien/It
- Any/All
- E/Em/Eirs
- He/Him
- He/They
- It/They
- She/Her
- She/They
- Xe/Xem/Xir
Pronoun display can be turned off with /pronouns Off
All About Pronouns
A pronoun is a word used instead of a noun. Well then, what is a noun?
A noun is a person, place, thing, or idea.
- Person: Steve, Alex
- Place: Spawn, Info Center
- Thing: sword, wood, diamond
- Idea: friendship, happiness, kindness
A pronoun is used in place of a noun.
- Steve is mining. He found lapis.
- Alex went to the Info Center. She learned a lot.
What about pronouns on Autcraft?
(Autcrafter)<He/Him> Steve: Hello, Friends!
Steve wants to be called “he” or “him” when we talk about him.
(Autcrafter)<She/Her> Alex: Hi Steve!
Alex wants to be called “she” or “her” when we talked about her.
(Autcrafter)<They/Them> Wandering Trader: Hello! Would you like to buy this cactus?
Wandering Trader does not want to be called “he” or “she.” They would like to be called “They” or “Them.” You may also call them by their full name: Wandering Trader.
Wandering Trader will be sad if you call them something they are not. Friends don’t make friends feel sad. Please call Wandering Trader by their name, or using the pronouns They/Them.
What should I do if I don’t understand how to use my friend’s pronoun?
Just call them by their name.
(Autcrafter)<He/Him> Steve: Hey Alex! Did you see what Wandering Trader was selling? You should check out Wandering Trader’s items!
What about pronouns I have never seen before?
- Pronouns are listed in a consistent order.
- he/him/his is the same order as xe/xem/xir
This is my friend Creeper Xe likes to sneak up on people. I like to watch xem blow up dirt. Xir explosions are loud!
/seen
Description
Helpers, SrHelpers, and Admins in-game can use the /seen command to view how long a player has been online or offline.
Note: The command is not caps sensitive, so writing the name of the person in lowercase letters will still work with the command.
Note: This command is only available to Helpers, SrHelpers, and Admins.
Command
/seen PlayerExample1234
- Result 1: Player PlayerExample1234 has been offline since 2 days 6 hours 21 minutes.
- Result 2: Player PlayerExample1234 has been online since 2 hours 42 minutes 13 seconds.
/spawn
Description
The spawn command is a command that is used to teleport back to spawn.
Command
When a player wants to return to spawn they type /spawn. If a player has used the /tpa, /home, or /warp commands in the past two minutes and attempts to use the /spawn command, it will not work unless they have a rank that bypasses teleport timer.
/teleport
Description
Players can teleport around the server in various ways. You can teleport to someone, have someone teleport to you and you can teleport to locations using commands or warp buttons.
Teleport requests
Requesting to teleport to others and vise versa can be done with commands that start with ''/tpa''.
TPA
Command: /tpa <player>
Example: /tpa username1
You can send a teleport request to another player using the ''/tpa'' command. This will prompt that other player to either accept, deny or ignore your request.
TPAHere
Command: /tpahere <player>
Example: /tpahere username1
If you wish to have a player come to you instead of going to them, you can use the ''/tpahere'' command. This will prompt that other player to either accept, deny or ignore your request.
TPAccept / TPYes
Command: /tpaccept or /tpyes
When you receive a request from another player to either allow them to teleport to you or to have you teleport to them, you can accept their request using the /tpaccept or the /tpyes command. This command accepts the last request made to you. So if one player sends you a request and another player sends you a request as well before you can accept, you will be accepting the second player's request, not the first.
TPDeny / TPNo
Command: /tpdeny or /tpno
When you receive a request from a player to either allow them to teleport to you or to have you teleport to them, you can deny their request using the /tpdeny or the /tpno command.
TPCancel
Command: /tpcancel
If you accidentally send a teleport request to the wrong person, you can cancel it by typing in ''/tpcancel''.
TPToggle
Command: /tptoggle
If you do not want people to teleport to you, you can use ''/tptoggle'' to make it so that when someone sends you a teleport request, it is automatically denied. This command is only available to people with Patreon rank.
Spawn
Command: /spawn
You can teleport to Spawn by entering the ''/spawn'' command from anywhere on the server.
Timer
Shortly after Autcraft began, a teleport timer was added to discourage players from teleporting all around the server all of the time without actually exploring or traveling by any other means.
The constant use of teleportation proved to be very taxing on the server and generated a lot of lag.
Initially, the TP Timer was set at 5 minutes. This was removed completely for January 2014 as the initial world was closed and new worlds were created as a means to give players greater ease with which to move their belongings. When the timer was reinstated in February 2014, it was reduced in duration to 2 minutes where it remained until March 18th, 2020, when it was reduced to 30 seconds, where it stays today.
/vanish
Description
Vanish is a command available to Admins, which allows them to be invisible on the server and not appear on the online player list.
Conditions
Used when an admin needs to focus on work either on and/or off the server and is not available for chatting. The /vanish command is only accessible to the players with the rank of admin. No other ranks have access.
Chatting to a Vanished Admin
Use /r <message> to reply to a vanished admin, if they private message you.
What a Player Should Know and Do
We are not ignoring you. We may not be at our keyboard, we may be back and forth between the server and various other places on the internet, or talking to another player privately. Please do not ask us to private message you in public chat, if you know we are online. If you have an emergency, please use the /helpop command. If it is not an emergency, please modreq what you need.
Protections
Description
A Protection is an area around your land that essentially locks the permissions to only you and other players of your choosing. Once protected, no other players will be able to place or break blocks within your protection.
Your protection will also include a custom greeting that appears in chat for any player that enters as well as a farewell message that appears in chat for any player leaving your area.
Requirements
Your build must be 30 blocks or more away from every other build around it. If there is something created by another player already existing within a 30 block distance to your requested build, then it can not be protected.
In order to have your area protected, you must have something build that is clearly visible to the admins. If your base is under ground, then you must mark out its furthest edges above ground.
If you need it protected before you have time to begin building, you must, at the very least, mark out the area using clearly visible materials, such as wool or coloured glass. If the admins can't find it, it won't be done.
Requesting Protection
To request that your build be protected, you must stand within the area to be protected and issue a modreq
30 Block Rule
As stated, you must be at least 30 blocks away from all other player's builds in order to be approved for protection.
However, players must realize that builds are protected with a 10 block buffer. This means that your base will be protected as well as 10 blocks out from your base in each direction. This means that if another player builds 30 blocks away and their base is also protected with a 10 block buffer and both players expand up to the edge of their protection, it could look like both bases are actually only 10 blocks apart, not 30.
Adding Members
You can add other players, called region members, to your protection, enabling them access to build with you.
To list members of your region, type /rg info in the chat.
Additional Options
You may request, in your modreq to have your area protected, to include these additional options as features of your protection:
- Disable use of all buttons, levers, pressure plates, doors, enchantment tables, workbenches (it is not possible to enable/disable individual items, it's all or nothing)
- Disable chest access for all players not on the protection list (this overrides Lockette)
- Custom Greeting (specify in your modreq or the comments of your modreq what you would like the greeting to say)
- Custom Farewell (specify in your modreq or the comments of your modreq what you would like the farewell to say)
- Deny raid triggering due to Bad Omen for visitors
Region Members
Description
Region members are players you allow to build/place/break or otherwise move blocks and items in your protected region.
Choosing Members
Members should be players you like, know well and trust.
Member Limit
Each region may have one owner and up to 6 members.
Add A Member
Stand in the region you own and want them to be a member of, then modreq for an admin to add the player to your region. You must provide the full and correct username of the player, at that time.
Remove A Member
Stand in the region you own where they are member and modreq for an admin to remove them from your region's member list.
Note: You must allow the member to remove their items first, before removing their membership. If this is proving difficult, please alert an admin and we will assist you.
Listing Members
To list members in your protection, type /rg info while in the protection
Homes
Description
Most players build and set homes for themselves somewhere on the server. Some players have multiple homes. There is a system which allows you to keep track of these and even get around from home to home easily.
Home
Command: /home <name>
Using the home command, you can instantly teleport to your home from any location on the server. Remember to give your homes a name though so that you can go from home to home if need be. Also, use descriptive names that are easy to spell so that you never forget which home is which.
Example: /home cave
SetHome
Command: /sethome <name>
Stand in the location that you want to return to each time, generally in the middle of your base or at your storage area or somewhere that you know you'll want to be each time, and enter the ''/sethome'' command to set the desired location of your home teleport.
Remember to give it a descriptive name that is easy to spell.
NOTE: Home names can not have spaces in them because it will only put the first word in.
Example: /sethome cave
DelHome
Command: /delhome <name>
Sometimes you may wish to abandon a home, if you are moving or if you run out of available homes that you can set. In this case, you can "unset" a home by entering the ''/delhome'' command.
Example: /delhome cave
Limit
When you join Autcraft, you are given a limit of 5 homes. That means that you can do the ''/sethome'' command, assigning 5 separate homes that you can teleport to at any time with the ''/home'' command.
Griefing
Description
Griefing is the breaking and/or taking of any item or block placed by another player without the owner's permission; or the placing of items/blocks inside or on the builds of others without their permission.
Examples include but are not limited to:
- Removing items from a chest you did not place without the owner's permission
- Removing items from an item frame without the owner's permission
- Breaking walls or beacons made by others without the builder's/owner's permission
- Placing signs on or in a build without the builder's/owner's permission
- Placing a lockette sign on a chest without the person who placed the chest's permission
- Placing lava, water, a piston or lever in a position to do any of the above or make it so the area cannot be accessed by the owner
If This Happens to You
Take a deep breath, then modreq where it happened, telling an admin what you believe is missing or damaged. We will check the history of the area and replace/repair what is needed.
What To Do If You Grief Accidentally
Modreq, standing where it happened, if you cannot repair the damage yourself.
Consequences of Griefing
If there was no modreq to repair an accidental griefing by you, items taken will be removed from your inventory and you will be mailed with a warning on the first griefing; jailed for 24 hours on the second. If griefing continues, admins will assess your history and discuss a longer jail time, possible temporary ban, or removal from the whitelist until your parents are contacted and respond. If you are an adult, you risk a longer jail time or removal from the whitelist, until we feel you understand the rules and will no longer grief.
Exceptions
Region Members of your region cannot technically grief it. They are people you have asked to live with you, because you trust them. It is up to you to choose your members wisely, make sure they understand what you will and won't allow to be done in your region, and to modreq for their removal as a member from your region, if they do not respect your wishes. If items are missing or placed in your protected region, this normally means a member of your region has removed or placed an item. Please ask for the items to be returned or removed by your members before alerting an admin, in this situation.
AutismFather Sword
Description
The AutismFather Sword is designed to be the ultimate reward on the Autcraft Server for players who not only go above and beyond in being helpful and kind but go to extraordinary measures for the benefit of the entire community.
The AutismFather Sword was added to Autcraft on August 26, 2013.
The AutismFather Sword, as displayed in the TARDIS
View
AutismFather created this video on August 26, 2013, explaining the sword.
The Sword
The AutismFather Sword is a Netherite Sword with a special name, lore, and a special combination of enchantments that you can not get in the game normally.
Enchants
- Sharpness 5
- Smite 5
- Knockback 2
- Sweeping Edge 3
- Fire Aspect 2
- Looting 5
- Unbreaking 5
Lore
Lore is the purple text below an item's enchantment list. The AutismFather Sword's Lore is ''A Gift From AutismFather''
How to Get It
You earn this sword by not only having these qualities but by demonstrating these traits often:
- Helpful
- Kind
- Positive
- Friendly
- Generous
- Thoughtful
If you put your community first, ahead of yourself, and are always thinking of others, you will earn yourself the best sword on the server.
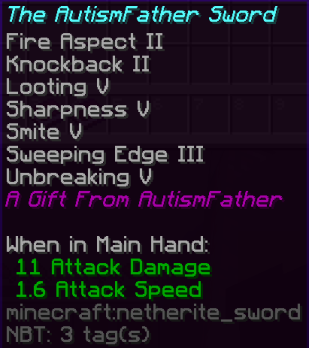
Sword Holders
- pandarulers229
- MiningMomGh
- STD1990
- Rin_Elf
- daddy1015
- ZEDDY1977
- Zachyoshi2003
- bb1201
- EatSleepRC
- LadyCath
- bluebouncybubble
- Buddy4999
- martinm5009
- GrafterCrafter
- dancingone
- mama_juju
- Ultamite_Killer
- CookieCrazyDawn
- AutismPastaLover
- TheHemikoWay
- Farockz
- Purrrpley
- Jasdin
- covakaresmum
- ITheDragoon
- Jlegoman
- Saidy
- BarboBase99
- JustBlue333
- RyliahRose
- _Teliassen_
- Amooodle
- MaxiDerp
- Taren03
- SciFiAspie
- n1n
- CWG_
- emerald1561
- Crankles_
- Solphire
- FunMummy
CBA
Description
Caught Being Awesome, known as CBA, is the term used to describe the act of catching players during random acts of kindness or friendship or sharing or any other positive way that makes a positive impact on others.
How to get a CBA
Players are generally just discovered by the watchful eye of those with the Admin, SrHelper, and Helper ranks.
Screenshots or logs are captured of the moment and recorded into a hidden forum where they can be reviewed and stored.
Players who are Caught Being Awesome are awarded with .5 credits on the Autcraft store.
TAO
Description
Players are encouraged to tell staff when they see someone being extra kind or helpful in game.
When to Submit a TAO
- Know someone who has been very nice? Been friendly?
- Did someone do something good or helpful?
- We want to hear from you!
If a player sees someone going the extra mile to be kind and helpful to others, they can let staff know by submitting a book at TAO. Located north of the world portals room, this area can also be reached with the command /warp tao
How to Submit
Grab a free book from the dispenser. Write the message and sign the book with your player name. Drop it in the hopper. It's that easy!
Player of the Week
January 31st, 2026
Ozaron
Description
The Player of the Week, or POTW, is the player that stands out the most during the week from Saturday to following Saturday. It used to be Monday to Monday before the day was changed in January 2018.
Earning Player of the Week is actually tougher to do than earning a CBA due to its competitive nature. Often, many players stand out through the week but only one player can be chosen.
To be that one special player selected to be POTW, you must exhibit one or several of the following:
- Be Kind
- Be Helpful
- Show Personal Growth
- Be friendly
How POTW is Selected
The Admins and SrHelpers nominate players each Saturday that they feel are good candidates for POTW. Admins discuss all of the nominations, exchange notes in case anyone missed anything and then the Player of the Week is selected. Generally the POTW is announced on the server each Saturday at 4:00 PM Server time (16:00 displayed on the Tab menu, 4:00 PM Eastern Time)
From the first POTW until December 2017, POTW was always announced on a Monday, but in January 2018 announcements happened on Sundays to make it easier for Players to join the event. Starting on 2nd May 2020, the POTW announcement was moved to Saturdays.
The POTW will have with their player head and signs announcing their position inside the TARDIS. Players are also awarded 4 credits on the Autcraft Store.
POTW 2025
Click here for more information about POTW
- January 4, 2025
- SeaLlamaa
- January 11, 2025
- animedude123
- January 18, 2025
- Skylord_Gamertag
- January 25th, 2025
- OPsteffOP
- February 1st, 2025
- CrumbleKJ
- February 8th, 2025
- cjgroeneweg
- February 15th, 2025
- Crankles_
- February 22nd, 2025
- EchoTheDiamond
- March 1st, 2025
- NullDelirium
- March 8th, 2025
- Kodiaks
- March 15th, 2025
- CreepingNala
- March 22nd, 2025
- stxrnya
- March 29th, 2025
- internscout
- April 5th, 2025
- thequeenfrog
- April 12th, 2025
- YorkBork
- April 19th, 2025
- WHP0627
- April 26th, 2025
- TobyMacGeorge
- May 3rd, 2025
- WigglyWoo99
- May 10th, 2025
- Kaynotaspy
- May 17th, 2025
- EchotheDiamond
- May 24th, 2025
- Light_38
- May 31st, 2025
- freddiekafka
- June 7th, 2025
- LRPG2013
- June 14th, 2025
- EnderSquiddy
- June 21st, 2025
- nic_rand2409
- June 28th, 2025
- TheDrag0nTurtle
- July 5th, 2025
- Skylord_Gamertag
- July 12th, 2025
- Claarra
- July 19th, 2025
- IcarusTails
- July 26th, 2025
- ChogorrinYT
- August 2nd, 2025
- SeaLlamaa
- August 9th, 2025
- bittymus
- August 16th, 2025
- EmygratheDJ
- August 23rd, 2025
- Kira_Shades
- August 30th, 2025
- shatteredmelody
- September 6th, 2025
- TobyMacGeorge
- September 13th, 2025
- JuliJune
- September 20th, 2025
- H3r0Dude
- September 27th, 2025
- JediMasterArdean
- October 4th, 2025
- ATytoAlba
- October 11th, 2025
- Kaynotaspy
- October 18th, 2025
- Lynncat09
- October 25th, 2025
- bumbleBeeman201
- November 1st, 2025
- Andertxuuuuu
- November 8th, 2025
- RiverJaguar6324
- November 15th, 2025
- nic_rand2409
- November 22nd, 2025
- JuliJune
- November 29th, 2025
- Ech0Lal1a
- December 7th, 2025
- OPsteffOP
- December 13th, 2025
- Majora_The_Demon
POTW 2026
Click here for more information about POTW
- January 3, 2026
- AusomeAutie
- January 10, 2026
- Ceebug
- January 17, 2026
- Blu3Power
- January 24, 2026
- Sweatykiller423
- January 31, 2026
- Ozaron
Learn About...
Description
The Learn About section of our wiki contains information on many frequently asked about topics on Autcraft. This section is regularly updated as new features are added to the game. To see each article, select "Learn About" from the wiki navigation menu, then choose a topic. You can learn about features such as:
- Using Armor Stands
- Making a Forum Post on www.autcraft.com/forum
- Installing Resource Packs
- How to use Item Displays
- Jobs and Jobs Quests
- Player Particles
- Player Shops
- Smithing Templates and Armor Trims
If you would like to see a topic added to this area of the wiki, please make a post in the suggestions section of the forum.
Armor Stands
Description
Have you always wanted to know how to pose your armor stands in different ways to add some fun to your builds? Read on to learn all about the armor stand editor!
How to Use
First, you must craft an armor stand. The recipe calls for 6 sticks and 1 smooth stone slab. You can make smooth stone by smelting a piece of regular stone block.
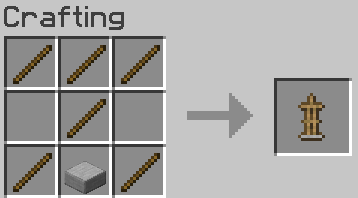
After placing your armor stand, shift and right click or type /armorstand near to bring up the editor GUI. If you are positioning more than one armor stand, you can use /armorstand last to bring up your most recent one.
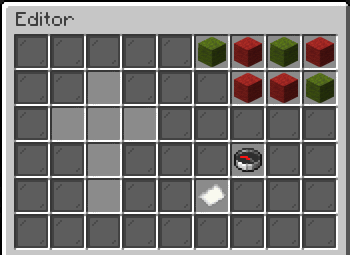
Each wool block controls a specific setting, as seen when hovering over the blocks.
- Visible - Controls visibility of the stand. Whatever the stand is wearing or holding will remain visible.
- Small - Toggle between two size options
- Gravity - Affects ability to raise and lower armor stands. When gravity is enabled and the block the stand is place on is broken, the stand will fall to the next block down.
- Visible Arms - Remove arms while the rest of the stand is visible
- Glowing - Adds a white "glow" outline that can be seen through all other blocks.
- Visible Name - Select this, and use a named nametag, to display text above any armor stand. Alternatively, place the armour stand on an anvil to rename before positioning.
- Plate - Toggles visibility of the stone plate at the base of the stand
Compass
Open Position Options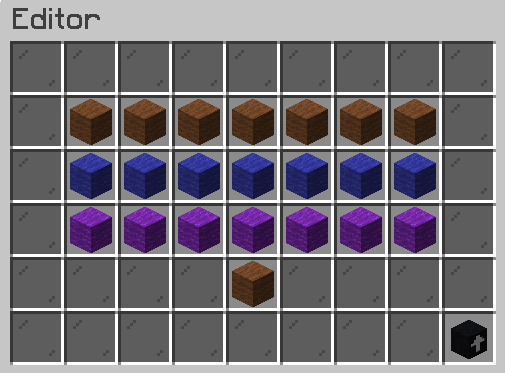
From left to right, each row controls the head, torso, left arm, right arm, left leg, right leg, and position. Position refers to the full armor stand, while the other options control individual parts.
The brown wool blocks control the X axis. Blue controls the Y axis, and purple controls Z. While Y is always up and down, the X and Z are relative to your coordinates. This means one direction will not always be to the "left." You will need to experiment to see which direction to move your armorstand.
Left clicking increases the value, while right clicking decreases. Holding shift while clicking will move increase/decrease at a quicker rate.
Using these various options will allow you to pose your armor stand any way you wish.
Paper
Open Clone Picker
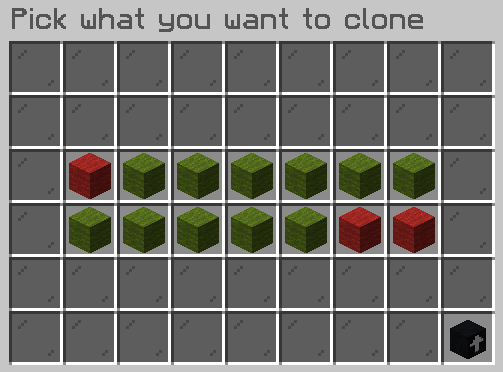
Each wool block corresponds to a setting you chose while editing your armor stand. On this screen, you can choose which things you want to copy to a new armor stand. After choosing which options to keep, you will be instructed to right click a new armor stand, or to punch a block (left click) to cancel.
![]()
When your armor stand has been successfully copied, you will receive this message in the chat:
![]()
Now you have made an identical copy of your display
Beacons
Description
Beacons are used to apply a variety of effects to an area, which is determined by the size of the beacon pyramid.
How to Craft a Beacon
Beacons are crafted with 5 clear glass, 3 blocks of obsidian, and one nether star.
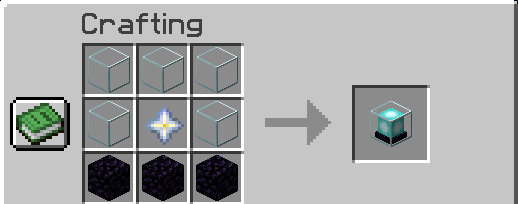
About Beacon Pyramids
The size of the pyramid will determine which effects you are able to choose, as well as the the range of the effects (how many blocks away from the beacon they will work). The level of a beacon refers to how many layers. How to construct each level will be shown after this section. Pyramid levels 1-3 can choose one effect. Level 5 can choose a secondary effect.
- Level 1 Pyramid
- Requires 9 blocks
- A single 3x3 block area
- Speed I, Haste I
- 20 block effect range, 11 second duration (once you leave the area)
- Level 2 Pyramid
- Requires 34 blocks
- 5x5 bottom layer, 3x3 top layer.
- Speed I, Haste I, Resistance I, Jump Boost I
- 40 block effect range, 13 second duration (once you leave the area)
- Level 3 Pyramid
- Requires 83 blocks (1 stack + 19 blocks)
- 7x7 bottom layer, 5x5 center layer, 3x3 top layer.
- Speed I, Haste I, Resistance I, Jump Boost I, Strength I
- 40 block effect range, 15 second effect duration (once you leave the area)
- Level 4 Pyramid
- Requires 164 blocks (2 stacks + 36 blocks
- 9x9 bottom layer, 7x7, then 5x5, and 3x3 layers
- Speed I, Haste I, Resistance I, Jump Boost I, Strength I
- A Secondary effect may be chosen, either Speed II, Haste II, Resistance II, Jump Boost II, Strength II, or Regeneration
- 50 block effect range, 17 second effect duration (one you leave the area)
A fully maxed beacon pyramid with all effects will require 6 beacons, 5 at level II effects, with the 6th set to Regeneration.
How to Build the Pyramids
Pyramids can be built from any combination of iron, gold, emerald, diamond, or netherite blocks. They must be completely solid. The beacon is placed at the top of the pyramid on the center block.
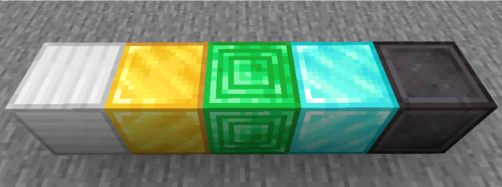


Selecting the Effects
Right click the beacon to bring up the menu. The beacon must be "fed" a netherite ingot, emerald, diamond, gold ingot, or iron ingot in order to apply the effect. Level 4 beacons will require a second "feed" to apply the secondary effect.
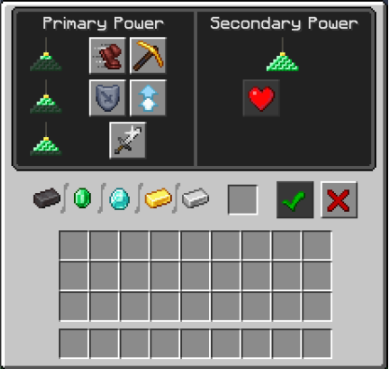
Building a Multi-Beacon Pyramid
Beacons must be surrounding by blocks on all sides on the top layer. This is best seen with a level 1 beacon
When adding a second beacon, more blocks must be added to maintain this requirement.
A third beacon can be added the same way.
When adding 4 or more beacons, they can either continue in a line, or can make squares and rectangles.
The rest of the pyramid will need to be adjusted to continue the solid structure. Here is a level 4 pyramid with 2 beacons.
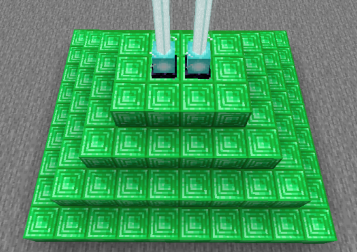
There is no fancy math involved in doing this. Simply decide how many beacons you need to use. Place them on top of a 4 block tower. Build out and fill in the beacon making sure each later expands by one block, from top to bottom.
A fully maxed out level 4 beacon with all 6 buffs will require 244 mineral blocks.
Changing Skins
Description
Players can have a variety of skins in the game. This page will explain where to find them, how to make the change, and review what is an is not appropriate for Autcraft.
Where to Find Minecraft Skins
There are a variety of websites that can be used to find the perfect skin. For these directions, we will look at The Skindex. Use the search bar to look for something specific, or browse the various options. Let's use this cute fox skin as our example:

We have decided to change to this skin. The first step is to download the image using the Download button on the right side of the page. Please remember where you save the file to so you are able to find it again. Creating a folder for minecraft skins on your desktop is an easy way to do this.
Changing the Skin
For this next step, there are two options. For the first, we need to visit the Minecraft website. Log in with the link in the upper right corner of the page. The next page will show your Minecraft games. Make sure to do this in the Java Edition section.
Select "Change Skin."
The model you choose will determine the size of the skin. When in doubt, choose Classic. If you discover black lines on the back of your skin that shouldn't be there, you may need to upload your skin again and use the Slim model.
Now it's time to upload the image file you downloaded. Click the button that says "Select File" and then search your computer for the location you saved the file to. After it has been selected, click Open. The skin will appear on the screen when finished. At this point you can leave the Minecraft website.
Open the Minecraft launcher. At the top of the window will be a few tabs. Select "Skin."

This page will display all skins you have used. Your new skin will appear on the page. Hover over the thumbnail for options, which will allow you to use the skin of your choice, or apply a special name to the skin.
A second option is to add a new skin directly through the launcher Visit the Skins tab, then choose either the wide (classic) or slim model and click the browse button. At this point you will need to navigate to the location where the skin image file was saved. Select the file to upload it.
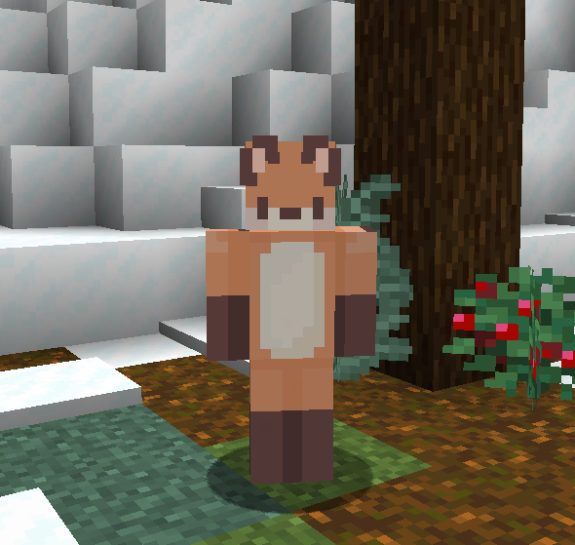
Enjoy your new skin!
Changing Your Drop Key
Introduction
A "drop key" is the key on your keyboard when tells the game to drop the item you are holding. Whatever items you are currently holding when the key is pressed, will be tossed to the ground. Accidentally hitting this key while playing is the most common cause of lost items.
Key Bindings
Key bindings are a setting in computer programs that cause a specific action to happen when pressed. A great example of this is in word processing programs. Copy and page can be quickly done with CTRL + C and CTRL + V (⌘ +V/C or CMD + V/C on a Mac. Keyboard shortcuts are a type of key binding.
When to Change
In general, it is good to stick with the default key bindings. It makes it much easier to get help when wanting to know how to do a specific action, or answering other people's questions. Another consideration is that most key binds are standard for gaming. Small differences do exist, such as a sprint key, or opening inventory. It may make sense to change your bindings to be consistent between the games you play.
It is also worth changing your key bind if you repeatedly hit the key on accident, negatively affecting your game play. The default drop key (Q) is a great example of this. The most common cause of lost items on Autcraft is from players accidentally bumping Q while using the movements keys (WASD). The best way to avoid this happening, is to change the drop key.
Deciding on a New Key
The first step is to go to the key bindings page in your game settings. You can get there with Escape > Options > Controls > Key Binds...
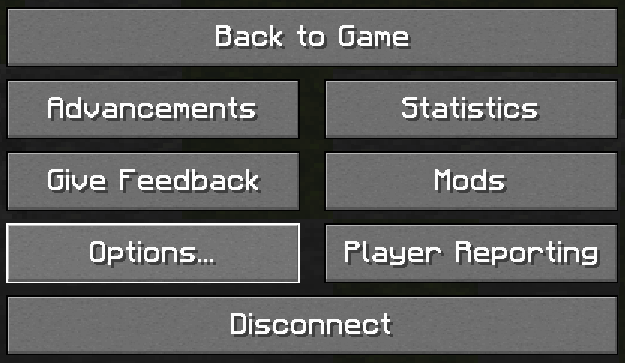
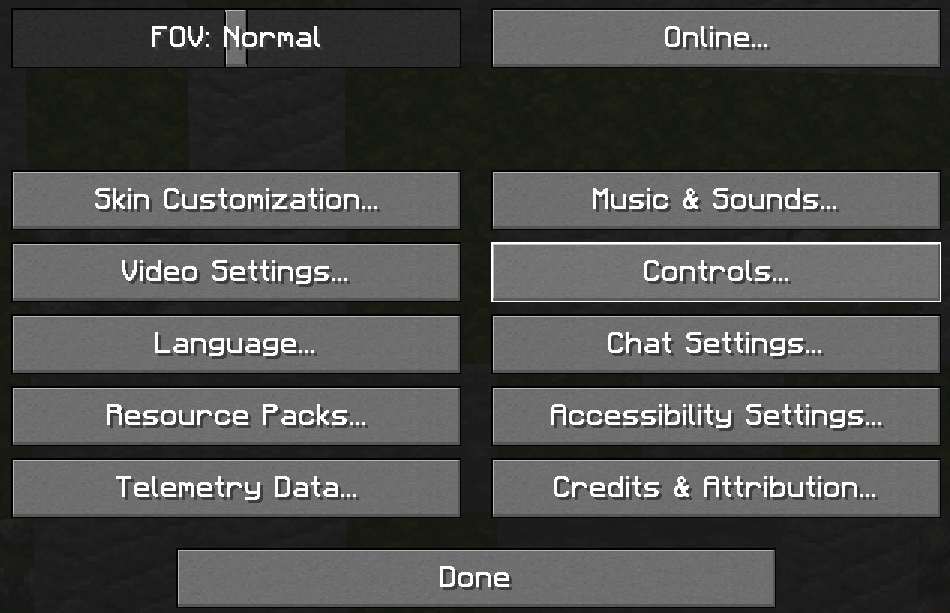

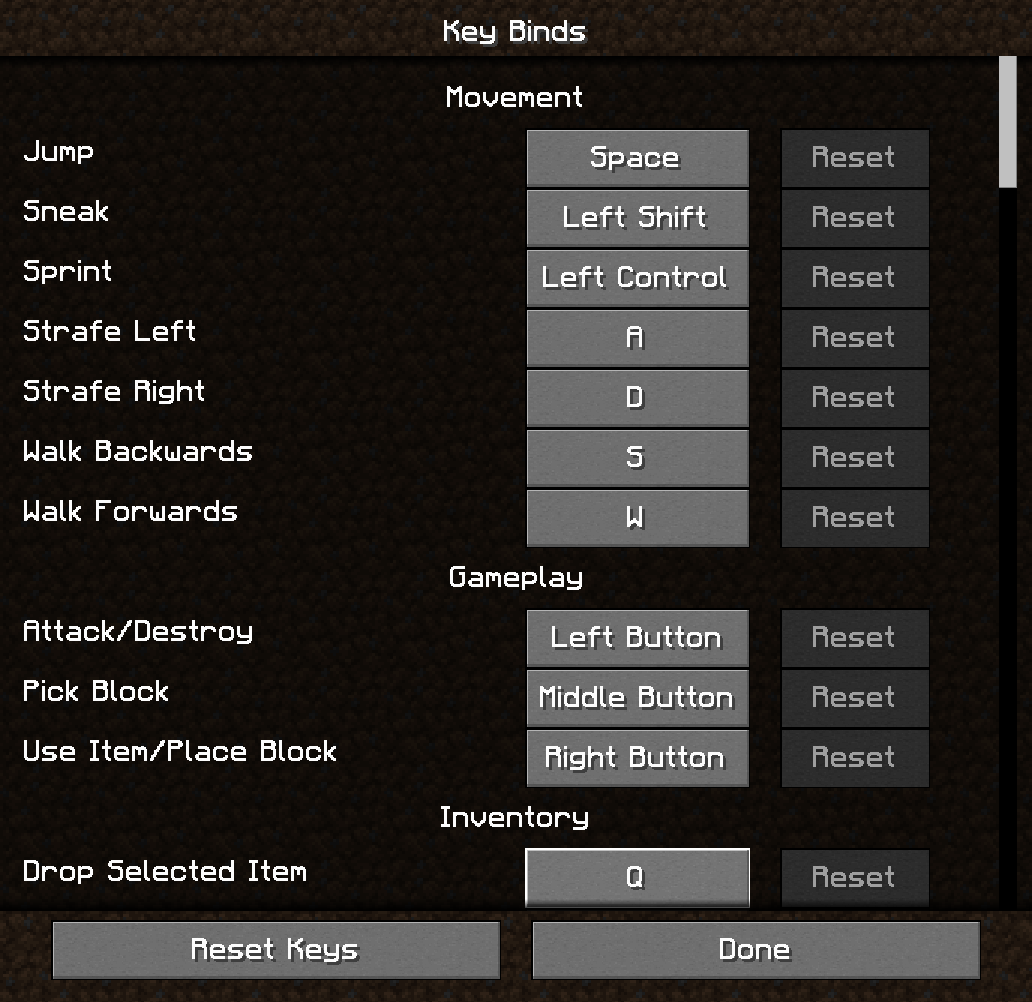
This page is where you can change any of your bindings, or completely remove them. At the bottom of the above image, you will notice that Q is set for "Drop Selected Item." This is the key we are changing.
Clicking on the button that says Q will change it to say > Q <. At this time, you can select another key. Any key on your keyboard can be bound to an action.
Let's start by changing our drop key to the space bar:
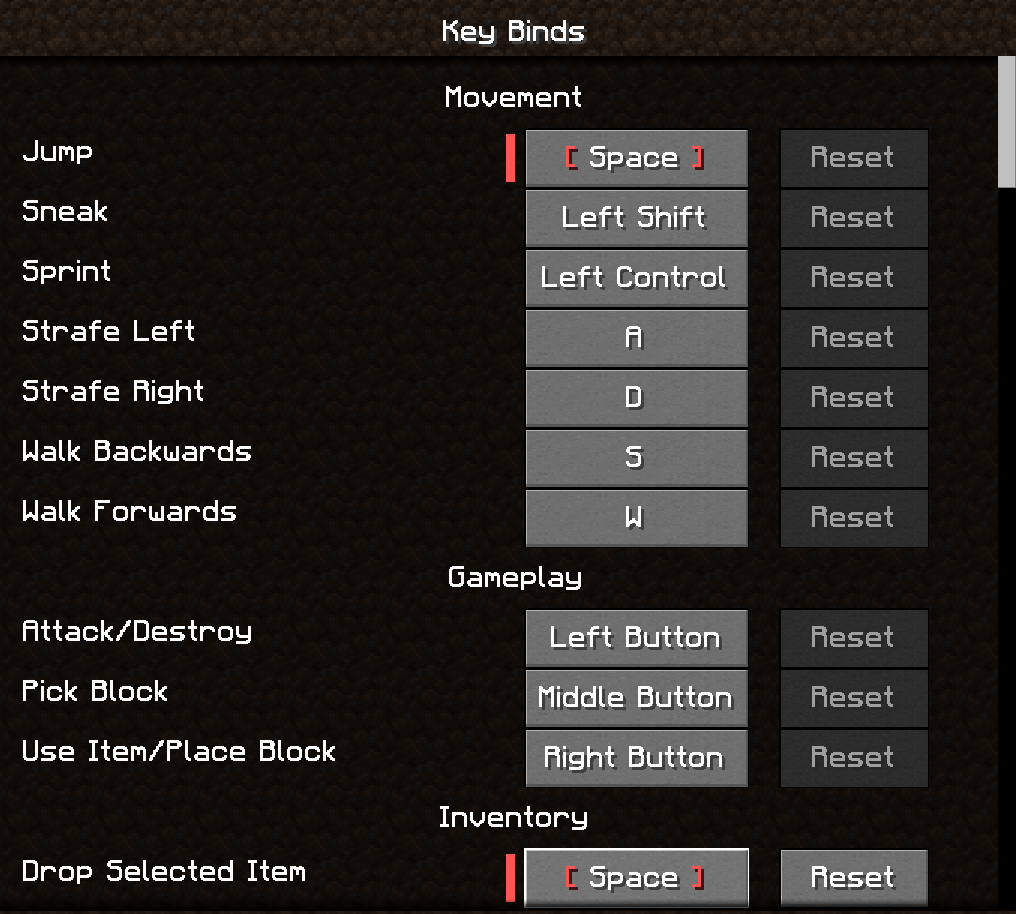
The red marks that have appeared let us know that there is a conflict with this selection. One key is assigned to two actions. In this example, space bar is assigned to "Jump" and "Drop Selected Item." This means any time you press the space bar, both of those things will happen. It is important to choose a key that is not already assigned to something. The keys that are available will depend on what other mods you may have installed.
To prevent accidentally hitting the drop key, consider choosing a key that is not next to your directional keys, or other keys you frequently use during the game. In this example we are using Backspace/Delete.
![]()
To leave this screen, either press "Done" or hit escape to return to your game.
![]()
I Messed Up! How Do I Fix It?
The easiest fix it to select the "Reset Keys" button at the bottom of the Key Binds page. This will return all bindings to the default setting.
All My Keys Are Assigned! How Do I Find One!
Find a key bind that you aren't using. Perhaps one assigned to a mod or a feature that you don't use. Click the button with the current binding and then click escape/esc. This will unbind the key.
Conduit
Description
Conduits allow players to stay under water indefinitely without the use of potions or an Ocean Prince boss head.
From the Minecraft Fandom Wiki page:
"This effect restores oxygen, gives underwater night vision, and increases mining speed by 16/7%. Conduits also damage any hostile mobs, like drowned, guardians, and elder guardians, within a range of 8 blocks of the conduit. Conduits can be activated in any biome and at any height or depth."
How to Build
The activation frame of the conduit must be built out of prismarine block, prismarine bricks, or dark prismarine block.
The frame is built as follows:
Begin with a cross shape, 5 blocks by 5 blocks. This image is looking straight down from above.
Next, stack four blocks on each end, for a total height of 5 blocks. Repeat the same cross pattern on top.
Add a square going around the center of the frame.
In the bottom center of the frame, place another block, with the conduit block on top. (See below how to craft the actual conduit block)
Remove the block that was just placed so the conduit is "floating" in the center of the frame. This will activate the conduit.
If the activation was successful, there will be an effect icon on your screen.

How to Craft a Conduit Block
A conduit is made by placing 8 nautilus shells around a heart of the sea.
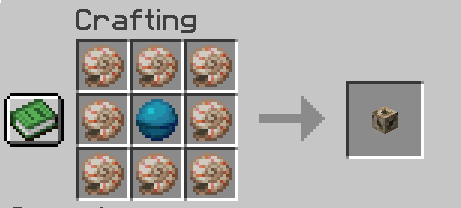
Custom Recipes
Description
Autcraft features many unique items, including some that you can craft yourself! Read on to learn how to make some special recipes.
Leap Frog's Head
Combining one of each Shiny Frog (temperate, verdant, and pearlescent) on the crafting table will result in a Leap Frog's Head. Wearing this head will give you Jump Boost VI.
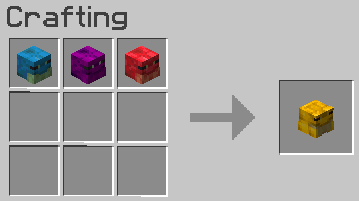
Wither Miner
Crafting together one of each Shiny Wither variant will create a Wither Miner pickaxe. This amazing tool features Efficiency VIII, in addition to Mending, and Unbreaking III. The attached lore states "Powered By The Souls of the Forgotten." When combined with a haste II beacon, this pickaxe can insta-mine deepslate!
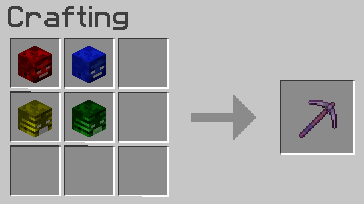
Dragon Egg
Dragon Eggs are a much sought after item on Autcraft, considering there is only one available each month. Normally, an egg only goes to the first player to kill the Ender Dragon after the resource worlds reset. Now, anyone can craft their own special egg by combining nine Ender Dragon heads!
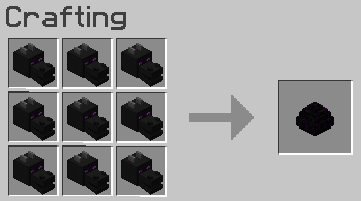
Forum Posts
Description
Making your first post on the forum can be a confusing experience. Read on to learn how to start a new topic and add images to your posts. Please remember that all images must follow Autcraft rules.
Getting to the Forum
There is a purple navigation bar at the top of our website. The link to the forum is next to the Home button. Click this link.

You should now be in the forum section of our website. There are several categories here for posting. If you aren't sure where your post fits in, just ask! Here is the first section of the forum, however there are many more areas.

Posting on the Forum
For this example, we will be posting a screenshot to share with friends. These types of posts belong in the Personal section of the forum.
We have a subtopic for Pictures and Screenshots, so that is where we will go to make our post. Once we are in that section, click "New Topic" which is next to the search box.

Clicking "New Topic" will bring up the text editing window, where we will make our new post.
If our post does not include any images, we can write our message in the text box and click submit. We are going to post a screenshot, so we first need to open the menu for extra options. Click on the three dots.
This will open the options window for our post.

Our options include things to change the appearance of the text, like bold, italic, underline. We can change the text color, font size, and add emojis to our post. We are going to add a picture, so we need to click the icon that looks like an image.
![]()
This will bring up a window for us to add our picture. Click the text that says "Upload."
You have two options for adding your picture. You can click "Browse for an Image" and search your computer folders to find the picture. For Minecraft screenshots, they will be found in the Screenshots section of your Minecraft folder. If you need help finding your folder, ask in chat!
The second option is to drag and drop the file directly into the white box. If your picture is saved to your desktop, this is the easiest option.
Once your image has been added, you will automatically be returned to the General section so you can edit the image size. If you aren't sure how big you want it, just click Save. The size can be edited later as well.
Click Save and see how your picture looks in the post.
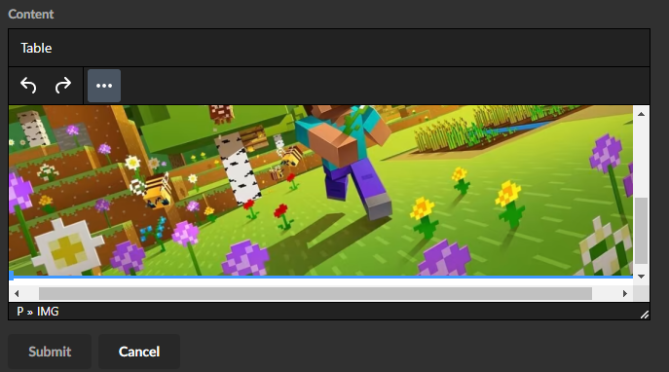
Oh wow! Our picture is very big. We will need to make it smaller. There are two ways to do this. One is to click and drag the blue squares in the corners of the image. You can use these to make the picture bigger or smaller right in your text box. If you have a specific size you want to make the picture, just click the image, and then go back to the image uploader. It will show you the size for the selected picture and we can edit it.
We have adjusted the width of our image to 400 pixels wide. For reference, most of the images in this wiki page are also set to 400 pixels wide.
There we go! Our picture fits much better now. All we need to do is add some text and a title. The Topic Title is located above the text box. When you are finished, click submit and check our your very own forum post!
Installing Resource Packs
Description
Installing resource packs is quite simple once you know where to put the files. read on to find out more.
Choosing A Pack
The first step is to download your desired resource pack. Autcraft allows any pack that does not provide an unfair advantage. The best example of an unfair advantage would be any packs using X-ray. Texture packs that change how blocks look, or resource packs that change music and paintings are fine.
These packs can be found in many places, such as Planet Minecraft or CurseForge. It is up to you to determine the safety of the website you are downloading from. If you aren't sure, please ask an adult or a trusted friend. After downloading your chosen pack, do not unzip the file.
Where To Place the Pack
Whether you are on a Mac or a PC, your game was installed with a special folder for resource packs. If you do now know where this folder is, the easiest way to locate it is through the game itself.
- While in game, click escape, options, resource packs.
- On the resource packs page, click the bottom button that says "Open Pack Folder"
- This is where you will place your resource pack files. You will not need to restart the game once new files are added.
Using Your New Pack
Back in the resource pack page in the Minecraft options menu, you will see there are two columns. The "Available" column shows any resource packs you have that are not currently being used. This is where your newly added packs will be. The "Selected" column lists resource packs that are currently in your game. To move a pack, simply hover over the icon and click the large right or left arrow. All packs in the right column will be active in your game.
Some packs may have an alert saying it was made for a different version of Minecraft. This does not mean the pack will not work. While sometimes this may be the case, most often the resource pack will work just fine.
Common Questions
- I have installed my resource pack but it's not working
- There are two possibilities for this. One is that the pack truly is not compatible with the version of Minecraft that you are using. The second is that a different pack is overriding the settings. When hovering over the pack icon in the "Selected" column, there are small up and down arrows. Selecting one of these will change the order of the listed packs. The higher the pack is in the list, the higher the priority it will be given. It may take some time to figure out which order works best for your combination of resource packs. The fewer packs you use, the less likely this will be an issue.
Install Optifine
Description
Optifine is a mod that helps players with fps, rendering, and additional add-ons.
How To Install Optifine
Note: Autcraft is not responsible for the actions and creations of Optifine. Download and install and use at players discretion advised. Please have adult supervision when downloading or installing.
- Go to Optifine Downloads. From here you want to click the (Mirror) Button next to the download button.
- Click the middle Download Button in Navy Blue Color. Don't Click the Ads
- You might get a warning saying "This type of file can harm your computer. Do you want to keep Optifine_1.xx.x_HD...jar anyway?" Choose "Keep." This is a standard warning with any .jar file.
- Double Click the file if you are on chrome and it shows in the bottom left corner or go to your Downloads folder and double click it there.
- Click Install to put it on Vanilla Minecraft, Click Extract for Fabric (See Below, Red For Vanilla, Blue For Fabric
- Error: If you get this error ( See Below ) You want to go to your Minecraft Launcher, "Installations" (+) New... (Select Version) and click create, After, Try installing again.
- After installing you might have to reload currently running Minecraft installations and the launcher to get it to show. If it does not show after successful install, click "Installations" (+) New... "Versions" and scroll till you see "release 1.xx.x-Optifine_HD_U_x"
Capes
Optifine Capes are a staple in the plugin, to get one you have to donate 10$ To optifine, We suggest it's your decision if you want to get a cape or not. ''Autcraft is not responsible for the actions and creations of Optifine, Download and installs and use at players discretion advised.
Note: Optifine Capes Must Be Autcraft Appropriate and family-friendly. Those who don't comply must change capes or remove it.
Optifine Capes can have a banner pattern on the back, a specific Optifine Logo, and different colors. To use the banners you need to copy the last part of the URL of an alternate banner-making website.
How To Change Capes
- Have Optifine Installed And A Cape Bought
- In Minecraft Go To Options > Skin Customization... > Optifine Cape... > Open Cape Editor > OF Website > Design:[Banner], URL [], Align, Top, Bottom
Cool Cape Designs
- aaptptakakakaoaoao = Upside Down Face
- aafvpiaiaDabataK = Wavey Patterns
- aaeLkeafayasaqlDac = Space Theme
- aahBayasaBadaCac = Cool Lines
- paaBaBaBayasaqbt = LoliPop
- aaaolllLlEljowowlc = Duck Face
- paaoataGpLplagpfpA = Panda Cape
- oabfkqlwmEaeaBasay = Rainbow Chain
- jaoKlKkKmKpbpDpspy = Rainbow Lines
- jamKpcpbpDpspypGph = Pink To Blue Lines
- hapKpvagepkh = Mountain Top
- papehGhhphpGpzpnplhthopopthApA = Skeleton King
- fabKbKacafaEaAaB = Butterfly Cape
- paavlLllowlclElL = Duck 2.0
- aaklabadckaqboltbo = Flower Cape
Alternatives
Optifine may not be the best option for everyone. It adds some custom features players may not like and does not give enough performance boost to be worth. Some other options similar to Optifine are: Sodium, Lithium, and Phosphor along with others on our approved mods list.
Item Displays
Description
We have an Autcraft-exclusive plugin that makes creating and removing item displays easy for everyone!
What is an Item Display?
An item display is a form of entity display, which was a new feature with Minecraft 1.19.4. These displays are created with some code that is stored on the server and sent to your client so it shows you an image of something that isn't actually there! Item displays generate zero lag. This allows us to place items all over the server without the use of item frames and armor stands, which greatly reduces overall lag on the server.
To learn more about lag, please see https://www.autcraft.com/wiki/lag/
How to Place an Item Display
The main command to type is /itemdisplay
Once this is typed, all you need to do is tab through the remaining options and hit enter!
The command works by selecting to create, choosing the item, and then using either the default size (item frame size) or actual block size (large).
For example, a full size birch log display would be entered as:
/itemdisplay create birch_log large
While a birch log sized to replace an item frame would be typed:
/itemdisplay create birch_log
Here are those two displays for size comparison:

Using the default size displays to replace item frames in a storage room could look like this:
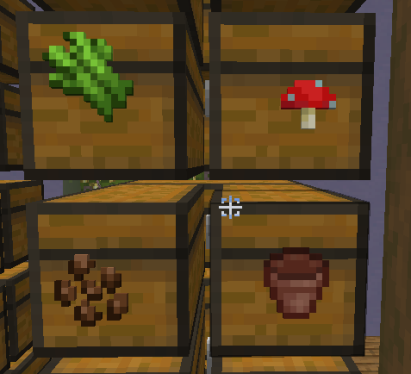
These item displays will rotate to always face the viewer. To create a display that will show in one fixed direction without moving, use this command:
/itemdisplay create item_name fixed
Replace "item_name" with the name of the item you wish to display. Such as birch_log in the previous example. This display will set to the direction you are currently looking when the command is entered.
A trick for centering these displays is to /sit on a block to center yourself, then use the shift key to stand. You can also adjust the height of displays by placing and standing on layers of snow.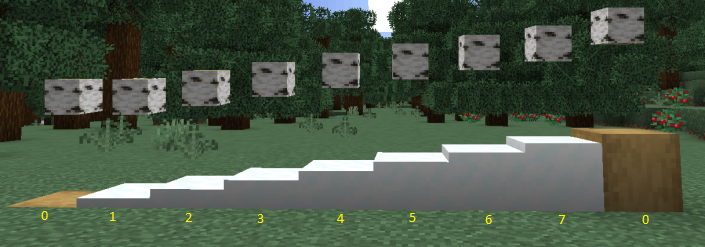
The list of items to choose from comes directly from the Minecraft database, and all items are listed in their data form. To find out what an item is called, make sure you have Advanced Tool Tips enabled (F3+H) and hover over the item in your inventory or in the crafting menu. As you start to type the item, the plugin will automatically filter the options and then you can tab through, much like when sending a message to a player in chat.
How to Remove an Item Display
Since the item displays don't actually exist on the server and we can walk right through them, how do we remove them? With the shift key! Simply pressing shift while right-clicking the display will remove it from view. This is accomplished through the use of hit boxes. If you struggle to remove the item, enable hit boxes with F3+B and click somewhere inside the box. Using hitboxes will also show you where to click on chests if you have used item displays as storage labels. When using the default (small) size item displays, this hit box should be no larger than an item frame. This means we can still open chests as always, as long as we click on the edges of the chest to avoid the hitbox.
Limitations and Guidelines
Item displays can only be placed within protections that you are a member of. This means that you are either the protection owner, or the owner has added you to the protection. You are not able to place outside of your protection, including unprotected areas in the build and resource worlds.
Each player is currently limited to 500 item displays. This is a brand new plugin and we are still testing to make sure there are no issues and this doesn't negatively affect the server. Assuming we don't run into any problems, this limit may be raised in the future.
Players are only able to remove item displays that they placed. You cannot remove a display from your protection that another player placed. Please ask them personally if they can remove it. If you run into any issues, speak with a staff member or submit a /modreq.
All item displays must follow Autcraft rules for safety and appropriateness. If staff determine that an item display or combination of items does not meet these guidelines, your display may be removed.
Jobs and Quests
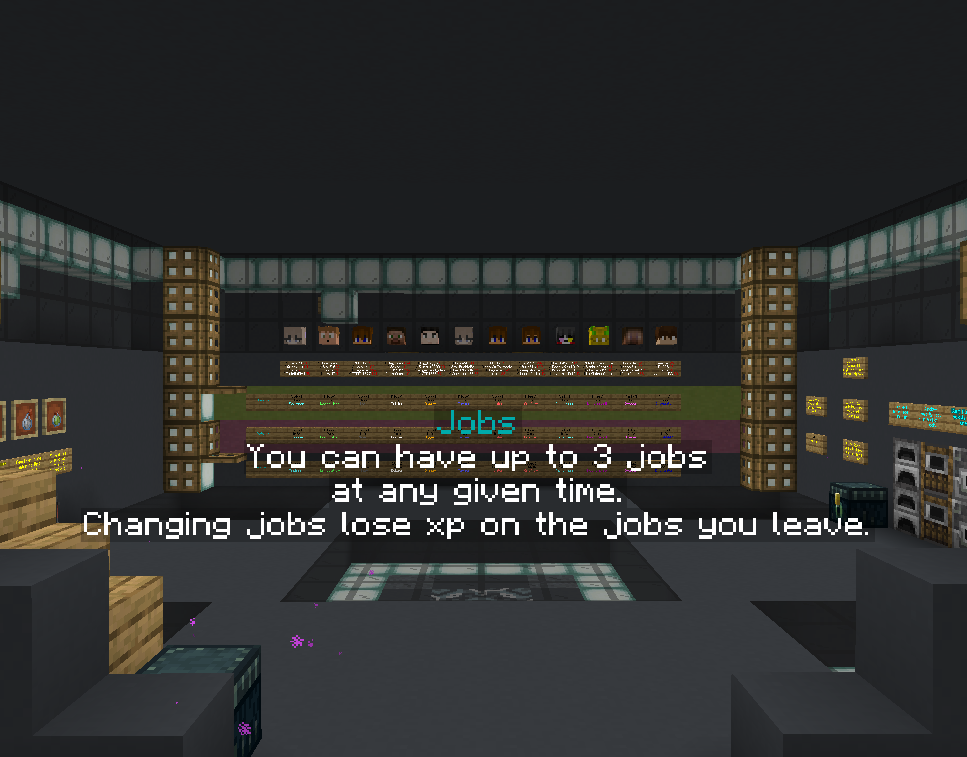
Description
In our /warp jobs room, you can sign up for up to three jobs that allow you to earn in game currency ($), job experience (exp) and jobs points (points) while playing the game. For more information on which jobs are available, please go to Wiki - Locations - Jobs Room.

In Game Currency
Performing job actions earns in-game currency. The amount of money earned can be seen with the commands /bal, /balance and /money. This money can be exchanged for emeralds at The Bank at /warp shops.
Jobs Points
To see how many jobs points you have created, you can do /jobs points. On Autcraft, 10,000 jobs points equals 1 credit. You can convert your points into credits by using the command /jobs shop. You can use credits to buy things on the Autcraft website store, such as spawn eggs, ranks, decorative heads and much more.
Jobs Experience
The more you do your jobs, the more experience (exp or xp) you get. This helps you move up jobs levels and get new job titles, which allows you to earn more money and jobs points each time. These are the same job titles that Villagers move through as they trade.

The job titles are as follows:
- Novice (from level 0)
- Apprentice (from level 25)
- Initiate (from level 50)
- Journeyman (from level 75)
- Adept (from level 100)
- Master (from level 125)
- Grandmaster (from level 150)
- Legendary (from level 175)
You will get a message similar to 'You are now A Miner' or 'You are now J Fisherman' when you reach the level.
Quests
Each job you join offers quests which allow you to earn more money ($), jobs points or in some cases, whole credits.
When you type /jobs quests, a box will appear in your chat box listing the available quests for your jobs. When you hover over the title of the quest, it will give you the information on what you need to do and what your reward will be for completing it.

Once you have completed your quest, you will get an automated message to let you know that the points or money have been added to your account.
Player Particles
Description
Player Particles is a plugin on Autcraft where players can make unique sets of particles. There are thousands of combinations for players to use using styles and different particle effects. This page will list the effects, display the styles, and walk you through how to set your own particles in the game.
Effects
Effects are animations in the game, such as flames, dust, or enchantment table. These are mostly used particles inside Minecraft and you can harness the power for a unique display. Effects must be purchased from the Autcraft store. Examples of each effect are displayed in the store.
- Ambient Entity Effect
- Angry Villager
- Block Break
- Bubble Effect
- Bubble Pop Effect
- Cozy Camp Smoke
- Camp Signal Smoke
- Cloud Effect
- Composter
- Crit
- Current Down
- Damage Indicator
- Dolphin
- Dragon Breath
- Dripping Honey
- Dripping Lava
- Dripping Water
- Dust
- Enchant
- Enchant Hit
- End Rod
- Entity Effect
- Explosion
- Falling Dust
- Falling Honey
- Falling Lava
- Falling Nectar
- Falling Water
- Firework
- Fishing
- Flame
- Happy Villager
- Heart (Patreon exclusive)
- Instant Effect
- Item
- Landing Honey
- Landing Lava
- Large Smoke
- Lava
- Mycelium
- Nautilus
- Note
- Poof
- Portal
- Rain
- Slime
- Sneeze
- Snowball
- Soul
- Soul Fire Flame
- Spell
- Spit
- Splash
- Squid Ink
- Sweep Attack
- Totem of Undying
- Under Water
- Witch
Styles
Styles are how your chosen particles are displayed. All of these styles are free to use and are not purchasable.
Current styles and example gifs (directly from the plugin developer. not all styles are displayed):
Arrow
Batman
Beam
BlockBreak
BlockPlace
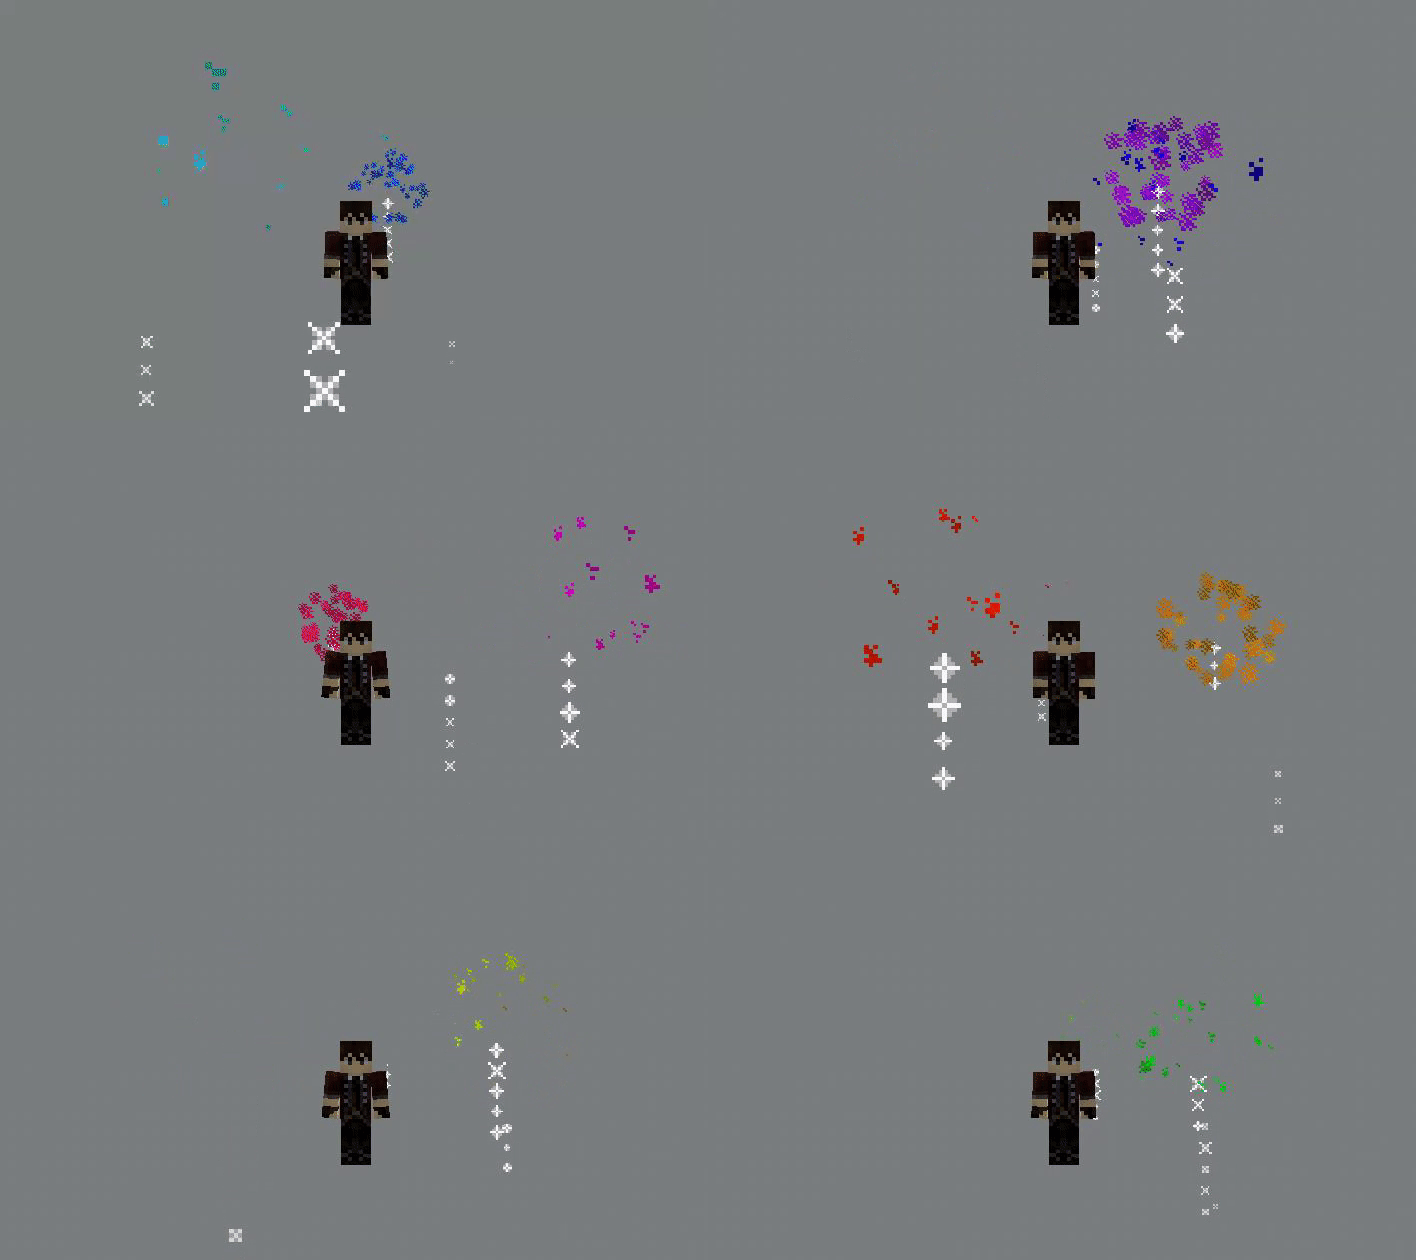
Celebration
Chains
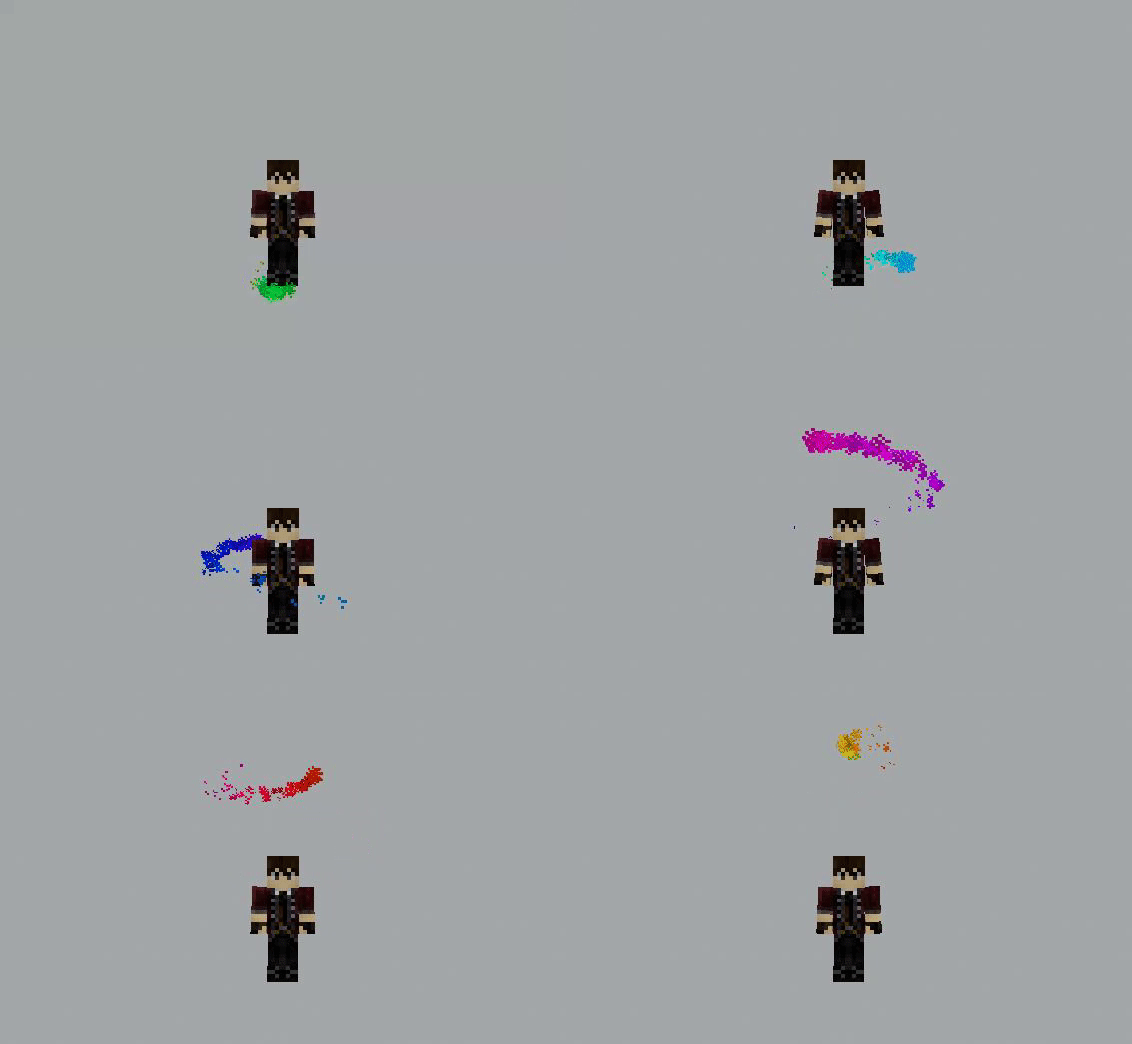
Companion
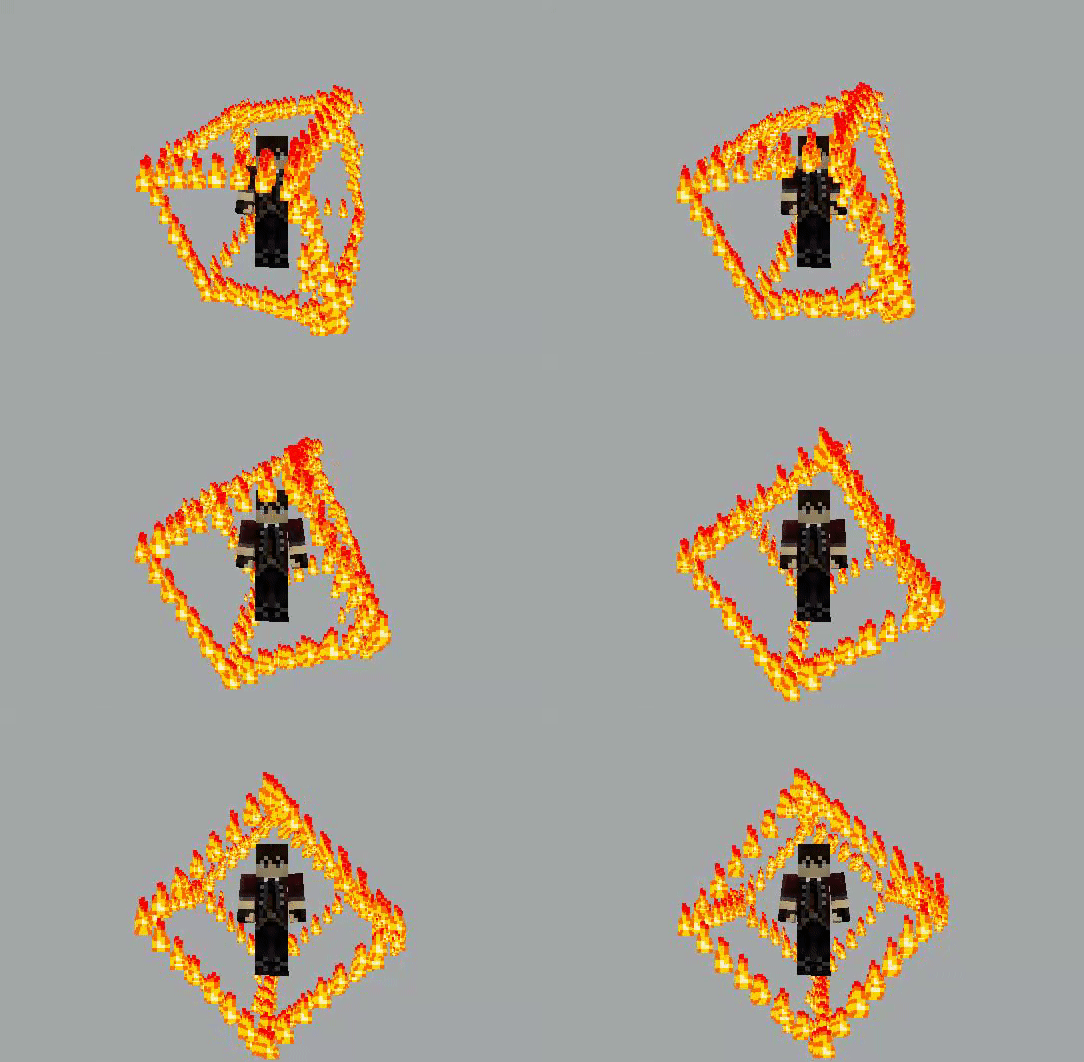
Cube
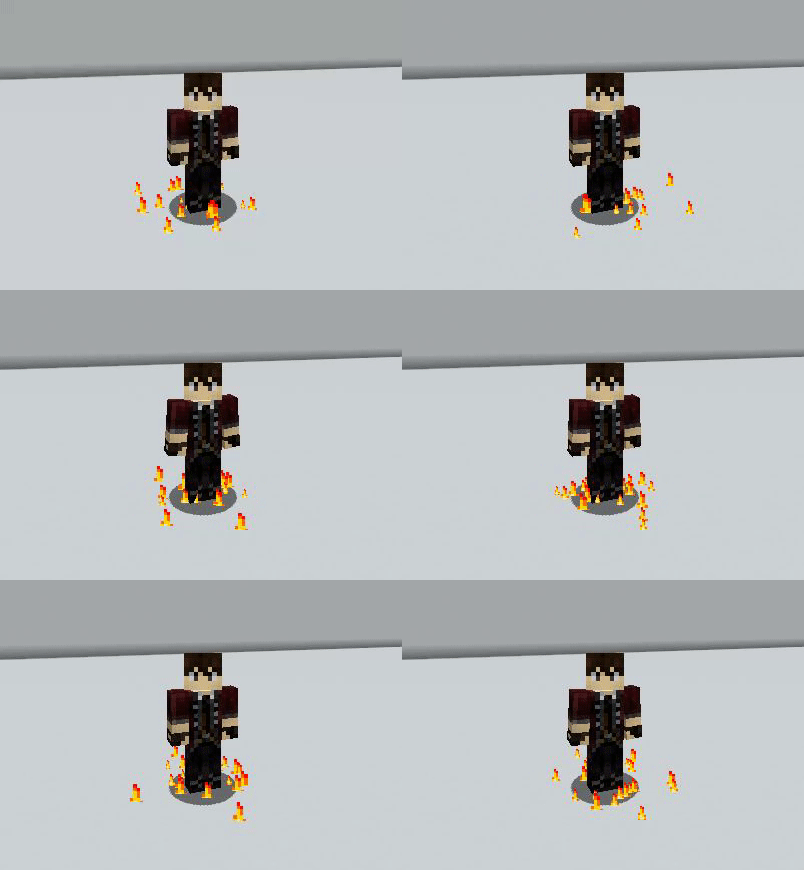
Feet
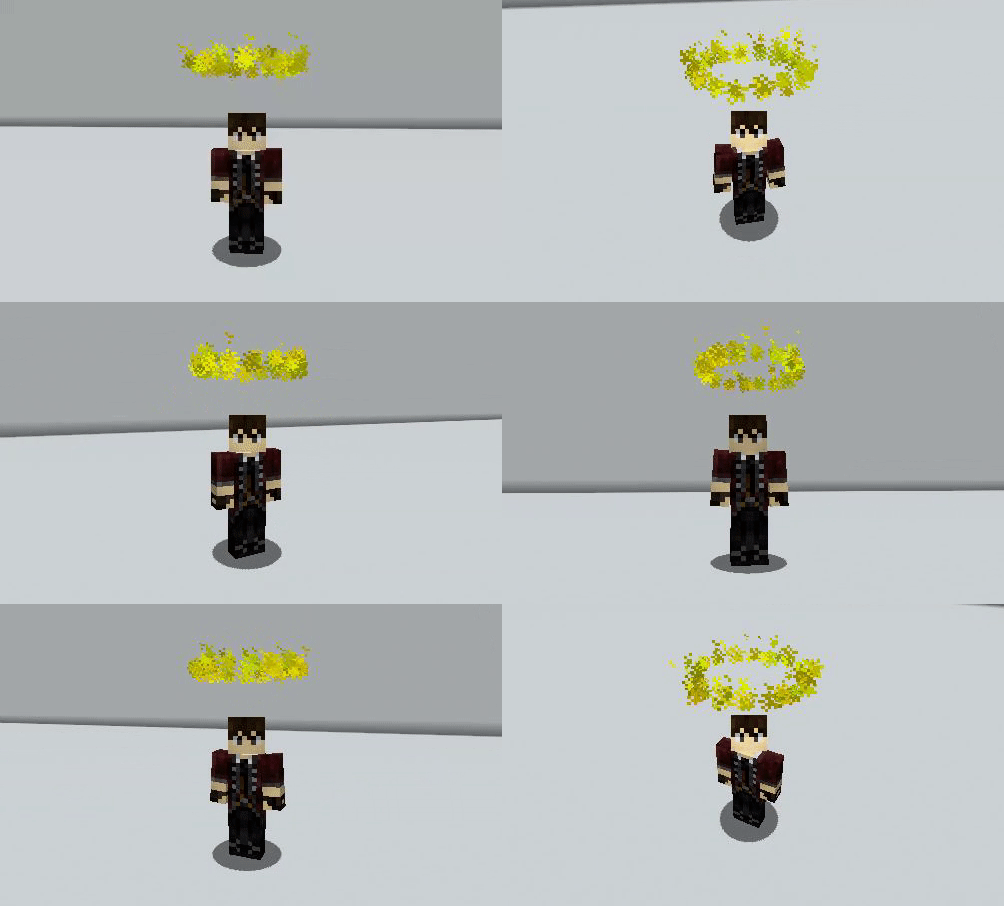
Halo
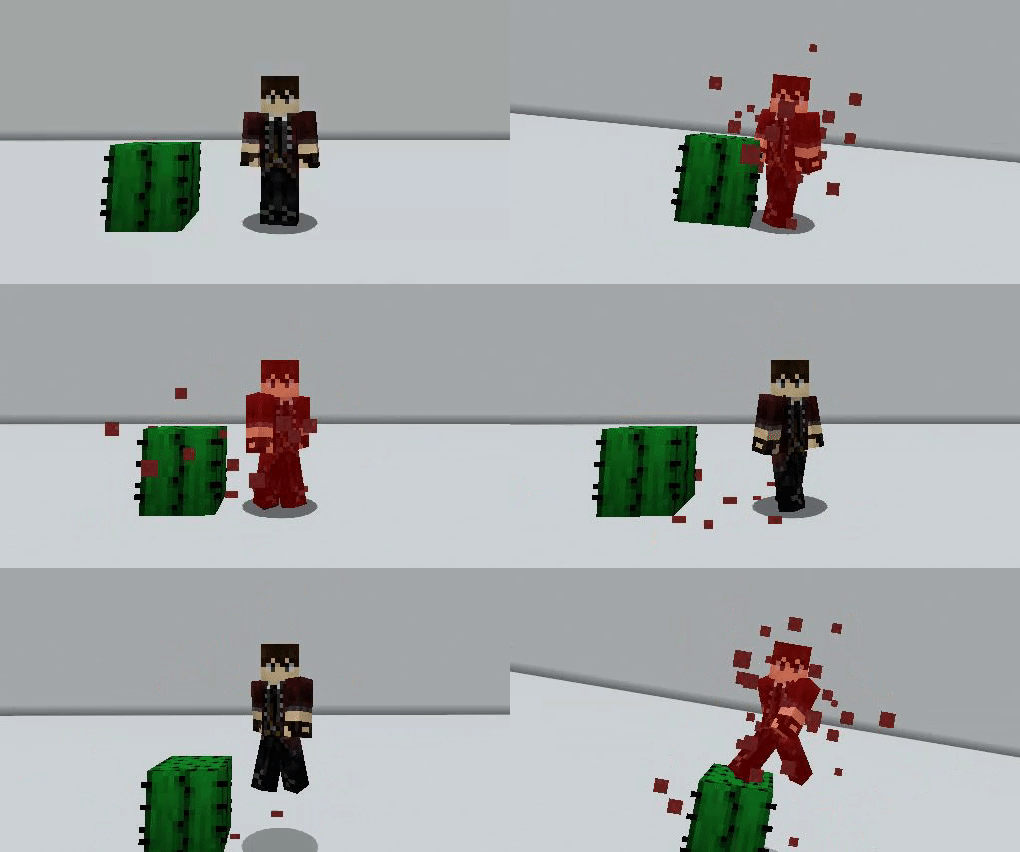
Hurt
Invocation
Move
Normal
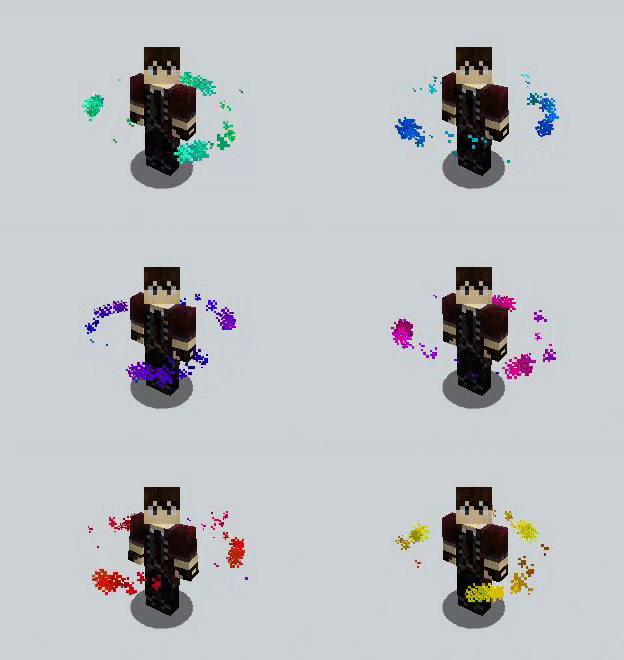
Orbit
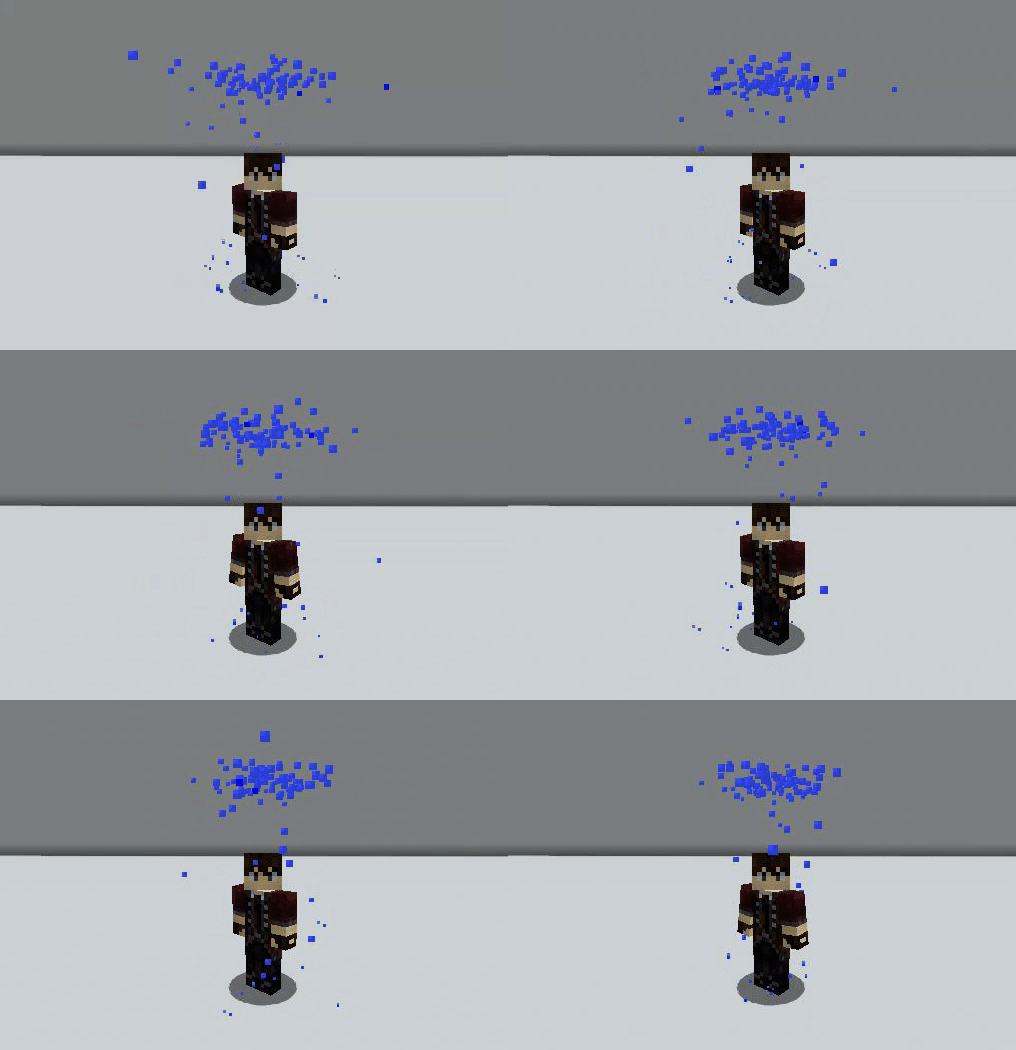
Overhead
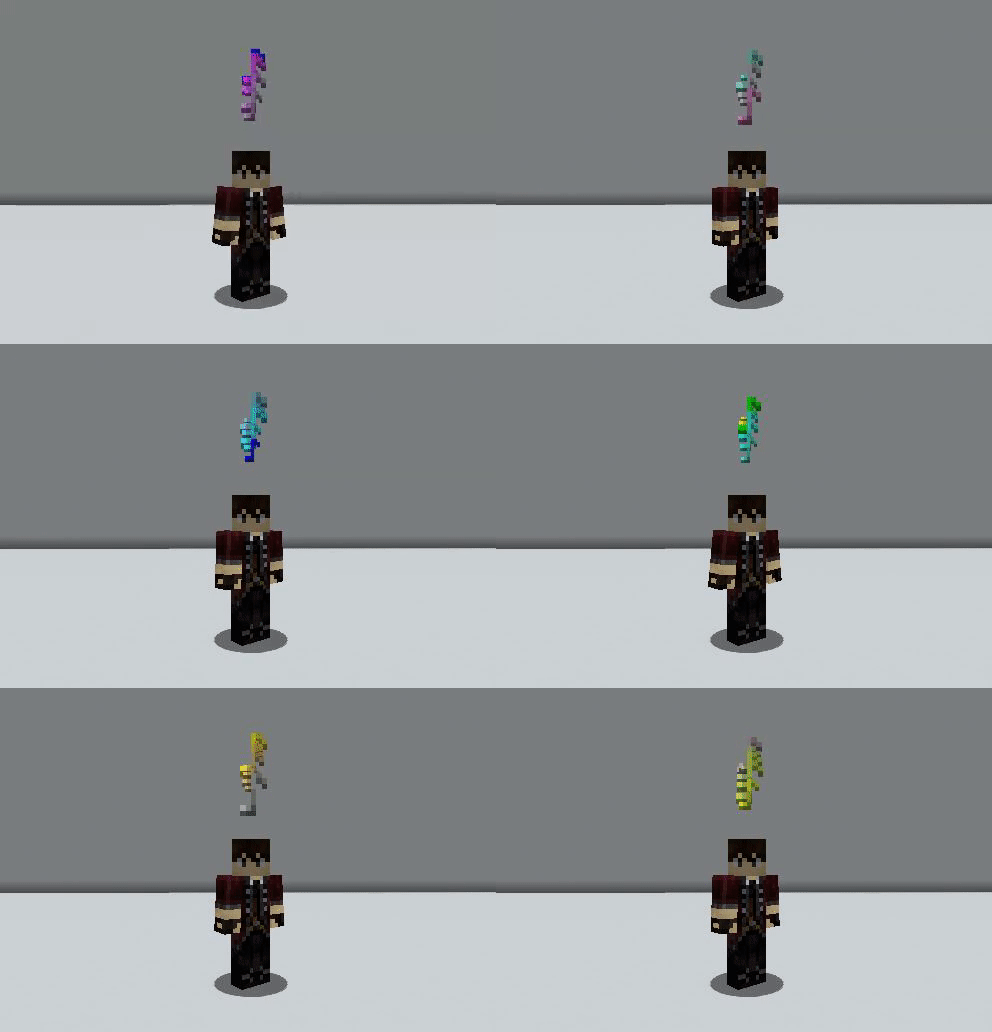
Point
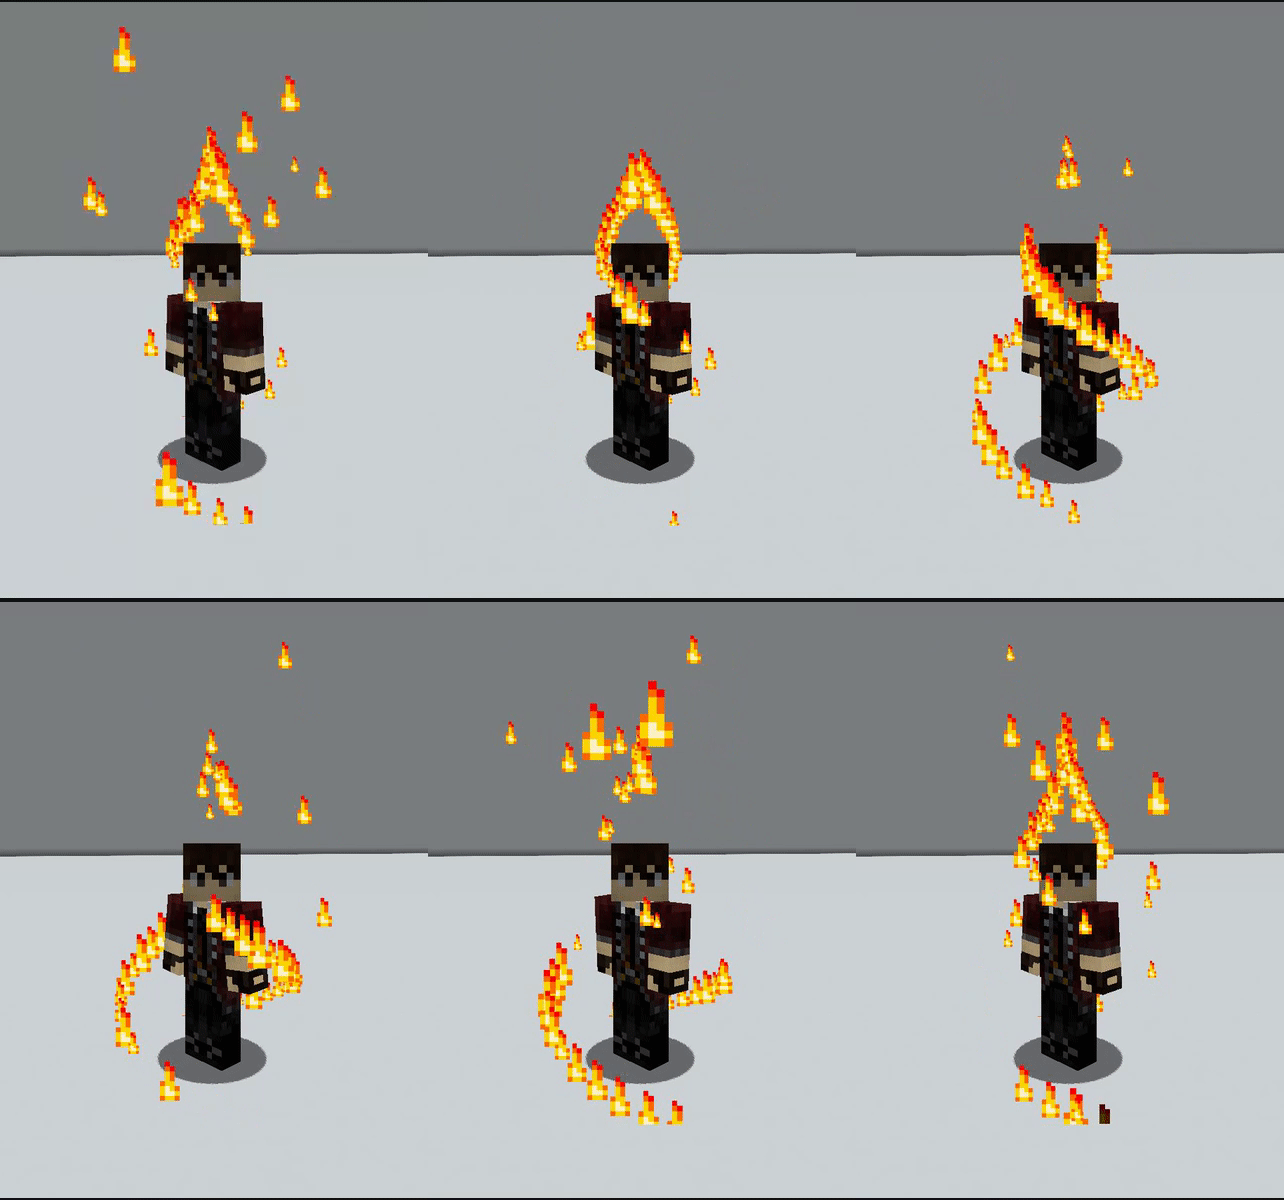
Popper
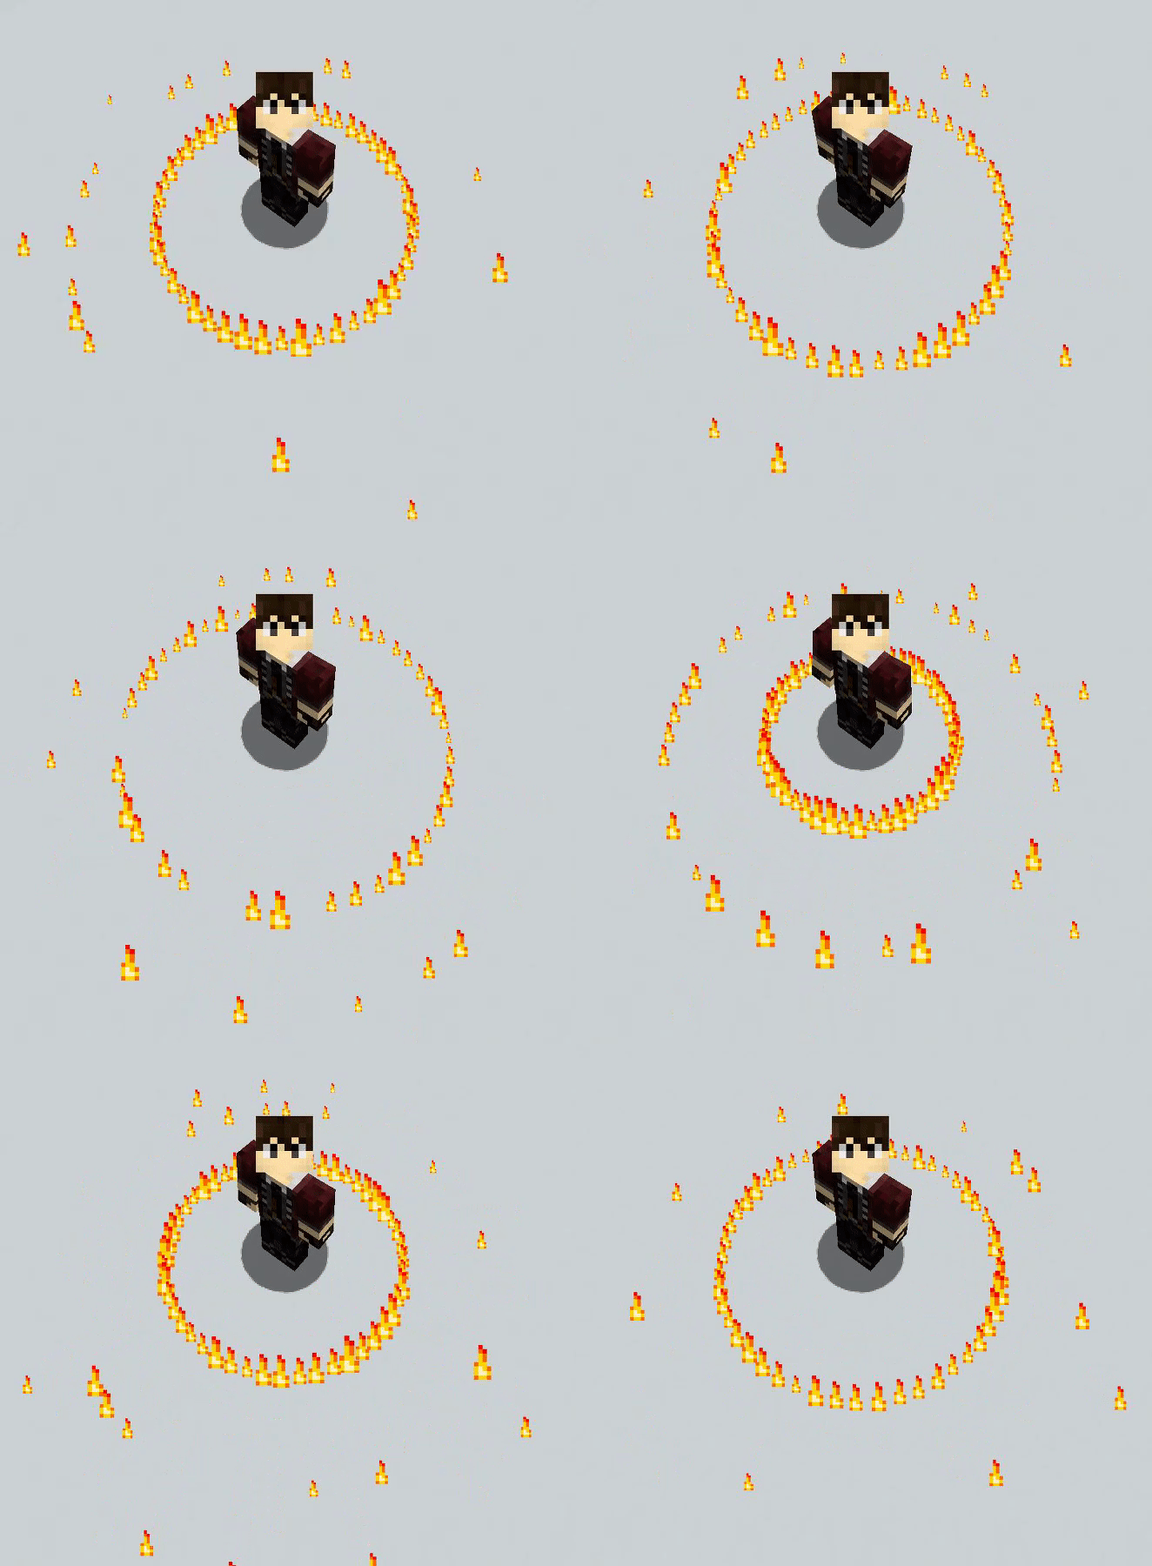
Pulse
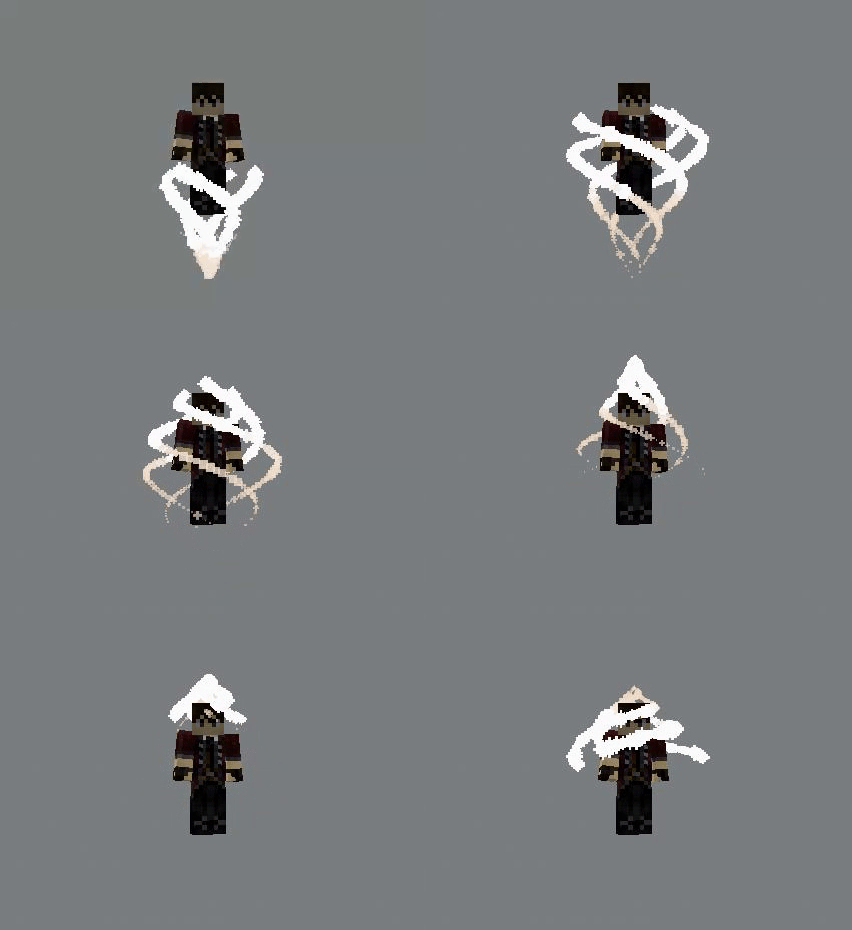
Quadhelix
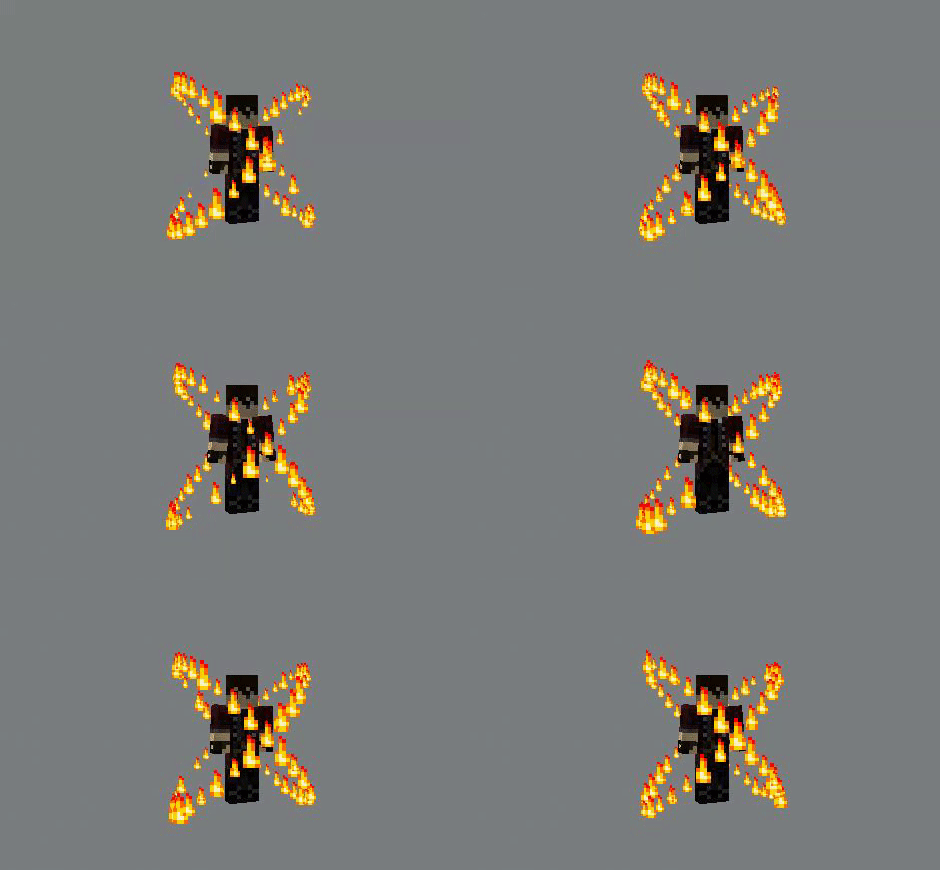
Rings
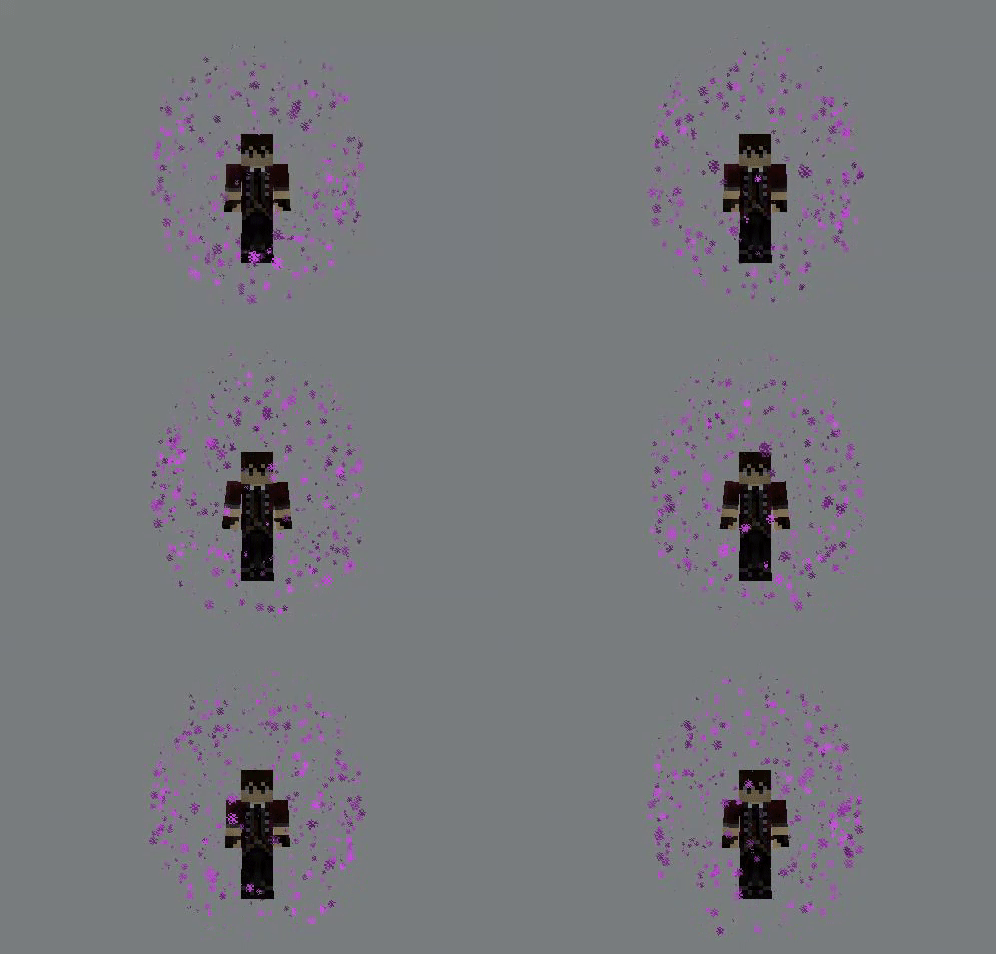
Sphere
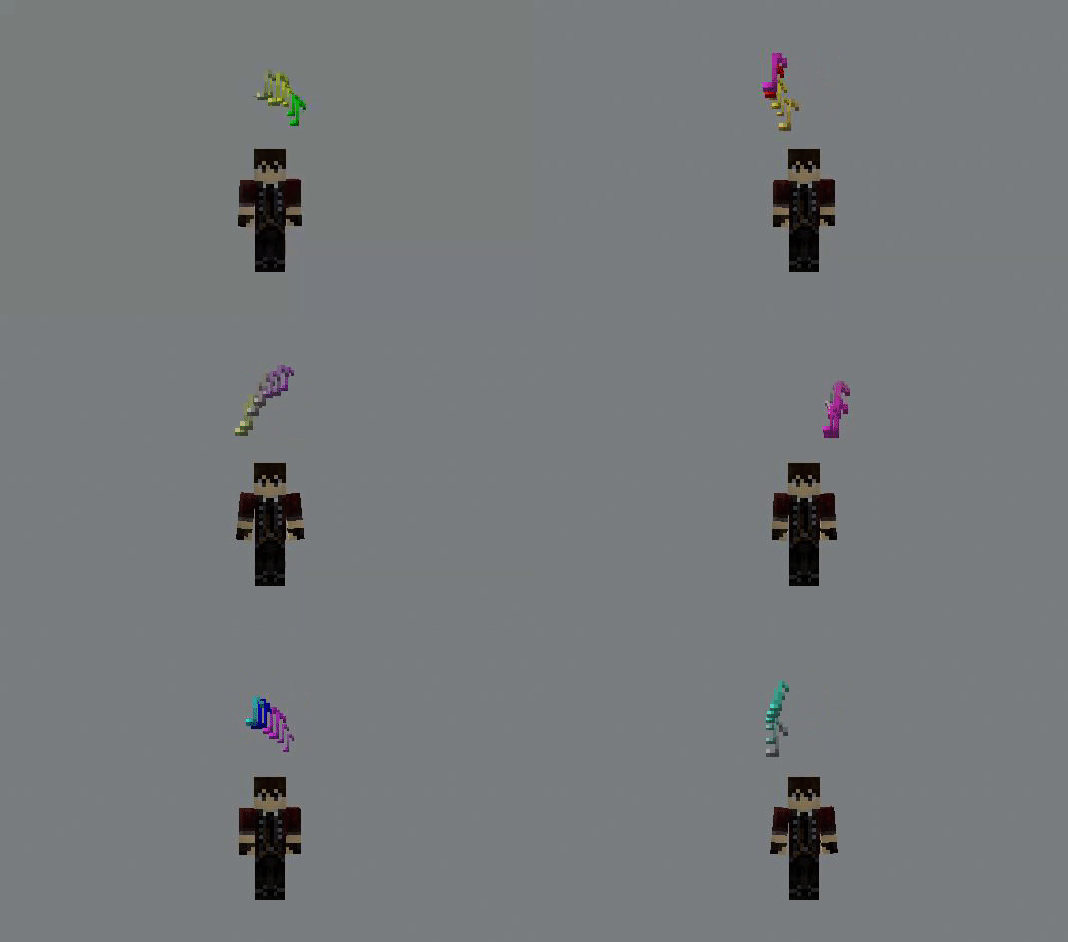
Spin
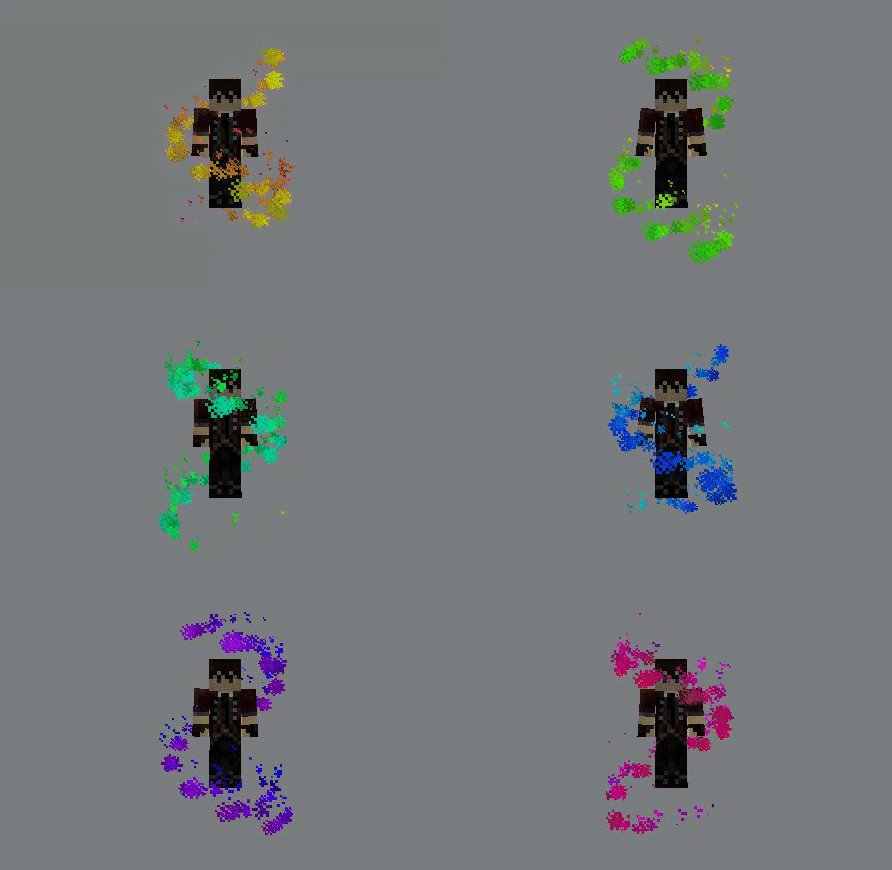
Spiral
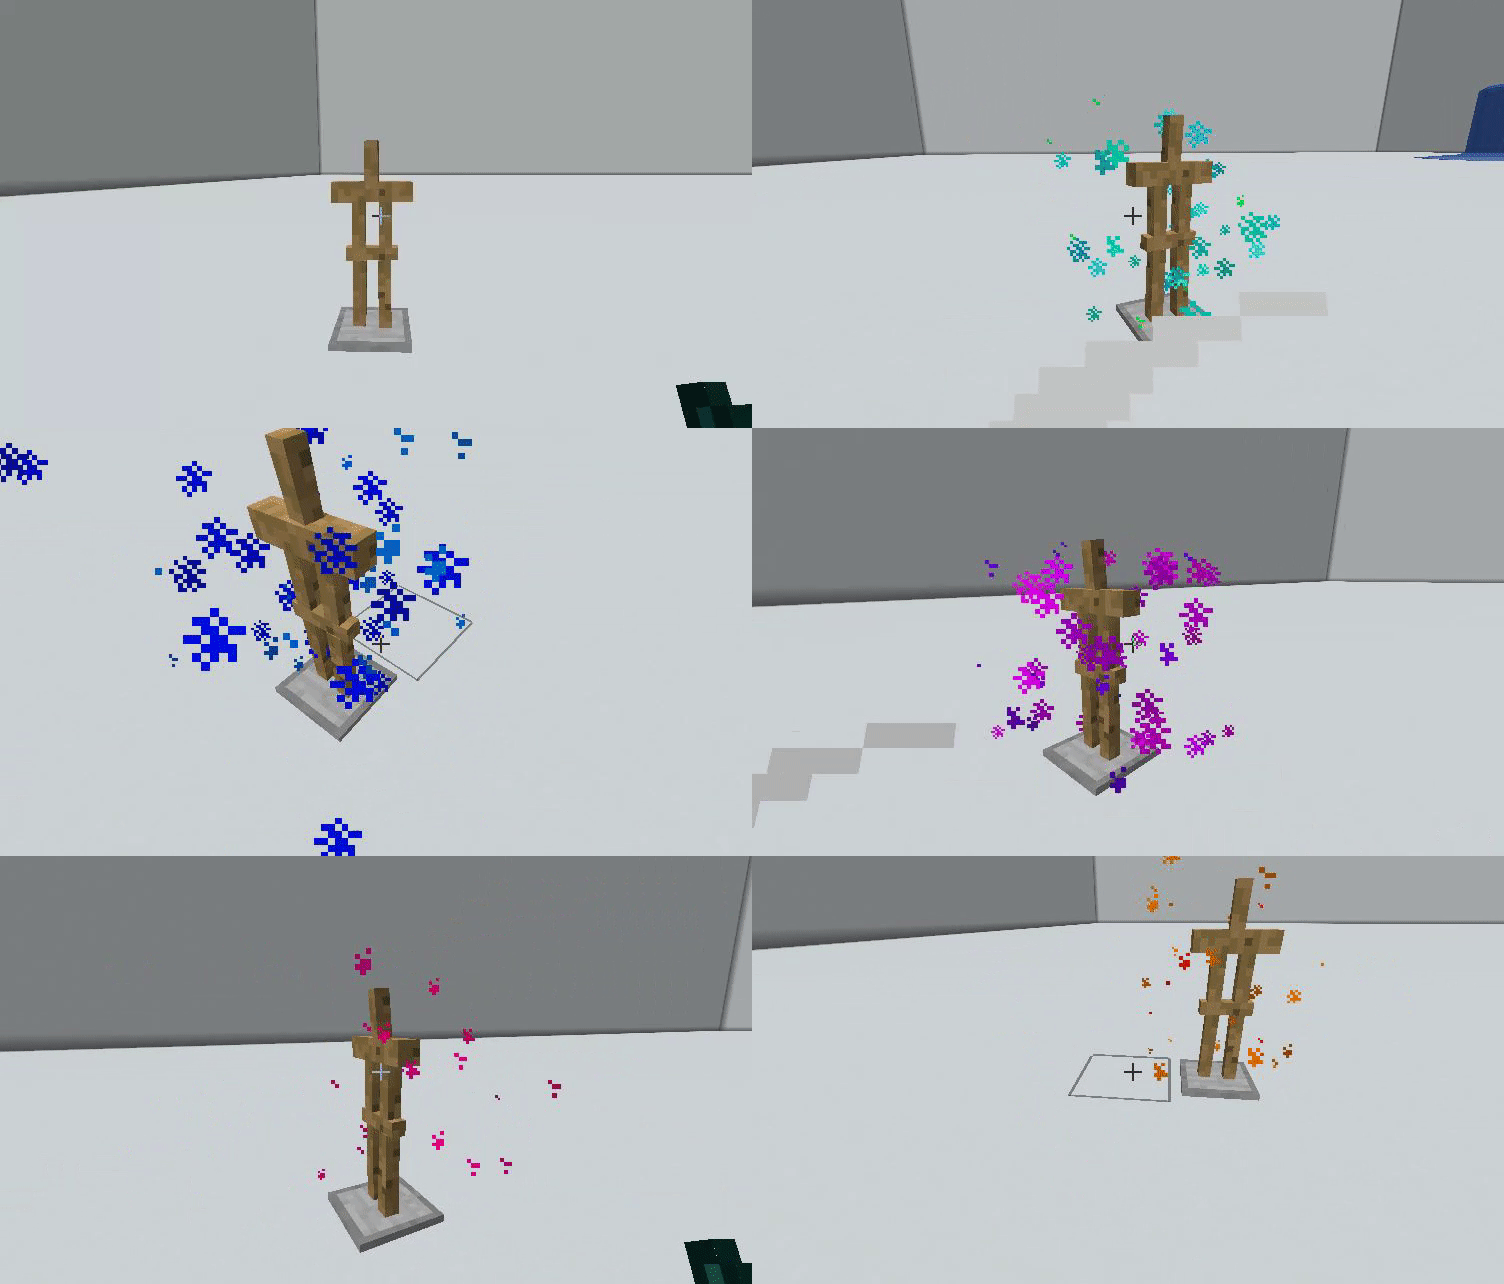
Swords
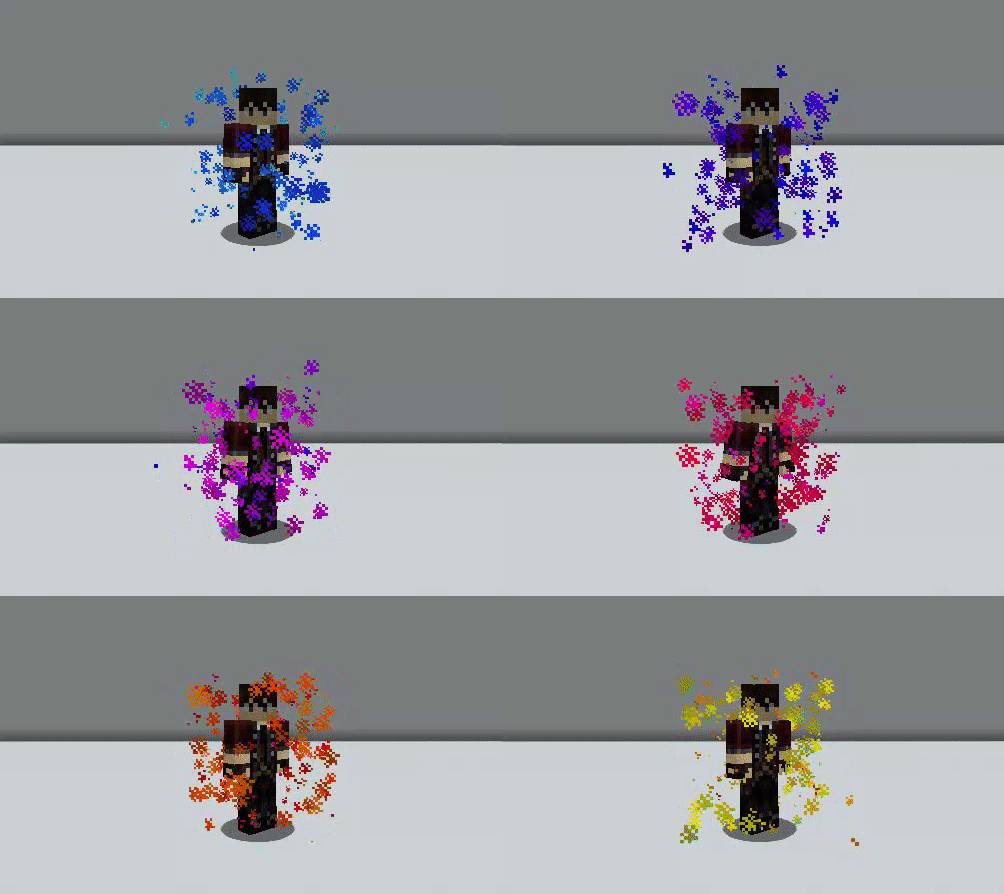
Thick
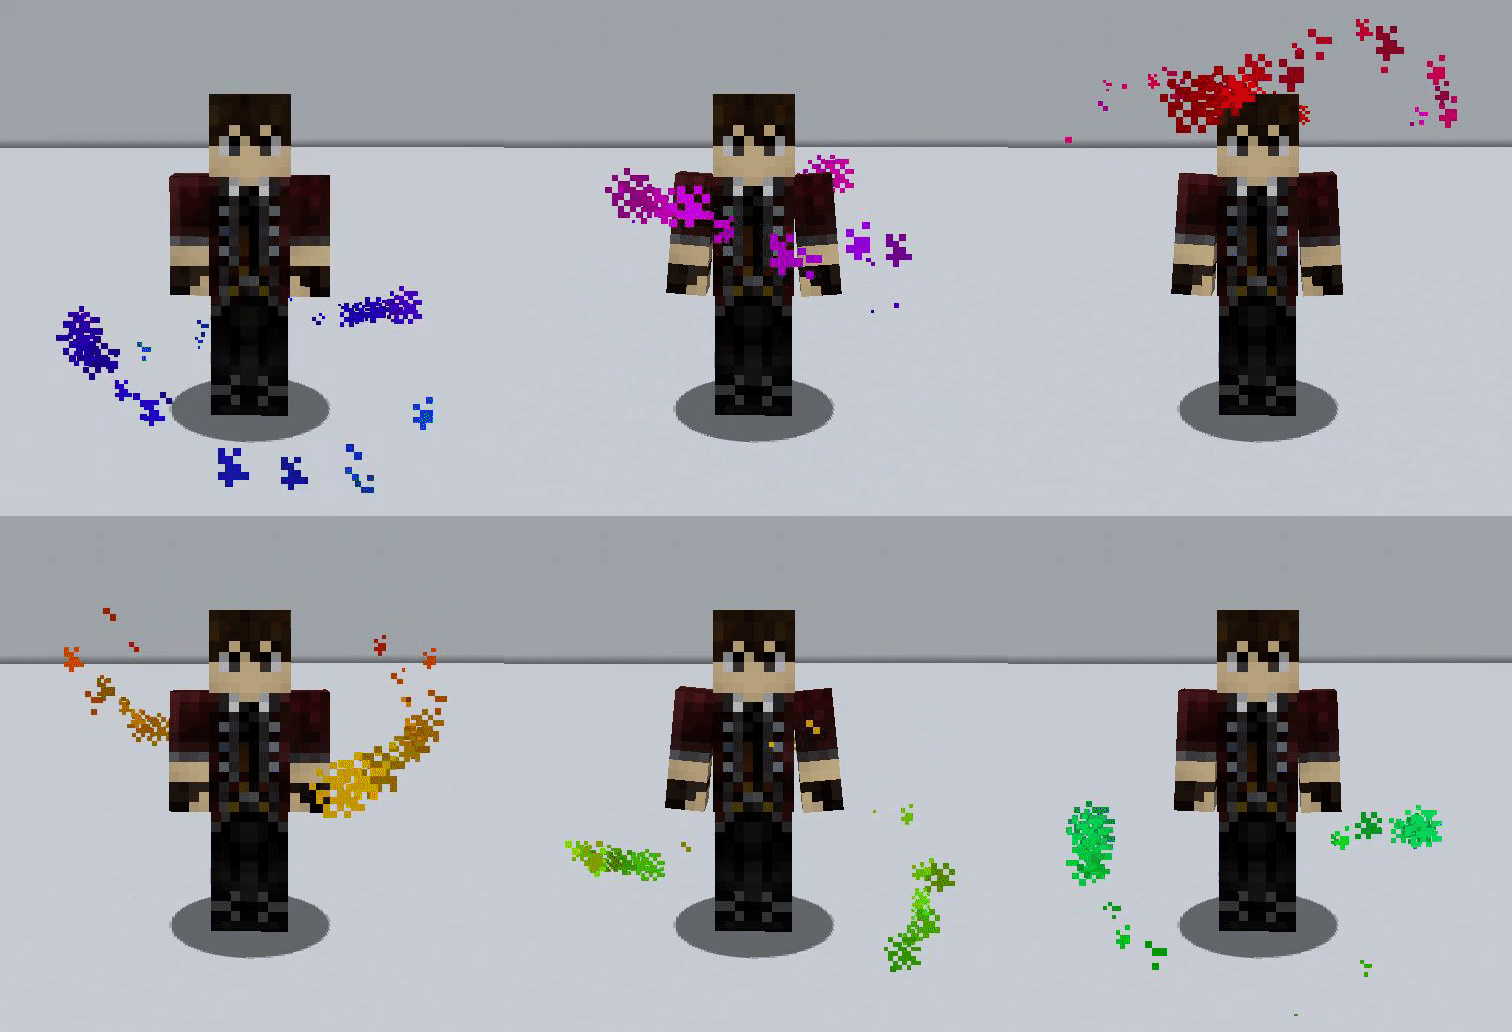
Twins
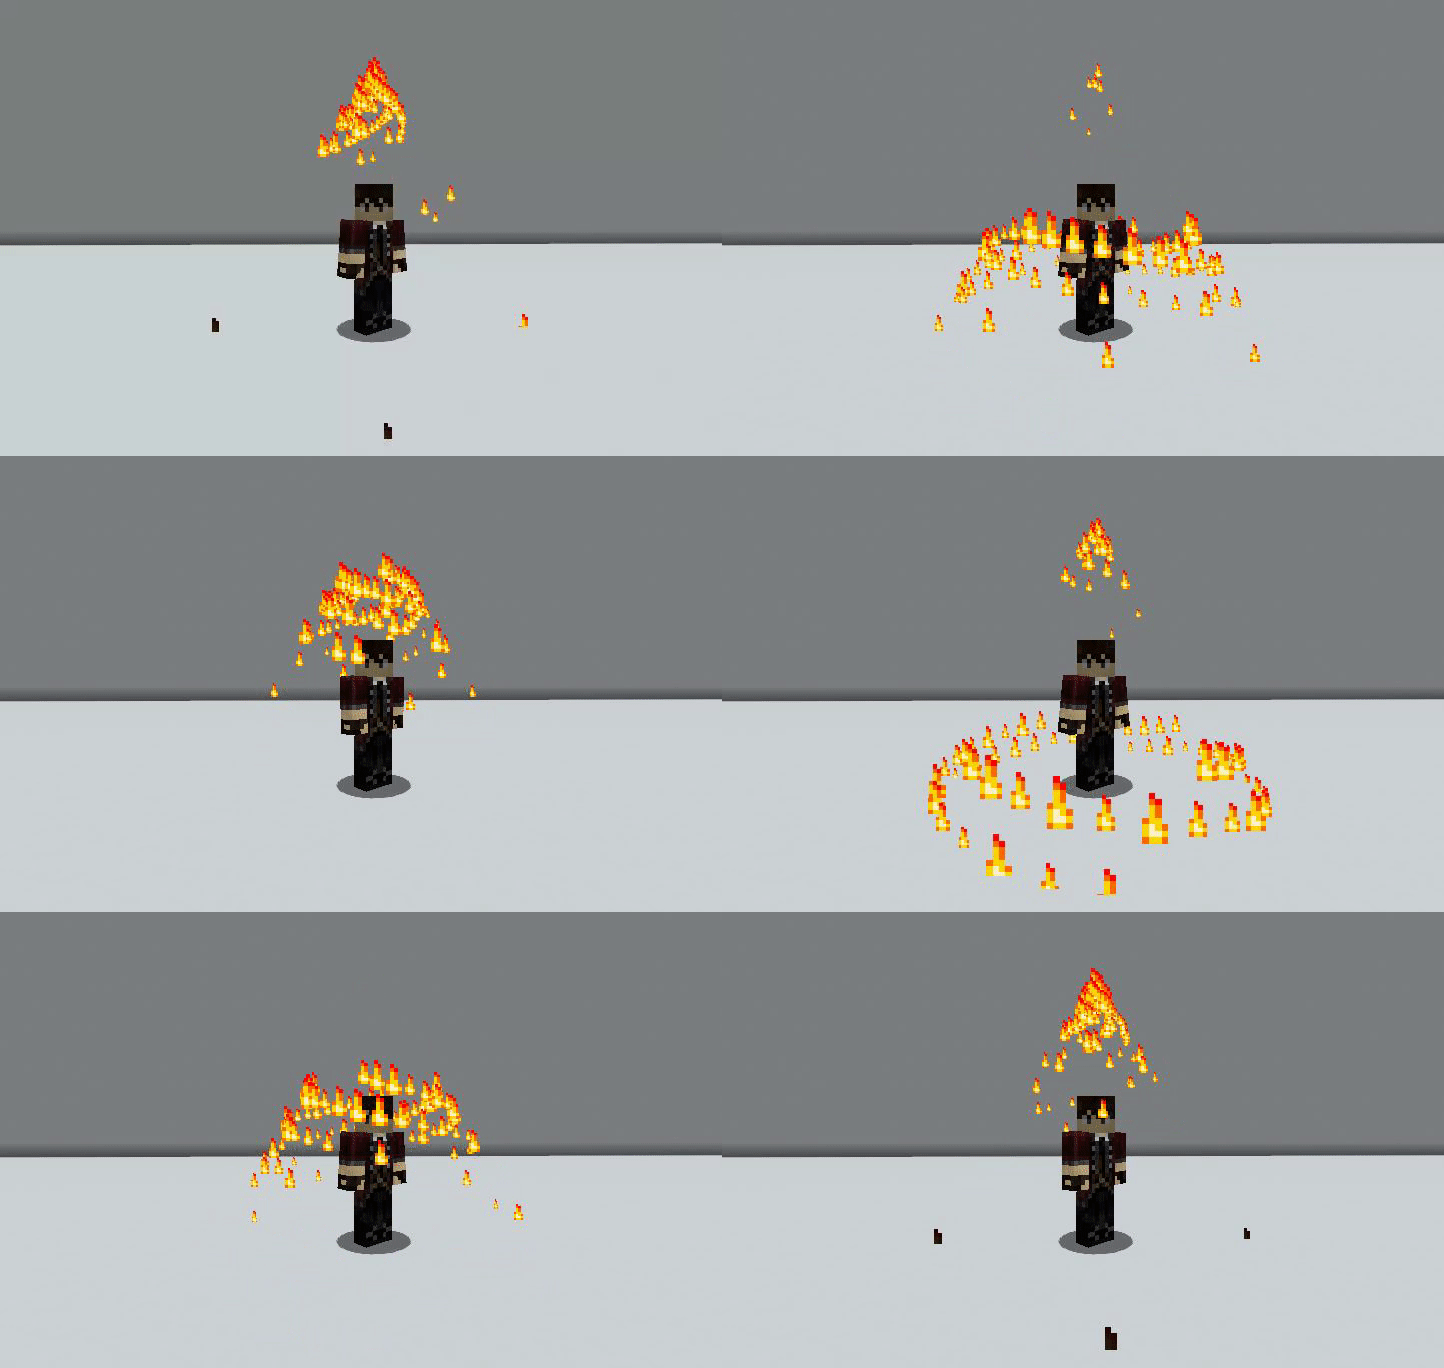
Vortex
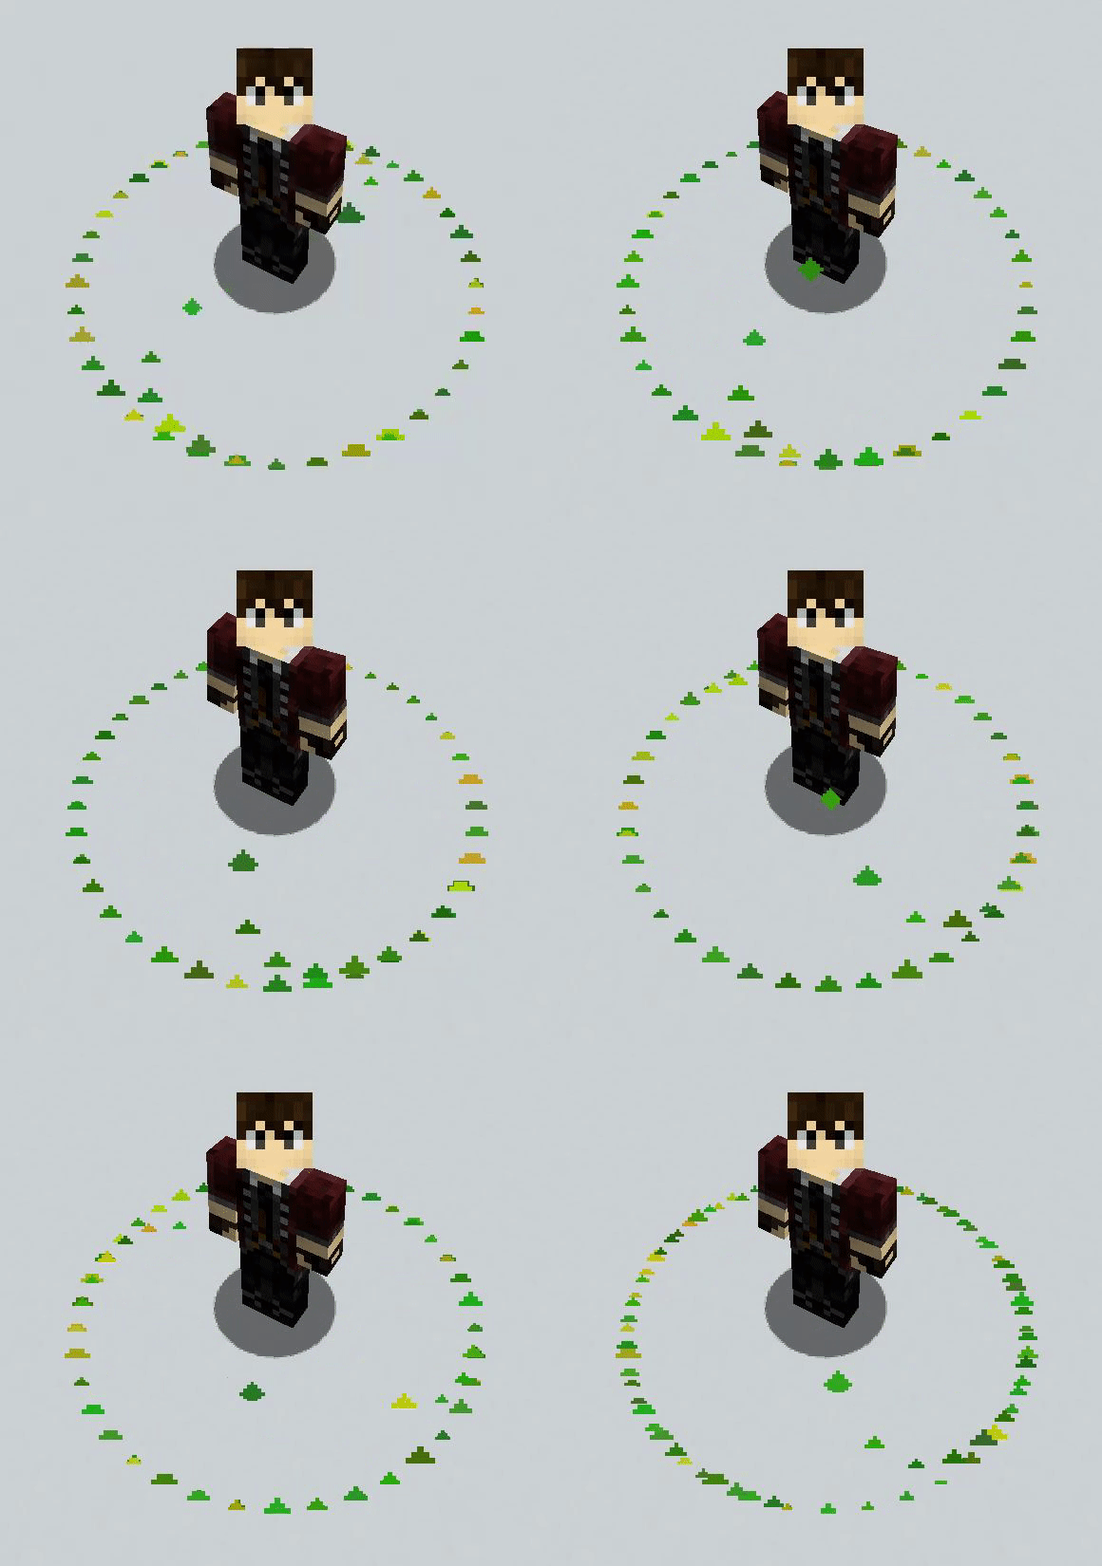
Whirl

Whirlwind
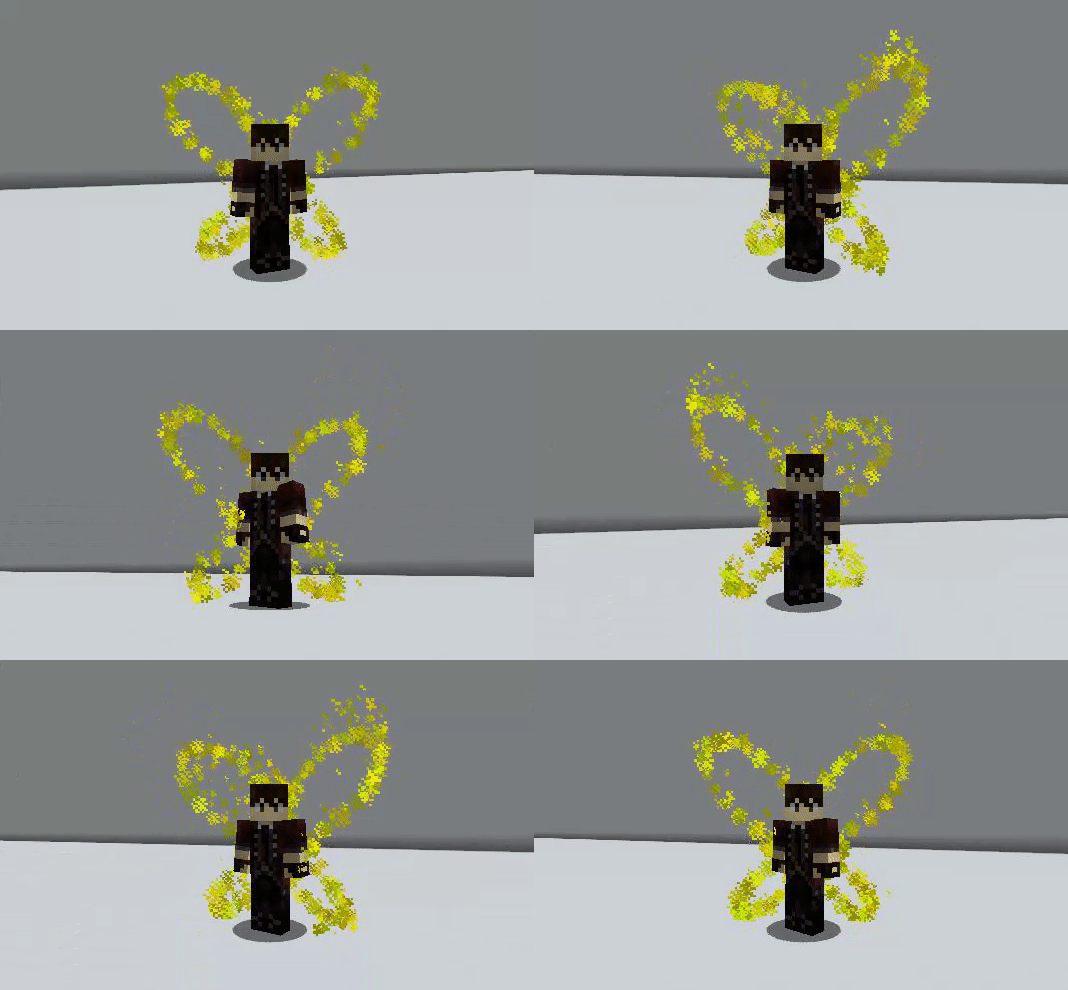
Wings
Data
Some particle effects have data that can be applied to change the color. You can see which effects use color data by doing
Example, using "dust" effect:
/pp data <effect>
/pp data dust
- RGB - enter the color by typing the value of red, green, and blue, in a range from 0-255 for each color. For example, 150 0 0 is red. 150 0 150 is purple.
- Hex Code - Consists of red, green, and blue values in a hexadecimal notation. The format is #xxxxxx. For example, #148F77 is a shade of cyan.
- Color Name - allows players to choose one of the 16 Minecraft colors. For colors with two words, such as light blue, type light_blue
- Random/Rainbow - Random will display a different colors each time, whereas Rainbow will rotate through each of the Minecraft colors in rainbow order.
Example using the effect "dust," style "celebration" and the color pink
RBG: /pp add dust celebration 253 128 174
Hex Code: /pp add dust celebration #FD80AE
Color Name: /pp add dust celebration pink
Using the GUI
Particles can be managed using commands, or by using the graphical user interface, or GUI. to access the GUI type /pp
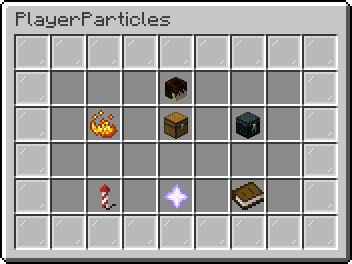
- Player Head - Displays information about your particles
- Blaze Powder - Manage your particles
- Chest - Manage your groups
- Enderchest - Load a preset group
- Firework - Edit primary effect
- Nether Star - Edit primary style
- Book - Edit primary data
Manage your particles (blaze powder)
In this section you are able to create, edit, and delete your particles. This page will display an enderpearl for each existing particle group you have (you will have none if this is your first time creating a particle group). Choose the book icon to create a new particle, or the barrier to clear all items and start over.
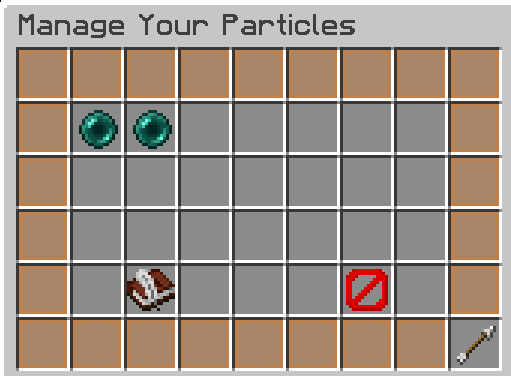
On this page, select a particle effect. You will only see effects that you have purchased from our store or any default options. Upon choosing an effect, you till automatically be moved to the next page.
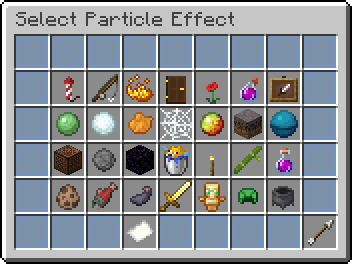
Particle styles are how your chosen effect is displayed. Examples for most options were near the beginning of this page. For most particles, this is the last thing to select. A few options will have a third page for choosing particle data. For us, the data is the color.
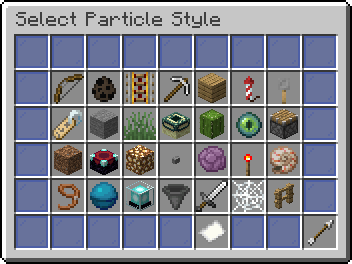
Here you can select the color for you chosen particle. For more information on particle data, scroll back up to the "Data" section.
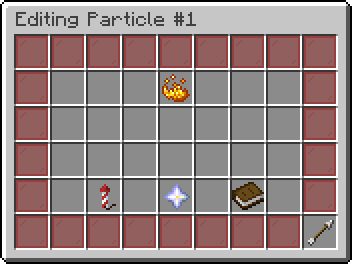
Your first particle will be "Particle #1. You can layer particles, and they will be numbered sequentially. To edit a particle, click the enderpearl. Hover over the pearls for a description of each particle. The editing page allows you to change the style, effect, or data.
Particle Groups
One you have created your particles, go back to the first page labeled "Player Particles" and click on the chest.
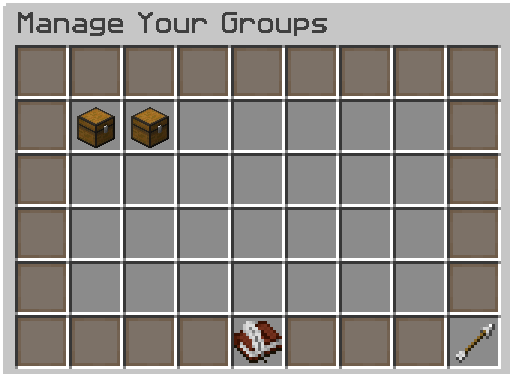
To save your current particles, click on the book and quill. You will be able to name your groups in the text box. Once saved, they will appear as a chest. In this image, two groups have been saved. Click a group to begin using those particles. This will allow you to switch back and forth between different particle group sets.
To create a new group, first, make sure your current set is saved to a named group. Next, go to the very first page that opens when you type /pp. This will display your current particles. To remove a particle, shift + click. (Don't worry! Your group will still be saved. This process creates a new group). At this, point, you can scroll back up to the Edit Particle section to continue.
Frequently Asked Questions
- How much are particles?
- Each particle costs 2.5 credits on the Autcraft store.
- How can I see each effect?
- Pictures of each particle effect will be added to the store in the near future. Stay tuned!
Player Shops
Player Shops
Description
Players on Autcraft can make shops to sell items at any price.
Shop Creation
To begin setting up a shop, place a container near the location of the shop. The container must be recently placed. If there is already a container, it must be broken and placed again. Containers include chests, shulkers, and barrels. For the remainder of this article, containers will be referred to as "chests."
While holding a stick, right click the desired chest. The stick will now be used for shop type and appearance selection.
Shift and right click the stick in the air (so no block is selected) to select shop appearance. Options are:
- Villager
- The most common shop on Autcraft. Players interact with a villager to purchase items.
- Wandering Trader
- Players interact with a wandering trader to purchase items.
- Sign
- Players interact with a sign to purchase items.
All shop appearance options function the same way. There is no benefit for having one over the other, other than for cosmetic reasons.
Next, right click the stick into the air without crouching (no shift). This will cycle through the shop types:
- Selling Shop
- Sells items to player for emeralds.
- Buying Shop
- Buys items from players for emeralds.
- Trading Shop
- Trades items with players. This is how players can sell items for diamonds or other currency.
- Book Shop
- Sells copies of player created books.
Now you will choose how you want the shop to look. Shift and then right click the stick into the air once more. The options are:
- Villager
- You can change the villagers job outfit and color.
- Wandering-Trader
- The trader only has the default appearance.
- Witch
- Only use in hard world. If you select a witch shop in peaceful, your shop will be automatically removed.
- Sign
- A simple sign with all the same options as a mob shop.
After selecting both the shop type and appearance, use the stick to click the location where the shop should be placed. All shop types can be placed on the ground. Signs shops may be used anywhere a sign can be placed.
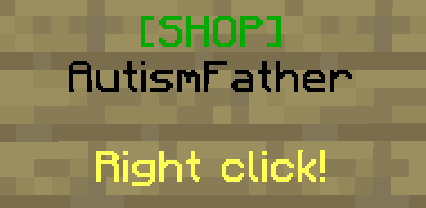
Shop Set Up
Place the items to be sold into the shop chest. For this example, there are End Crystals and Nether Stars:
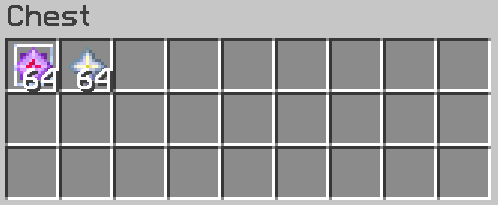
Shift right click the shopkeeper or sign to enter the Shopkeeper Editor:
- First row
- Items for sale.
- Second and third row
- Null symbols ∅
- Price selection (more information below).
- Null symbols ∅
- Fourth row
- Paper
- Hover over the paper to see the shop type and instructions for how to set the price.
- Book
- Displays the current page. Shops that sell many items may have multiple pages for price setting.
- Book (2)
- Click to move to the next page. A book will appear on the left side of the screen to go back a page.
- Paper
- Fifth row
- Name tag
- Set the name of the shop. Follow the directions on screen.
- Chest
- Opens the chest associated with the shopkeeper.
- Bell
- Toggles trade notifications. A text and sound alert will be sent to you in-game when items are purchased.
- (Villager shop appearance only)
- Egg
- Toggles the baby variant. This is a visual change only, and can still be traded with.
- Null symbol ∅
- Changes the villager profession. This changes the outfit displayed on the villager.
- Leather tunic
- Choose villager biome variant. This changes the colour and style of the outfit displayed on the villager.
- Cobblestone
- Changes the villager badge color. Options are cobblestone, iron, gold, emerald, and diamond.
- Egg
- (Sign shop appearance only)
- Sign
- Changes the wood variant of the sign.
- Ink sac
- Does nothing, though is meant to toggle the glowing text on the sign.
- Sign
- Bone
- Delete shop. This action is permanent. Choose Yes or No on the confirmation screen to continue.
- Name tag
Setting Prices
In a selling shop, all items are sold for emeralds. The top row of the editor displays the items for sale. The second row is for setting an emerald block price, and third row is for individual emeralds. The maximum number for both is 64. If the price totals 20 emeralds or less, the price will be set in emeralds only (no blocks). If the price totals more than 20 emeralds, the price will be set as as many emerald blocks as possible, and emeralds for the remainder. Left click the null symbol ∅ to increase the price by one emerald or block. Shift and left click to increase by 10. Right click and shift right click will lower the number. To stop selling the item, reduce the cost to zero and remove the item from the shop chest.
In this example, the End Crystals are set to 10 emeralds and the Nether Stars are set to 5 emeralds. This is how they are displayed to players using the shop to buy items:
Setting Up a Buying Shop
This shop works the same as a selling shop, however the shopkeeper will give emeralds (not blocks, so a maximum of 64 emeralds) to players in exchange for the desired items. Place one of each item to buy in the chest, as well as emeralds to give players in exchange.
Left click the red null symbol ∅ to set the number of emeralds players will be given in exchange for the desired item. In this example, shoppers will give an End Crystal in exchange for 64 emeralds. The shop screen displays like this:
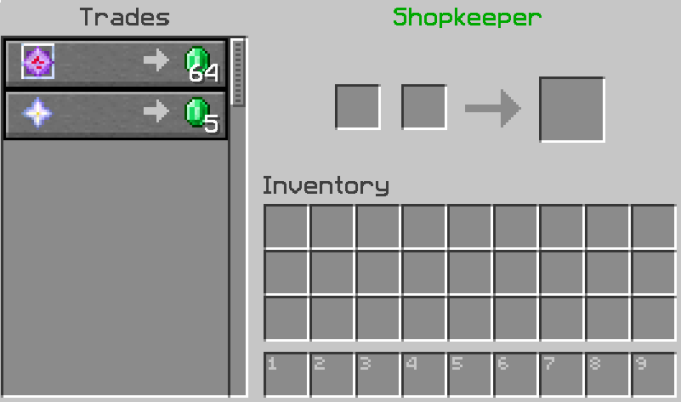
Setting Up a Trading Shop
This shop allows players to sell or buy things for more emeralds than the selling or buying shops allow, or for a currency other than emeralds. For example, a common currency on Autcraft is diamonds. Place one of the item to be sold in either the top row of the shopkeeper or in the chest, and the item(s) to be traded (such as diamonds) in the 2nd and 3rd rows of the shopkeeper. In this example, End Crystals will be sold for Nether Stars. Left or right click to set the quantity for each.
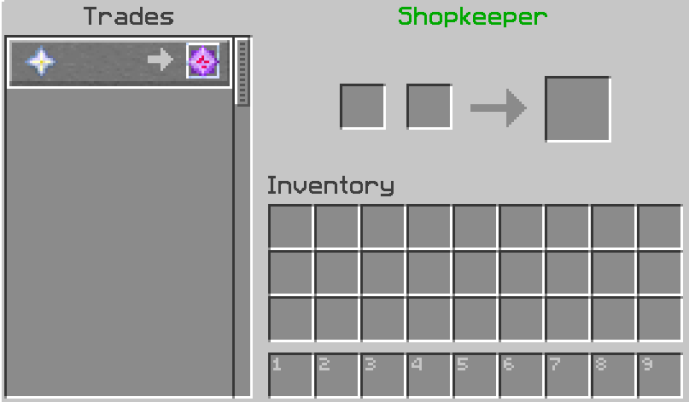
Setting Up a Book Shop
Place the signed book (or books) into the chest along with blank book and quills.
In the Shopkeeper Editor, the books will appear in the top row. Use the second and third rows to set the price with emeralds or emerald blocks. This process works identical to a trading shop.
When books are purchased, the blank book and quill will turn into a copy of the selected book.
Rainbow Beacon
Description
Beacons can be used for more than their special effects. They are also excellent sources of light and can be used to display colors and patterns. If you are not familiar with activating beacons, first visit our page on Beacons.
How to Change Colors
The color of a beacon beam can be changed by placing either block or pane of glass above it. Shift + left click to place the block.
Multiple colors of glass can be placed in different orders in order to change the colors and create a gradient effect.
Glass can even be used to create images in the sky, such as this display in the Village of Boos.
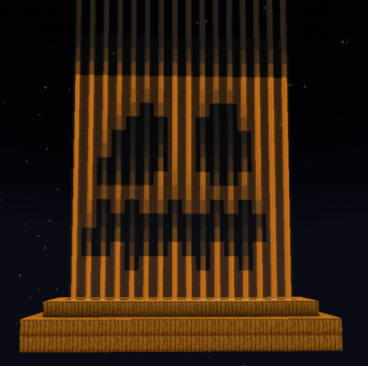
What will you create with your beacons?
Sign Codes
Sign Codes
Description
Special codes can be used to change the appearance of signs
About Signs
Signs can be crafted using any wood type. Six matching planks and one stick will craft 3 signs. Each sign can display four lines of text. Each line has a width limit, however due to varying character length, there is no set number of characters that can be used on each line. For example, "O" is wider than "I."
Sign Uses
Signs can be used in many ways. They can label the contents of containers, display ownership of items or builds, or be used with the /lockette command.
Changing Sign Appearance
Players can easily change the color of sign text by tapping the sign while holding dye. Another way to change appearance is by using special codes. There are a variety of codes that can be added to signs to change their appearance. These codes affect the color and formatting of the text. The color code must come before the format code.
Color Codes
- &0 - Black
- &1 - Dark Blue
- &2 - Dark Green
- &3 - Dark Aqua
- &4 - Dark Red
- &5 - Dark Purple
- &6 - Gold
- &7 - Gray
- &8 - Dark Gray
- &9 - Blue
- &a - Green
- &b - Aqua
- &c - Red
- &d - Light Purple
- &e - Yellow
- &f - White
Format Codes
- &l Bold
- &m Strike
- &n Underline
- &o Italic
- &r Reset (removes formatting)
How to Use Sign Codes
As a reminder, color codes must come before format codes. There does not need to be a space between the code and the text. Here are some examples:
Hello!
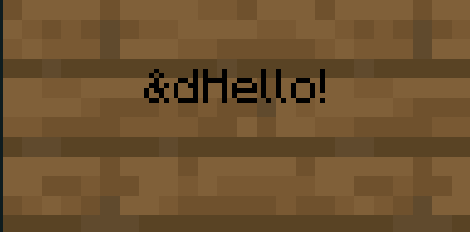
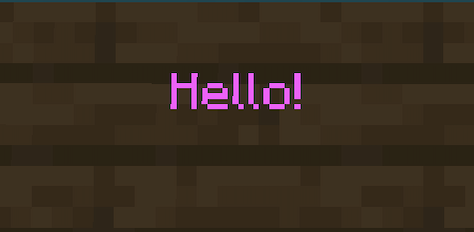
You can use a different color for each line of text!
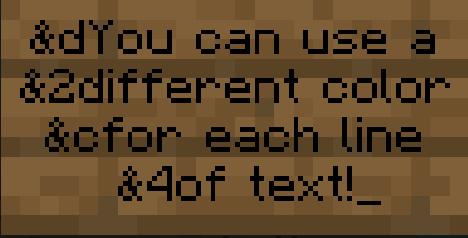
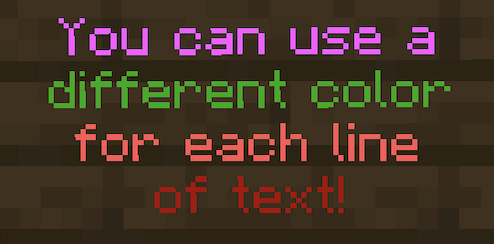
Or each letter!
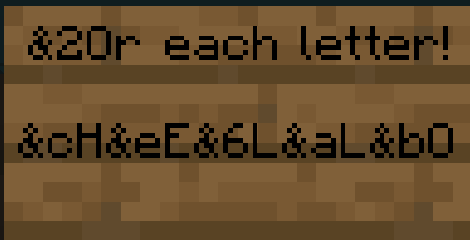
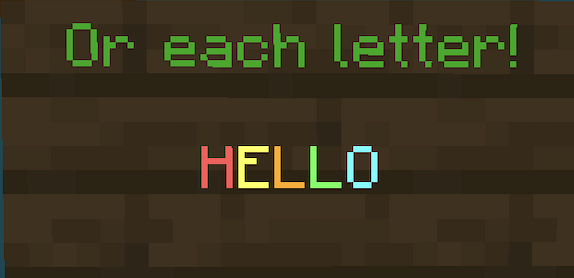
We can make words BOLD or italic
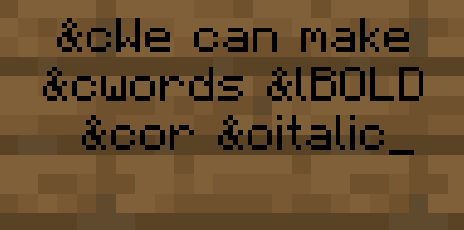
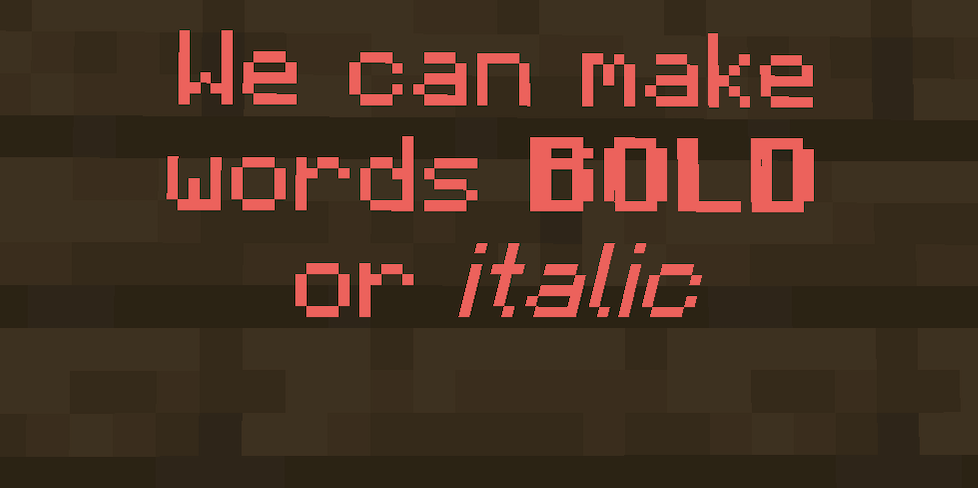
We can also change the glow color
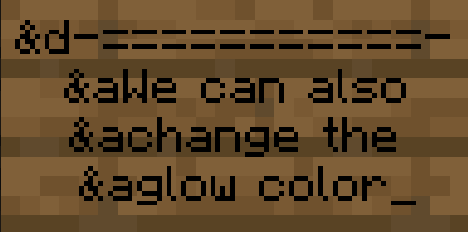
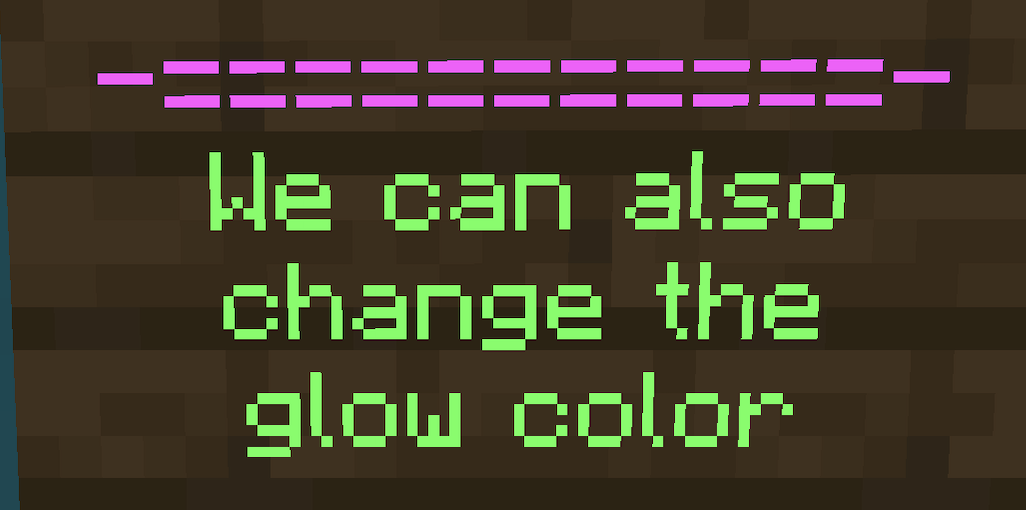
Tap the sign with glow ink. A white glowing outline will appear.
Then tap the sign with dye. The color formatting will remain, but the glowing outline will now appear in the selected color.
Smithing Templates and Armor Trims
Description
Smithing templates are an exciting new feature in 1.20 that allow players to customize their armor with designs and colors. These templates are also required for upgrading diamond armor to netherite. Read on to learn more.
Smithing Templates
A basic smithing template is required in order to upgrade diamond armor to netherite, or to add armor trim designs to existing armor. Each design is created from a specific smithing template. There are 17 smithing templates, 16 with designs, and they can be found in various areas around Minecraft. The locations of each template are listed below with the images of the designs.
Making Copies
With Smithing Templates being somewhat difficult to locate, be sure to take advantage of the copying feature. Templates can be copied by placing the original template, 7 diamonds, and a specific block onto the crafting table. The resulting items will be the original template plus a new copy. The specific block needed depends on the template you are trying to copy. In the examples below, Rib requires a block of netherrack, while Tide requires prismarine.
Available Templates
To see these designs in person, visit the Armor Trim Room at /spawn, which is near /warp jobs.
Upgrade
- Used to upgrade armor from diamond to netherite
- Found in Bastion Remnants in The Nether
- Requires netherrack to copy
Sentry
- Found in Pillager Outposts
- Requires cobblestone to copy
Spire
- Found in End Cities
- Requires purpur block to copy
Tide
- Found in Elder Guardian drop in Ocean Monuments
- Requires prismarine to copy
Wayfinder
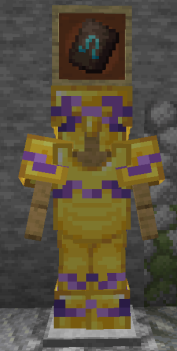
- Found in Trail Runs, in suspicious gravel
- Requires terracotta to copy
Wild
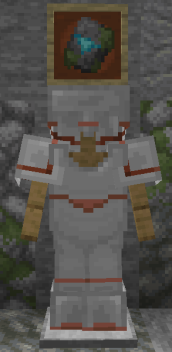
- Found in Jungle Temples
- Requires mossy cobblestone to copy
Coast
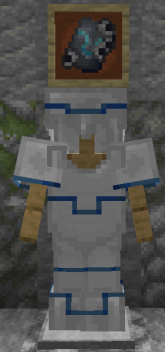
- Found in Shipwrecks
- Requires cobblestone
Eye
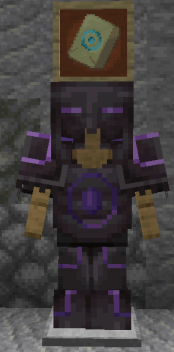
- Found in Strongholds
- Requires end stone to copy
Raiser
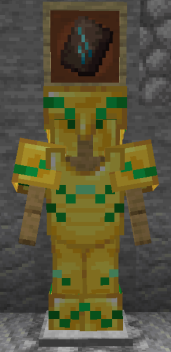
- Found in Trail Ruins, in suspicious gravel
- Requires terracotta to copy
Ward
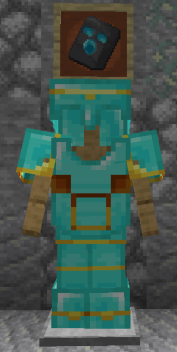
- Found in Ancient Cities
- Requires cobbled deepslate to copy
Shaper
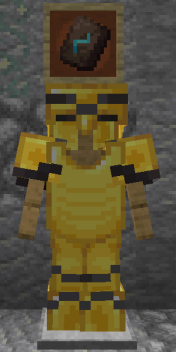
- Found in Trail Ruins, in suspicious gravel
- Requires terracotta to copy
Rib
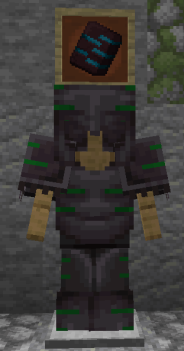
- Found in Nether Fortress
- Requires netherrack to copy
Dune
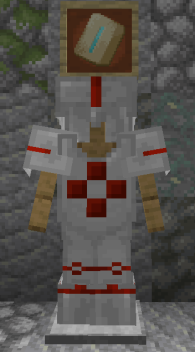
- Found in Desert Temple
- Requires sandstone to copy
Snout
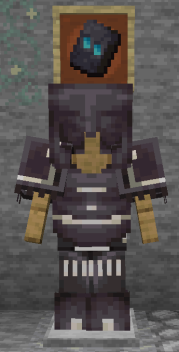
- Found in Bastion Remnant
- Requires blackstone to copy
Host
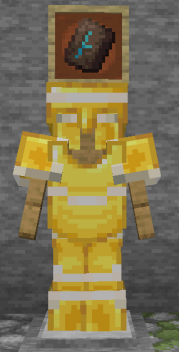
- Found in Trail Ruins, in suspicious gravel
- Requires terracotta to copy
Vex
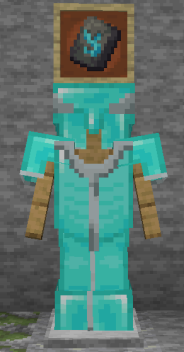
- Found in Woodland Mansion
- Requires cobblestone to copy
Silence
- Found in Ancient Cities
- Requires cobbled deepslate to copy
Trail Ruins
Description
Trail ruins are a new structure added in 1.20. These are part of the new archaeology gameplay, and require careful excavation to uncover the buried structure as well as retrieve the hidden treasures within.
About Trail Ruins
The above image shows a fully excavated trail ruin. They are randomly generated and each one will be different in size and shape, however they all share similar characteristics. They appear to be an ancient terracotta village, sometimes including the paths taken between buildings, as well as workbenches that past villagers may have used.
Locating a Trail Ruin
Ruins can be found in taiga, snowy taiga, old growth taiga, old growth birch forest, and jungle biomes. They are quite difficult to locate, with only the very top peaking through the surface of the biome, as seen below:
That single red terracotta block was the only visible sign of this trail ruin, which was found in a jungle biome. Carefully breaking the blocks around it will begin to reveal the full structure.
Excavating the Ruin
While mining out the ruin, keep a close watch for suspicious gravel. Use your brush to carefully sweep the gravel away and find the ancient artifacts inside. In this particular ruin, we found these items:
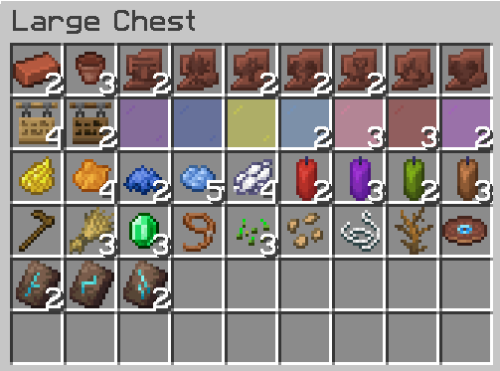
This is just an example of the types of items that can be found, as each ruin is randomly generated. Many workbenches can also be found in this ruins. This particular site contained a furnace, blast furnace, smithing table, and crafting table. Other ruins have held looms, grindstones, and cartography tables. You never know what you're going to find!
AutCon
Description
Autcon is an annual event based loosely around the famous MineCon. As children with Autism often struggle with social settings, Autcraft allows them to generate friendships, bonds and be social without being in person. Autcon helps them one step further by having them meet ''in person'', whilst being entertained by games and activities, and work on those in-person social skills.
Autcon Brisbane 2015
In 2015 the first Autcon was held in Brisbane, Australia. However small it was, Autcon was a success. Games were played, new friendships forged, barbecue lunch was provided and the members each left with a 'goodie' bag full of things to take home.
AutconUK 2016
In August 2016, Autcon was held in two locations, firstly in Liverpool, England, and was the first UK based Autcon. This was organized by SparkleTwinnie & TheHemikoWay, with help from TheDonster & DaisyBoo.
Autcon Sydney 2016
Autcon's second 2016 location was in Sydney, Australia and was hosted in the September. LadyCath hosted and organized this event.
AutconUS 2017
In 2017, Autcon was held in three locations, two of which were in the United States. Washington, D.C. and Atlanta, Georgia hosted these events.
AutconUK 2017
Also held in Liverpool AutconUK was organised by SparkleTwinnie and the AutconUK team, the event was held in the Harrington Center, Formby on Saturday 12th August.
AutconUK 2018
Held in Liverpool for a second time, AutconUK was organised by SparkleTwinnie and the AutconUK team, also the first Autcon with special guests AutismFather & WizardKeen! the event was held in the Harrington Center, Formby on Saturday 1st September.
AutconUK 2019
Held in Liverpool for the final time, AutconUK was organised by SparkleTwinnie and the AutconUK team. AutismFather couldn't make it to this one so he video called instead.
Autcon 2020
Autcon was not possible to arrange because of the pandemic and following lockdowns.
Instead, it was arranged online on Autcraft. Over 100 players visited, and AutismFather livestreamed the whole event. The staff built a specific arena with lots of booths with minigames and contests.
Autcon 2021
This event was also held online due to the pandemic, with brand new arena built for the occasion.
Autcon 2022
The 2022 event was again held online. The staff created builds around the theme Big Gaming. Mazes, games, and elytra jumps were created within larger-than-life versions of Minecraft mobs and blocks.
Autcon 2023
With the great success of the 2022 area, it was decided that we would continue to build upon the existing area to add more mazes and games. Special treasure hunts were held throughout the day.
Autcon 2024
Autcon was hosted online once again for 2024, with new builds built in the area showcasing the latest mobs and features from Minecraft 1.21. Games and small events were hosted all day throughout the two days that Autcon ran for. The /tr Plugin was unveiled and used for the first time during the Autcon weekend and during that time, two treasure hunts ran to showcase the new plugin in action!
Autcon 2025
Coming August 2025!
Autism Awareness Day
Autism Awareness Day
Description
After starting Autcraft, it became painfully obvious that the bullying problem facing all people, but especially Minecraft players that have autism, was far more severe than anyone ever realized. It is estimated that in the first two years of the server being around, [[AutismFather|AutismFather]] (The owner of Autcraft) was speaking to an average of 2 [[Players|players]] per week that were feeling so depressed that they had considered suicide and that was primarily due to bullying. It was this overwhelming build up of emotions that prompted the writing of the Plea to the Minecraft Community.
2014
The first annual Plea to the Minecraft Community came prior to April 2nd where it was requested that all players within the Minecraft community stand up to bullying. Many players responded positively.
Some players created videos, they can be seen below:
- IMPORTANT! Autism Awareness Day, April 2nd
- Autism Awareness/Bullying
- World Autism Awareness Day (April 2nd)
- Minecraft Bullies
- TDOR Vlog || Take a stand against bullying
- Timeshot SMP Ep. 11 || Bullying
- BULLYING | Minecraft Hunger Games - Game 140
- Minecraft Survival Games- Bullying- Game 9
- Autism Awareness (My Message to the World: Part 2)
2015
The second annual Plea to the Minecraft Community consisted of a live stream in which several famous YouTuber Minecraft players not only hosted and participated in the stream, they also visitors!
Videos of the live stream (not playable in all countries) can be seen below:
2016
Videos of the live stream (might not be playable in all countries) can be seen below:
2017
Videos of the live stream (might not be playable in all countries) can be seen below:
2018 World Record Attempt
Videos of the live stream will be put up soon:
Birthdays
Description
Birthdays are a common celebration on Autcraft! Read on to learn how they are recognized.
Player Birthdays
Players can enter their birthdays using the /birthday command. If your birthday was for example, August 5th, you would type /birthday 05 08. Upcoming birthdays for the week are added to the Birthday Board at Birthday Island, and will be announced at POTW.
Autcraft's Birthday
On June 23, Autcraft grows one year older! Currently, the server is 12 years old. Each year there are special decorations at spawn and epic wither fights to be had.
- 1st Birthday
- For the 1st Birthday, Autcraft Had 2 Dragon fights and decorations around the spawn.
- First Video
- Second Video
- 2nd Birthday
- The second birthday had parties and fun around as people fought the dragon in 3 fights, the first fight can be viewed here.
- The second video was a live stream.
- The third video is available here.
- A second live stream and 4th video can be viewed here.
- 3rd Birthday
- In the First Ragecraft 3 fight, Mobs from the popular map AutismFather played through were brought over to Autcraft In an Epic battle held on June 23rd, 2016.
- 4th Birthday
- The 4th Birthday Marked the end of the Ragecraft 3 Mob Invasions with fireworks to end off the day.
- 5th Birthday
- Everyone got an Autismfather Head (this is before Baby Admins were added to wither fights) and small wither fights through the day)
- 6th Birthday
- For the 6th Birthday, there was an admin-hosted dragon fight and fireworks at spawn, as well as small regular wither fights through the day. During the livestream, a giant "Take Back Our Identity" sign was added to Spawn 4.
- 7th Birthday
- Autcraft Celebrated with minigames at spawn, increased shiny rates, and wither fights! One huge change in 2020's birthday parties was the introduction of the Cursed Admins.
- 8th Birthday
- Yungtak and Xilefan came to visit and The Darkness was unveiled for the first time.
- 9th Birthday
- This year's visitor was GeminiTay! As always, players got a special commemorative head for the anniversary.
- 10th Birthday
- Coming soon!
- 11th Birthday
- Coming soon!
- 12th Birthday
- Coming soon!
The Darkness
Description
The Darkness is an amazing custom mob battle created by AutismFather that can only be found on Autcraft. There have been three versions, with the most current being The Darkness 3.0.
What is The Darkness
The Darkness is an automated Wither fight centered around a Minecraft fox and over 300 command blocks. The fox randomly runs around the arena while the command blocks set off a chain of events such as spawning custom mobs and mob bosses around itself, making spooky sounds, changing the arena walls, floor and roof, creating particles and potion effects on the players, and more. When all of the bosses are defeated, The Darkness (the fox) collapses until it returns again.
Custom Mobs
The Darkness features several custom mobs that were created by AutismFather
- Skeleton King
- Skeleton body wearing chain mail armor with a creeper head
- Rides on top of a mob tower featuring a ravager, panda, polar Bear, and sheep
- Holds a bow and Disc 11
- No head drop, but does drop Disc 11
- Zombie King
- Zombie body with Zombie King head
- Rides a very fast and erratic zombie horse
- Drops head that gives Resistance 4
- Nether King
- Piglin Brute body wearing Nether King head
- Rides a Ravager
- Drops head that gives Fire Resistance
- Dragon Slayer
- Wither skeleton body wearing Dragon Slayer head
- Rides a phantom
- Drops head that gives Night Vision
- Panda King
- Husk body wearing diamond leggings
- Rides a Panda
- May drop husk head, but no boosts
- Pumpkin King
- Husk body wearing Pumpkin King head
- Rides a black horse
- Drops head that gives Health 10
- Ocean Prince
- Drowned body wearing Ocean Prince head
- Rides an elder guardian
- Drops head that gives Under Water Breathing
- Witch Queen
- Witch body wearing Witch Queen head (not visible)
- Rides a spider on an invisible bat
- Drops head that gives Weakness 3
- Dragon King
- Wither skeleton body wearing enderdragon head
- Get too close and be hit by the sword and wither effects (within 10 blocks)
- Get too far and dragon's breath will rain upon you. (10-20 blocks)
- Drops an elytra and dragon head.
- Super Warden
- Warden with super strength and health
- Leaves a trail of sculk everywhere it walks
- Summons Warden's Emissaries if not defeated in time
- Drops a sculk catalyst
- Spider King
- Wither Skeleton wearing netherite armor and Spider King Head
- Rides a cave spider and holds a bow
- Spawns randomly placed cobwebs within a 7 block radius
- Single cobwebs spawn when a player is hit by an arrow
- Cursed Admins
- Cursed AutismFather
- Diamond sword
- Holds a diamond
- Angry villager particles
- Creates lightning all around him
- Cursed ZEDDY1977
- Diamond sword
- Holds a block of exposed copper
- Dust particles
- Summons phantoms
- Cursed Crankles_
- Diamond sword
- Holds a mini dripleaf
- Spore blossom particles
- Summons glowing endermites with rain particles
- Cursed Solphire
- Enchanted bow
- Holds blaze powder
- White ash, bubble pop, and crimson spore particles
- Gives jump boost to nearby players
- Cursed FunMummy
- Enchanted axe
- Holds suspicious sand
- Spawns baby sniffers with cherry blossom particles
- Gives Slowness VIII to nearby players
- Cursed AutismFather
Balloons
After all bosses have been defeated, "balloons" are unleashed throughout the Wither Arena. The floating balloons consist of jeb_panda and jeb_sheep stacks on invisible bats, glow squids on invisible bats, parrots, cats, and both regular and screaming goats. This bright and colorful display symbolizes the defeat of The Darkness, and provides a great way for players to collect mob heads.
The Darkness 3.0
Our newest version of The Darkness has been completely reimagined, using the same familiar bosses (plus two new additions), placed into an ever-evolving world of changing floors, structures, and effects. This completely automated fight is also randomized, meaning no one, not even the admins, will know which boss is coming next, and the structures are in different locations each time. Every fight is a completely unique experience! Keeping in mind that the order is different every time, here is what you can expect during each boss segment:
- The Darkness 3.0
- A snow fox, that wanders around the arena, spawning mobs wherever it is located at the time. Follow the fox to find the action!
- Floor changes to deepslate bricks
- Wither
- The arena goes dark
- The wither boss falls from the sky as a baby wither, which grows in size over time. When it reaches full size, the attach begins.
- Spider bees fly around as the wither grows
- Skeleton King
- The floor changes to bone block
- Fossil structures are randomly generated around the arena
- Strays riding polar bears and horse traps fill the area
- Panda King
- Floor changes to grass. A pillager outpost appears.
- Pillagers riding flying pandas attack from the sky.
- Panda stacks wander the area
- Ocean Prince
- The floor changes to water. Ocean ruins fill the arena.
- Drowneds on riding dolphins and baby drowneds attack with tridents
- Axolotls scatter about
- Dragon Slayer
- Sand floor, with a large desert temple
- Giant, invisible phantoms descend from above
- Baby husks with rabbits on their heads chase players around the arena
- Desert Raiders, adult husks wearing cactus heads, ride in on camels
- Zombie King
- The floor changes to podzol with oak trees
- Undead knights, zombies on fire with cakes on their heads, attack players
- Nether King
- Netherack floor, with crimson and warped biomes
- A nether fortress appears, with an active blaze spawner
- Zippy zoglins scatter about the arena.
- Piglins riding striders go on the attack.
- Pumpkin King
- Blackstone floor
- Giants wearing netherite armor go on the attack
- A giant Pumpkin King head appears in the center of the arena
- Dark Skeletons, skeletons wearing tinted glass heads, go on the attack
- Baby zombies wearing pumpkin heads and black leather armor chase players
- Witch Queen
- The floor changes to mud, with mangrove trees and a witch hut
- Witches riding flying squids fill the arena
- Evokers riding all colors of sheep send fangs and vexes all around
- Super Warden
- Floor changes to deepslate brick. The arena goes fully dark
- A light emerges under the warden, which follows it throughout the room
- As the warden chases players through the arena, it leaves a trail of sculk
- Take too long to defeat the warden, and the warden's emissaries will appear!
- Dragon King
- Endstone floor, with forests of chorus fruit
- Phantoms fill the area
- A gigantic dragon head appears near the arena entrance
- Cursed Admins
- The floor has returned to sea lanterns
- The cursed admins appear simultaneously and begin spawning their minions
- Defeat their armor and celebrate victory with balloons!
The Darkness 2.0
- The hosting Admin broadcasts a message across the screen to alert players to the upcoming fight.
- "The Darkness / Autcrafters: Grab your gear"
- When all players have arrived at the Wither World, The Darkness, represented by a fox, is spawned
- "The Darkness is here"
- "No Flying / Elytra is fine / fly is not"
- "Surround Sound / Headphones recommended"
- Arena floor changes to Blackstone
- Ash particles fill the arena
- “Something is coming”
- Blindness affects all players as cave spiders spawn all around
- Arena floor changes to netherrack
- "Darkness has summoned a wither"
- A tiny wither appears, and grows larger until full size, when it begins to attack
- Wither skeletons on chickens
- Wither skeletons with and without armor
- Floor changes to bone block
- "The Skeleton King Approaches"
- Skeleton king
- Horse traps, split into skeleton horses with skeleton riders holding bows, wearing enchanted iron helmets
- Skeleton Spider jockeys, wearing diamond helmets
- Arena floor changes to rooted dirt
- "Time for something new"
- Zombie pixel art
- Giants with ghast heads
- Netherrite giants, with a chance of dropping netherrite armor
- "The Zombie King"
- Zombie Horses
- baby zombie cave spider jockeys
- Arena floor changes to podzol
- Witch laughs
- "The Witch Queen! / Dark Magic Approaches"
- Witches riding glow squids on invisible bats
- The Witch Queen
- Arena floor changes to Nether bricks
- Lava columns
- Nether king
- Piglin Brutes riding ravagers
- Magma cubes
- Piglin Brutes riding Striders
- Arena floor changes to Soul sand
- Dragon slayer
- Invisible phantoms with spectral arrow effect
- "The Warden’s Emissaries are Here"
- “Did that sound like a panda?”
- Panda King
- Skeletons riding pandas
- Pillagers with crossbows riding jeb_pandas on invisible bats
- Arena changes to blackstone
- Pumpkin king
- Zombie horses
- Baby babies with tridents
- Baby zombies with pumpkin heads
- Slime with silverfish and endermite stacks
- Arena floor changes to water
- Ocean prince
- Baby drowned with tridents
- Arena changes to sea lanterns
- Levitation, wavy screen, and scary sounds
- Cursed admins
- Baby Admins
- “You did it. You pushed back against the darkness and drove it out! Your light shines bright and can never be defeated.”
- Fireworks
- Balloons
The Darkness (original version)
The first Darkness fights were shorter and had fewer bosses, however many of the original bosses and mobs carried over into the newest version. The original order of events was:
- Wither particle face
- Wither
- Wither skeletons
- Skeleton King
- Spider jockeys
- Skeleton horses
- Panda King
- Panda stacks
- Pillager pandas
- Drowned riding dolphins
- Nether King
- Piglins riding striders
- Zippy zoglins
- Dragon slayer
- Magma cubes
- Wither skeleton knights
- Levitation/nausea/scary sounds
- Cursed admins
- Clone brutes
- Balloons
Visitors
Description
Autcraft has hosted several visitors to the server, Minecraft players that have a substantial following on YouTube and considered celebrities within the community.
Visitors
- paulsoaresjr
- Dates visited: October 3, 2013 and October 4, 2013
- YouTube Channel
- Video of visit to Autcraft
- TerasHD
- Date visited: October 4, 2013
- YouTube Channel
- Glis6
- Date visited: October 18, 2013
- YouTube Channel
- Arkas
- Date visited: April 2, 2015
- YouTube Channel
- docm77
- Date visited: April 2, 2015 & April 2, 2017, March 8, 2020
- YouTube Channel
- Video of visit to Autcraft (2015)
- Video of visit to Autcraft (2017)
- xisumavoid
- Dates visited: April 2, 2015 & April 2 2016
- YouTube Channel
- Video of visit to Autcraft (2015)
- Etho
- Date visited: April 2, 2015
- YouTube Channel
- Video of visit to Autcraft
- Keralis
- Dates visited: April 2, 2015 & April 2 2016
- YouTube Channel
- Video of visit to Autcraft (2015)
- Biffa2001
- Dates visited: April 2, 2015 & April 2 2016
- YouTube Channel
- Video of visit to Autcraft (2015)
- ZombieCleo
- Date visited: April 2, 2015
- YouTube Channel
- Video of visit to Autcraft
- zueljin
- Date visited: April 2, 2015
- YouTube Channel
- Video of visit to Autcraft
- sl1pg8r
- Date visited: April 2, 2015
- YouTube Channel
- Video of visit to Autcraft
- FalseSymmetry
- Date visited: April 2, 2015 & April 2, 2017
- YouTube Channel
- Video of visit to Autcraft (2015)
- GoodTimesWithScar
- Dates visited: April 2, 2017, April 2, 2018
- YouTube Channel
- Video of visit to Autcraft (2017)
- SirCutieYuki
- Date visited: April 2, 2016 & April 2, 2017
- YouTube Channel
- Thinknoodles
- Dates visited: June 5, 2017 & April 2, 2018
- YouTube Channel
- PearlescentMoon
- Date visited: April 2, 2018
- Youtube Channel
- stampylongnose
- Date visited: April 2, 2018
- Youtube Channel
- Sqaishey
- Date visited: April 2, 2018
- Youtube Channel
- bigbst4tz2
- Date visited: April 2, 2018
- Youtube Channel
- Grian
- Date visited: April 2, 2018
- Youtube Channel
- NitroLukeDX
- Date visited: April 2, 2018
- Youtube Channel
- VintageBeef
- Date visited: April 2, 2018
- Youtube Channel
- Eonic
- Date visited: April 3, 2018
- Company Website
- FrediSaal
- Date visited: April 3, 2018
- Youtube channel
- SirJoe
- Date visited: April 2, 2018 & April 3, 2018
- Wizard_Keen
- Date visited: April 2, 2018
- Youtube Channel
- Hypixel & NoxyD
- Date visited: March 6th 2019
- YouTube Channel
- Logdotzip
- Date visited: August 31st, 2019
- Youtube Channel
- Xilefian
- Date visited: April 2nd, 2020, June 23rd, 2021, and June 23rd, 2023
- Ulraf
- Date Visited: April 2nd, 2020
- YungTak
- Date Visited: June 23rd, 2021
- elybeatmaker
- Date Visited: June 15th, 2022
- YouTube Channel
- GeminiTay
- Date visited: June 23rd, 2022
- YouTube Channel
- Video of visit to Autcraft
- Mysticat
- Date visited: June 11, 2023
- YouTube Channel
Treasure Hunt
Description
This game occurs every Sunday at 6 PM UK time (1 PM Eastern Time, 10 AM Pacific Time, 3 AM Australian Eastern Standard Time).
Rules of the game
- There is a limit of 10 players taking part per game.
- If you are playing the treasure hunt you must have read and understood the rules, joined the chat channel "Hunt" and joined using /tr join.
- ZED will then put your name on a sign.
- When the game starts all players will hunt around for a birch wood block, ZED will tell the players what area of the role play world to look in.
- Each birch wood block will be worth a different amount of points.
- Once you have found a block, push the button. If there is no button then it has already been found.
- The button will tell you and ZED what item you found. ZED will then confirm that he saw.
- Once all players have pushed a button the game is over.
- The item reported by each button determines the player's prize.
Valentine's Day
Description
Valentine's day is a day dedicated to spreading love and kindness to others, Autcraft has hosted Valentine's day events in the past, The most recent being the Love and Kindness day, 2025.
Autcraft's Valentines Day Hosted Events
Autcraft has hosted Valentine's Day dating back to 2020
2020
The Valentine's day event of 2020 was the Celebration of Love and Kindness 2020. This had parkour, a heart-shaped glass island at Spawn, a dance floor island, a maze, and the Admins gave out valentines.
2021
The event of 2021's Valentine's Day was similar to 2020s with a maze, a dance island, parkour, and an island made out of red glass. The admins also left valentines for others to collect and a unique map art with a photo map art wall. Unlike last year, this event also unveiled a brand new Wither Fight arena with hearts, chocolate, custom trees, a Ferris wheel, and more.
2022
The event of 2022 featured similar events to the previous years. The glass at Spawn 5 was changed to pink and white, and a DJ booth was placed up in the sky near an interactive dance floor in the shape of a heart. A heart-shaped maze, staff dunking booth, and photo backdrop filled out the remainder of the decorations. This year also featured a specially created resource pack which changed the in-game discs to play music all about friendship, and changed the game paintings as well! Each player received a special map art and a decorative head to remember the event.
Wither Fights
Description
Wither Fights are an event that Autcraft Admins hosts on the server from time to time. You never know when one may happen.
Wither Fights grew over time to include Giants (huge zombies) and expanded even further to include just about every mob there is in the game, including bizarre combinations of mobs such as witches riding bats and evokers riding sheep.
Introduction
Wither Fights first started taking place on the server back on August 17th, 2013. These fights took place in a secluded location within the world where no damage would be done to surrounding builds. The area was then regenerated using WorldEdit to be used once again at another time. Players had so much fun that it became a regular, yet unscheduled event on the server.
Time
Wither Fights happen a few times per day, often one did after POTW (After 4 pm EST), and some are hosted throughout the day for different time zones.
Wither World
This world is the host of all wither fights with each wither arena to be summoned into the straight-ahead arena. Players gather, collect food, and prepare for the wither fight about to happen with bows and arrows and chicken.
Currently, there is the main arena where all arenas are hosted and three side arenas where the Dry Glutch is Located (A wither Arena), and an old Sand Arena (unused).
There are also solo arenas if you want to host your own wither fight.
Arenas
Since the creation of Autcraft's new worlds in 2014, Wither Fights have been contained primarily within special arenas created by the admin where damage is either minimal or can be easily rolled back (fixed) so that the next Wither Fight can be started at a moment's notice.
- Bedrock Arena
- Created by AutismFather, the bedrock arena originally was placed at the top of the nether but was then moved to the wither world where it is still to this day. This bedrock arena had walls, a floor, and a ceiling consisting primarily of bedrock.
- However, the ceiling and floor also had glowstone (later replaced with Sea Lanterns) randomly placed throughout to provide light. It was a bonus effect that these lights would be destroyed throughout the battle causing a dimming/darkness that grew throughout the fight.
- Castle Arena
- The Castle Arena is a big wooded castle centralized in the wither arena and small 1.12 village houses in birch wood. This arena was one of the first stylized wither fights to a specific theme.
- Desert Arena
- Currently, this arena is not used often in the wither fights, this arena has a unique temple in the middle with 1.12 sandstone houses.
- Nether Arena ( Old )
- A wither arena in the nether, placed over a lava pool, fight mobs on a nether fortress with small bits of netherrack on the sides to fight. [Discontinued]
- Ocean Arena
- The Ocean wither arena has 2 guardian temples, stylized artwork like fish, a chest with coral, crabs, light towers, and a boat. Inside this arena, you will have a fun time with water mobs in the water or flying mobs in the sky.
- Ocean (Ice) Arena
- The Ocean Ice arena is very similar to the Ocean Arena but is themed with ice and snow decorations.
- Winter Arena
- The Winter Arena is an arena made by the Autcraft Helpers and has many stylized penguins in the clothing and manner of helpers, a big ice mountain in the middle with an 'evil' cookie monster(Maybe?) with other cozy houses and camping setups. There is an icy river surrounding the ice mountain and an ice skating rink. The train station has many penguin workers helping keep the train up to schedule. You can see the train boarding the station soon coming from the dark tunnel to the right of the entrance. Snowy trees can be seen around the arena to make a wintery feel.
- Mesa Arena
- This arena was also known as The Dry Gulch is an old wild-west inspired town in the mesa biome which was made at the same time as the minigames Dry Gulch maps.
- VOB (Village of Boos) Arena
- An arena centered around Halloween was created in 2019 was made by admins, sr helpers, and helpers and has the Spooky Haunted House, a Graveyard, a giant pumpkin, a bone structure, a forest, a lava pool, and some pixel arts. This arena is used sometimes but more often around the Spooky season of October but can be used throughout the whole year.
- The Forest Arena
- The arena of tranquility and peace decorated with customer trees, mushroom houses, butterflies, and many flowers and rainbows. Visit this peaceful place during the rampaging wither fight of withers and destruction. Made around the Spring of 2020
- Mars Arena
- Made as an arena for an out-of-this-world experience you fly around with jump boost and slow falling giving a low gravity feel with rockets ready to head back to earth and a dome city for survival and protection. Don't explore too far or you may get stolen by aliens investigating crash sites and a mysterious cave system and camp sight. Powered by Solar Power. Made in Spring 2020 and Revealed on Autcraft's 7th Birthday
- Mars With Magnets (Normal Gravity) Arena
- Very Similar to the Normal Mars map this map is housed with magnets under the ground to stick to all materials requiring the same gravity as earth. The landscape is less explorable but the same as the other.
- Valentines Arena
- An arena from valentines day with hearts, Ferris wheels, bears, costume trees, and a pinky and white backdrop. Added on 2/13/2021.
- Nether Arena (1.16)
- Fight amongst the 5 nether biomes, a bastion, and a nether fortress. In each biome it is specialized per the arena to fit and is custom made by the Patreon Build Team.
- Solo Arenas
- These small areas are open to players to build and create custom arenas along with fight withers on their own, these arenas are cylindrical shapes and anyone is allowed to place a wither here since it is made out of bedrock. There are 4 different areas, 3 of which are the same and one has bedrock structures to hide behind and make a more unique fight.
Special Locations
A few Wither Fights have taken place in locations other than the designated areas. These special fights are very rare but the destruction they cause can be so much fun.
- Withers At The Watch
- As the older world of 2013 was coming to a close, we held a special Wither Fight on December 24th, 2013 within The Watch.
- This fight can be viewed on YouTube.
- The End
- The end, the home of the Ender Dragon and brought in with withers as reinforcements and eventually Cursed Admins this land was the banished land to endermen and the Ender Dragon until the Dragon Fights happened which left the worlds open to attacks from withers and more dragons from time to time, Eventually, new mobs from ancient lands arrived to defeat the invaders, but more and more came including mobs one called 'The Ragecraft Mobs'
- Christmas Party 2020
- One night a smaller than normal wither arena was made, it was a small party for the night hosted by JustBlue333, the arena was Christmas-themed with presents, a big Christmas tree, and some pixel arts and penguins.
- Overlord_Krycis's Castle
- Overlord_Krycis sacrificed his castle to a swarm of Withers on January 24th, 2014.
- This fight can be viewed on YouTube.
Videos
Not all Wither Fights have been recorded but AutismFather began recording quite a few of them to not only document the occasions but to also give the players the chance to see themselves on YouTube.
Along the way, many special occasions were also recorded including Wither Fights in unique locations.
The entire playlist of videos can be viewed on YouTube.
Locations
Description
The server has a lot of locations for players to explore and play in, from several different worlds to mini-games. Below is a summary of various locations on our server. For more information, click the "Locations" link on the right side of this page and then choose the location you wish to read more about.
Spawn
This is a list of all the locations at the current spawn. For the history and information about spawn, visit its wiki page. Spawn can be reached with the command /spawn
- World Portals
- All the portals and warp buttons to major locations are in the Teleportation Station.
- TARDIS
- The TARDIS is a reference to Doctor Who in which the lead character flies around in a big blue phone box that is bigger on the inside. The TARDIS replaced the "wall of player heads" as the number of players we had with grew beyond what the walls could hold. As AutismFather thought about it, he realized that an infinite number of wall spaces were required so it only made sense to have a building that was somehow "bigger on the inside."
- Shops
- At spawn there's a range of items and blocks that players can buy, ranging from wood to elytras. The only items and blocks that will be for sale are base items and blocks (e.g logs, stone etc.) and rare items and blocks (e.g elytras, mending books etc.) You can get to it using /warp shop
- Bank
- The Bank can find a bank in the shops area of spawn, in a stone building next the tunnel exit. Ingame money can be traded in for emeralds, which can be used to purchase items in the shops area.
- Patreon Monument
- AutismFather signed up for Patreon to allow people anywhere in the world to support the server with monthly donations. In exchange for pledges of $10 or more, a monument at spawn was created to hold and display the patron's name. The Patreon Monument currently resides at Spawn5.
- Jobs Centre
- In the Jobs Centre you can join or leave jobs, check your job stats and see the top workers in each job.
- Mini-Games
- On AutCraft there are some fun mini-games you can play. These are Paintball, Parkour, Spleef, Hide & Seek, and Mob-Arena. The Mini-Games can be accessed through a portal in the Teleportation Station, or by typing /warp minigames.
Role Play World
Autcraft's RP world is an exciting land with many places to discover.
- Ponyville
- Fans of My Little Pony will enjoy Ponyville, a recreation of the town from Friendship is Magic.
- 1890's School
- A massive building created in the style of an 1890's school, players can create the perfect school like stories in a huge and impressive school environment.
- Castle
- Kings and Queens never lived so well in our Templar inspired castle. Complete with hidden passageways, spiraling towers, and a massive throne room, there is no end to the stories that can be created here.
- Cruise Ship
- The Cruise Ship, previously called Oasis, is exactly as it sounds, a cruise ship. It's built to scale, where one end of the ship is beyond the render distance of the other end. If you're not careful, you might even get lost inside the ship.
- Wonderland
- Set to the theme of Alice in Wonderland, you can explore the Queen of Heart's castle, the hedge maze and see all your favorite characters as you roleplay your own wacky adventures.
- Pokemon Island
- Visit the land of the Pokemon creatures and role play until you catch them all!
- Giant Land
At Giant Land, you will find huge statues of the admins as well as statues of most of the popular passive and hostile mobs in the game. Inside many of those giants, you may find a basic parkour course and even some hidden signs with messages.
Farms
There are many locations on Autcraft where players can kill mobs for XP or gather resources in a controlled environment.
- Ender Ender 2.0
- The Ender Ender is a build in The End where Endermen are dropped from severe heights so that players can kill them with a single empty-handed punch. 6 stations allow for several players to kill Endermen at the same time, collecting both experience and ender pearls all they want.
- Mob Farm
- Players can kill skeletons, creepers, zombies, witches, spiders, and slimes at our Mob Farm, all while earning experience, mob drops, and maybe even mob heads.
- Public Farm
- The Autcraft farm is based over at /warp shops and can be accessed either by going to /warp shops or /warp farm. You'll be greeted by two shopkeepers selling useful items, both from the End and Nether, and the Overworld. To the right of the farm is a board of buttons which you can press to collect a few seeds, enough to start a farm of your own!
Other Locations
- Calm Rooms
- The Calm Rooms, sometimes called Snoezelen rooms, are special buildings on the server specifically built to stimulate and calm a player's senses. There are several different rooms with different effects and moods. All of these rooms have the public chat disabled for both incoming and outgoing chat. A player can still send and receive private messages but nothing in the public chat. These rooms can be visited by pressing the warp button in the Teleportation Station at Spawn.
- Spam Rooms
- The Spam Rooms are a building with a series of rooms with different activities to "spam" with, the chat is disabled in there, but you can still message people. This to prevent people from spamming things in chat, and provide a place for people to calm down, much like the calm rooms, but a lot different as well. These can also be visited by pressing the warp button in the Teleportation Station at Spawn.
- Village of Boos
- A treat at Halloween and throughout the year, Village of Boos contains a haunted house, maze, cemetery, and jump scares, among other things. Once updated each year in October, you can expect fun, spooky happenings and treats from dispensers.
Appreciation House
Description
A house for appreciating the players who donate to the server to help keep Autcraft functioning. Want to support Autcraft as well? Learn more about Patreon Rank!
Location
The Appreciation House is currently located at Autcraft’s 5th Spawn.
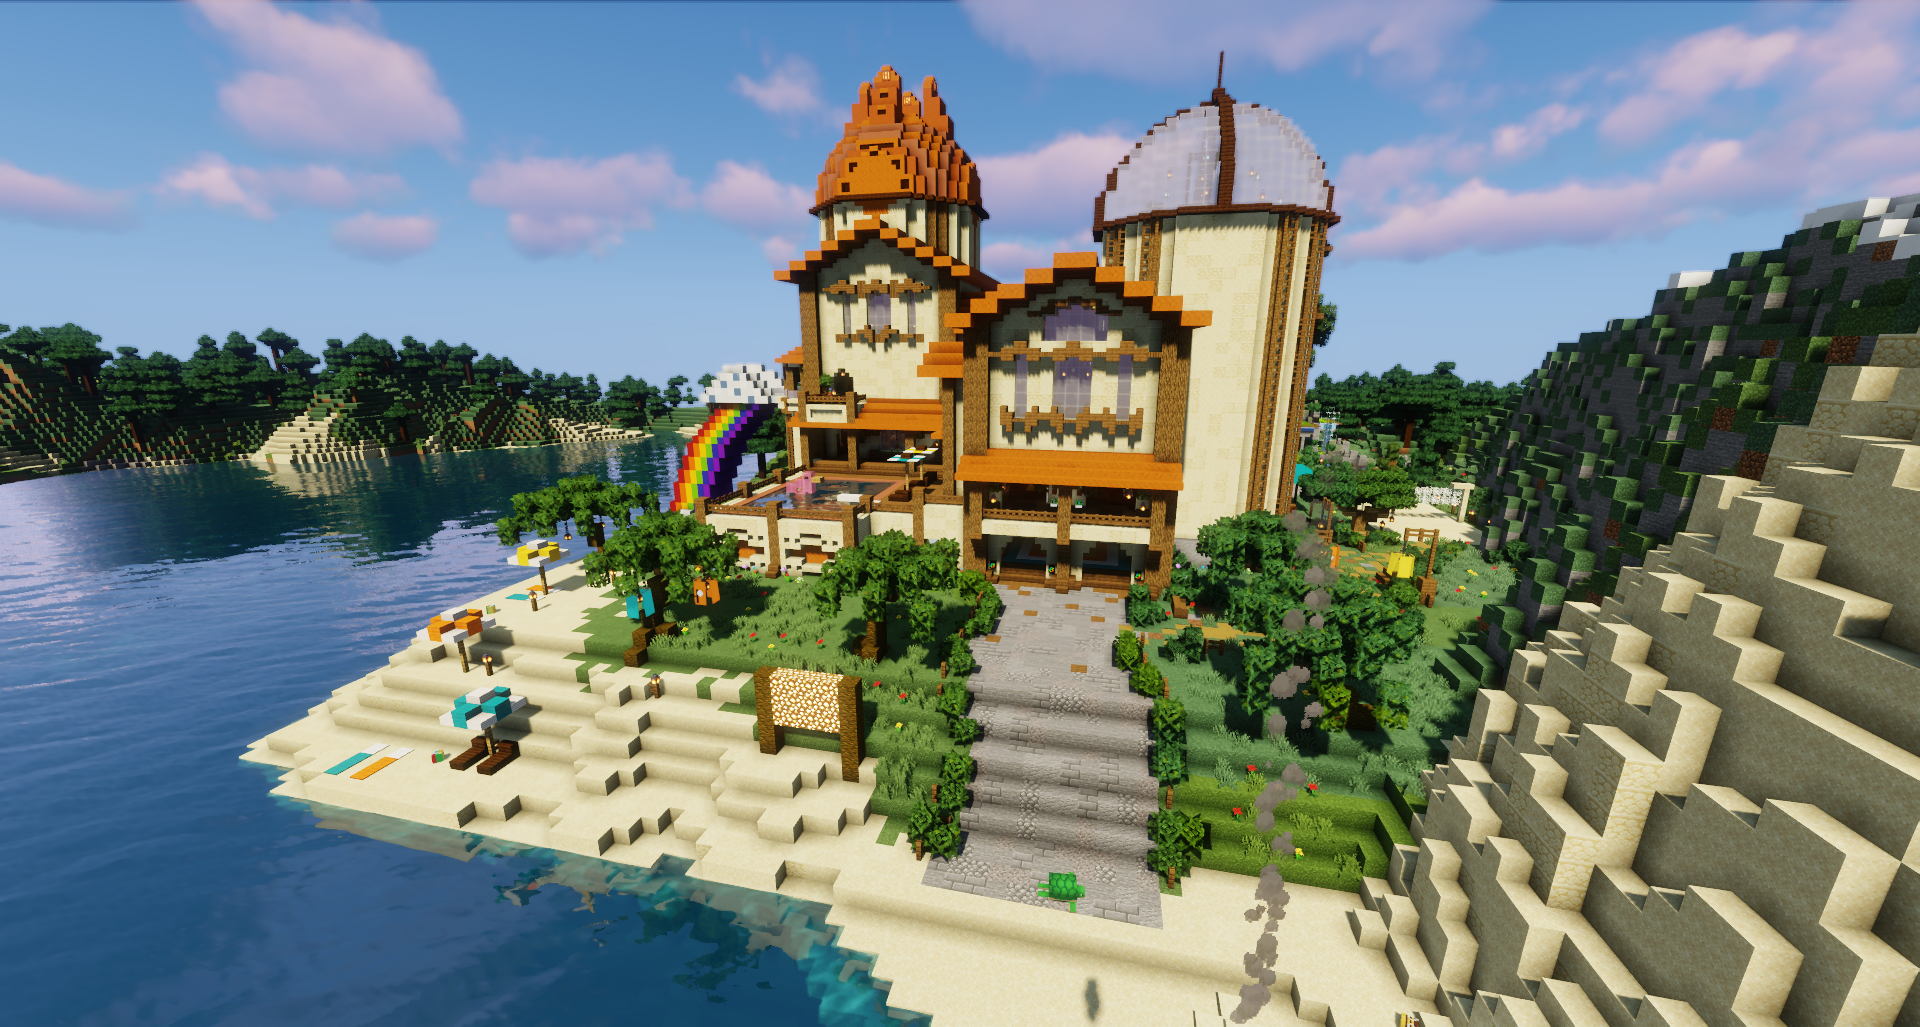
The Appreciation House
Features and Purpose
The Appreciation House has many cool builds that could be used for a variety of role play/hanging out/other communal reasons. It includes:
- Front Yard
- Facing the front there is a beach, a trail, and the front of the house showing the front of the house to spawn.
- Back Yard
- The back yard has a pond, a golf course, a dance area, a rainbow, and a volleyball court.
- Inside
- Many secrets and games inside. What will you find?
Future Updates
In the future, there will be updates with seasonal changes and holiday changes.
History
The Appreciation House was originally built to be exclusive for Patrons who pledge at least $10 per month, It was later decided that this build should be accessible to all players on Autcraft and is now open to everyone.
Autcraft Creative
Description
Autcraft's Creative server, dubbed ACC, launched on December 18th, 2017. The Creative server is powered primarily using the PlotSquared plugin and includes WorldEdit.
The addition of Autcraft Creative also includes the introduction of the system in which the Survival and Creative servers are separate machines but tethered together to provide players a way to travel back and forth between the two without disconnecting.
Creative Spawn
Development
The server was promised early in 2017 should AutismFather's Patreon page reach $2000/m. This milestone was reached in June 2017 and work on the server began. There were several delays however including some missing features in PlotSquared and the new Amp software, the replacement to McMyAdmin 2, was not yet complete enough to use. Also in that time, the Autcraft survival server was reaching its limits on hard drive space and required a server move, leaving the original server free to put Creative on.
Getting Started
You get access to the Creative server by first going onto Autcraft like normal and then either going through the Creative server portal or by entering the command /server creative.
When you join the ACC server, you find yourself at spawn with two books in your inventory which will explain the basics on using the server. This spawn is in a separate world from the plots world where you will have access to land and building tools.
To begin, use the command /plot auto to claim your first plot on which to build. You can also go to an empty plot and claim it by entering the command /plot claim.
Players with the Autcrafter rank get 1 plot, Iron and Gold get 2 plots, and Diamond and Patreon get 4 plots. Patreons also get access to some extra WorldEdit commands (brushes).
Extra plots and creative commands can be purchased using points at the Autcraft Shop.
Need to Know
Some commonly asked questions can be found here. Check these before asking an admin.
- Deleting a Plot
- You can not delete your plot. Unfortunately this can cause glitches in the plots so this has been disabled for players. We encourage players to reuse a plot by clearing it (/plot clear) and starting over. If you absolutely must delete it, do a /modreq and an admin will perform this action for you.
- Difference between Add and Trust
- Add - Player can only build on your plot while you are online
- Trust - Player can build on your plot any time as well as use world edit anywhere on your plot
- Deny a Player Entry
- /plot deny - This will lock a player out of your plot.
- /ignore - Just like on Autcraft, you can use the ignore command.
- Changing More Plot Settings
- /plot flag set gamemode <gamemode> - This changes the gamemode of the plot.
- /plot flag set time <ticks> - This sets the time of the plot. For example: 0 is dawn, 6000 is noon/midday, 12000 is sunset, 18000 is midnight.
- Merging Plots
- If you have multiple plots next to each other, you may want to merge the plots into one bigger plot. To do this:
- Stand in one of your plots that you want to merge
- Look into the plot that you want to merge with the plot you are standing in
- Type the command /p merge - This will remove the road between the two plots, and merge them into one bigger plot.
- If you have multiple plots next to each other, you may want to merge the plots into one bigger plot. To do this:
- Useful Tip
- Some players may have their plot set to be in survival mode which means when you fly into the plot you may die from fall damage. One thing you can do to help is wear an elytra and when your change gamemode activate it to fall slowly to the ground.
Christmas Village
Description
The Christmas Village started as a small place with some builds made for the players to enjoy something during Christmas time, small houses and mini-games were constructed and added, pixel arts and lights were placed.
The Christmas Tree
Constructed at the start of the village this tree is where players meet to collect a present for Christmas, On the 25th all through the day, you can log onto Autcraft, Head to the tree, and collect a present. Generally, these presents come with new shiny!
- 2020's Shiny: Shiny Zoglin
- 2019's Shiny: Shiny Wandering Trader
- 2018's Shiny: Shiny Polar Bear
- 2017's Shiny: Shiny Snowman
The Christmas tree has an easter egg! Look around to find it!
Advent Calendar
Each Year there are unique pixel arts inside each day's advent, At the start of December check back each day until the 25th to see a new pixel art and a new item!
2019 Contest
In 2019 there was a Gingerbread House Contest! The only category was Most Traditional, The winner of the Most Traditional Gingerbread House Was Ezra901
2020 Contest
In 2020 there was a Snowman Building Contest! The Two categories were Most Traditional and Most Humorous
- Winners Of Each Category Were:
- Most Traditional: Skylord_jenda151
- Most Humorous: n1n
Autcraft Sword
Every Year On Christmas Day a sword is given to all who log on, this is a tradition dated back to 2013 on Autcraft's First Christmas and have Special Lore For each year.
2020 Revamps/Updates
- Paths were more unified and around the whole Village
- Spots moved around such as Hot CoCo Mug and Gingerbread House
- New Advent Calendar Items
- Contest Winner's Display
- Updated Blocks and Ornament Decorative Heads.
- Updated Candy Cane
2021 Revamps/Updates
Check back soon!
Jobs Room
Description
Each player may have up to three jobs at any time. Performing job actions will earn job points and in-game currency.
Choosing Jobs
Available jobs are shows in the Jobs Room at /warp jobs. Right click any of the signs in the center row to view information about earning points for each job. Clicking on the top row will join a job, and the bottom row will leave a job. Players can have up to three jobs at a time and change jobs at any time. Points earned will not be lost by changing jobs, however there will be a loss of job levels.
Points are earned slowly when beginning a new job. Each job level has an XP goal to reach in order to progress. As job levels rise, the amount of points rewarded for job actions will increase. The higher a player's job level, the quicker points will be earned.
Job Options
- Explorer
- Explore our worlds!
- Woodcutter
- Chop down trees or other logs
- Miner
- Mine for ores, stone, obsidian, and other blocks
- Builder
- Place various blocks while building
- Digger
- Dig sand, dirt, gravel, and clay
- Farmer
- Harvest vegetables, flowers, mushrooms, saplings, and other plantable items.
- Hunter
- Kill mobs
- Crafter
- Craft various items
- Fisherman
- Collect cod, salmon, tropical fish, and pufferfish
- Weaponsmith
- Craft armor and weapons
- Brewer
- Brew potions
- Enchanter
- Enchant armor and weapons
Job Points
Job points can be converted into credits to use at the Autcraft Store.
In-Game Currency
Performing job actions also earns in-game currency. The amount of money earned can be seen with the commands /bal, /balance, or /money. This money can be exchanged for emeralds at The Bank at /warp shops.
The Lodge
Description
The first building ever made on Autcraft, the lodge was designed to be the central meeting place for players to gather and head off on adventures together. It was created with enderchests, anvils and even a hidden enchantment table for players to do virtually anything they needed while there. The lodge was created before Autcraft even opened to the public and hasn't changed much since.
Lost and Found
Description
Lost and Found is a service for players who have lost important items. This area is located at Spawn, southwest of the Transportation Station.
How It Works
If one has found an item that does not belong to them, they may deposit it into one of the five hoppers (Fig. 2). Then the item will flow into one of two double chests which are locked to AutismFather using the Lockette plugin. To re-obtain a lost item, one must contact any online Admin or use the /modreq command. Directions are also posted on signs in the structure
History
Lost and Found was built and established by AutismFather on April 14th, 2020.
Mob Farm
Description
A server-created farm where players can safely collect common mob drops.
Location
Players can use the Mob Farm at any time by typing the command /warp mobfarm
Featured Mobs and Drops
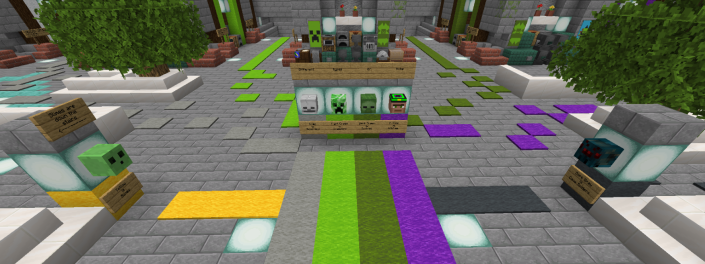
Mobs can be located by following the color-coded carpets to their spawner areas.
- Slime
- Yellow Carpet, downstairs
- Slime balls
- Skeleton
- Light gray carpet
- Bones
- Bows
- Arrows
- Creeper
- Lime carpet
- Gunpowder
- Zombie
- Green carpet
- Zombie flesh
- Carrot
- Potato
- Witch
- Purple carpet
- Sticks
- Glass bottles
- Glowstone dust
- Redstone dust
- Spider eyes
- Gunpowder
- Sugar
- Cave Spider
- Gray carpet
- String
- Spider eyes
Nether Hub
Description
This build features mob spawners, piglin bartering stations, and the Nether resource shops, as well as the main entry point for the Nether Resource World.
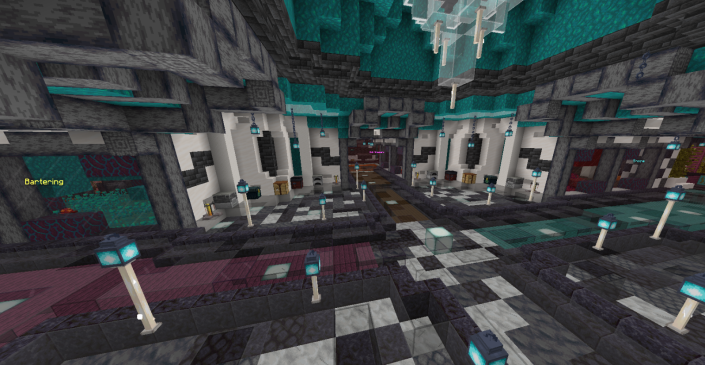
Mob Spawners
- Ghast
- Gunpowder
- Ghast tears
- Blaze
- Blaze rods
- Magma Cube
- Magma cream
Piglin Bartering
Pass one of the piglins a gold ingot. After a few moments, the piglin will drop a trade. Possible trades include enchanted books, armor, potions, obsidian, fire charges, spectral arrows, and other nether items.
Nether Resource Shops
There are three shops in this hub. Shops and available items are:
- Nether Ores
- Nether quartz ore
- Ancient debris
- Nether Items
- Soul sand and soul
- Nether brick and red nether brick
- Nether wart and nether wart block
- Crimson and Warped
- Crimson or Warped nylium
- Crimson or warped stem
- Crimson or warped fungus
- Crimson or warped roots
- Weeping vines
- Twisting vines
Pyramid
Description
The initial spawn location, where you appeared when you first join the server, where you went when you typed in /spawn and where you went when you die, was inside the great Pyramid as Spawn. Inside there was some useful information to get you started, examples of several mob heads that drop throughout the server and also the portal to the Wither Arenas.
The Pyramid was not transferred to the new 1.9+ spawn because of a design philosophy around circles and a focus on making it quick to get to the world portals. The spawn point was now on a circular junction next to the world portals & minigames. The portal to the Wither Arenas was now in the world portal building.
In the 1.13 + 1.14.4 spawn, the pyramid is not present.
Roleplay World
Description
Role Play Worlds is a place for players to explore, roleplay, and have fun. Locations in the RP world are listed below:
Locations
- Ponyville
- Fans of My Little Pony will enjoy Ponyville, a recreation of the town in which the most recent incarnation of the cartoon takes place.
- 1890's School
- A massive building created in the style of an 1890's school, players can create the perfect school like stories in a huge and impressive school environment.
- Castle
- Kings and Queens never lived so well in our Templar inspired castle. Complete with hidden passageways, spiraling towers, and a massive throne room, there is no end to the stories that can be created here.
- Cruise Ship
- The Cruise Ship, previously called Oasis, is exactly as it sounds, a cruise ship. It's built to scale, where one end of the ship is beyond the render distance of the other end. If you're not careful, you might even get lost inside the ship.
- Wonderland
- Set to the theme of Alice in Wonderland, you can explore the Queen of Heart's castle, the hedge maze and see all your favorite characters as you roleplay your own wacky adventures.
- Pokemon Island
- Visit the land of the Pokemon creatures and role play until you catch them all!
- Baseball Stadium
- America's Pass time some might say, come on over to experience the baseball fun by going on the field or the stadium with stylized stations.
- Hogwarts
- Hogwarts what? Watch out for invisible castles if you have no powers but ones that do will explore the castle of ghosts, swamps, and magical delight. Watch out! Under Construction!
- The Watch
- A Castle with a village inside to protect Autcraft, A special wither fight location long ago no longer used as such.
- Ice Rink
- A place to skate around with boats and ice to fly around.
- Rocket
- Blast off to the sky with the fancy rocket to get to the planet of Mars or to the Moon!
- Military Base
- A Base for cool tanks and fancy jets!
- Village Of Boos
- A warp to the off time of the year to get to VOB.
- Land Of Giants
- A Land of giant statues of mobs and of giant blocks.
Other Features
- Elytra Hunt
- Look around Rp world for golden blocks with hints for the next to get to a puzzle to get an elytra at Rp world.
- Disguises
- All players have access to /disg here with mobs so they can enhance their role-playing.
Secret Rooms
Description
If you explore spawn enough, you will find some secret rooms.
Note: The locations of the rooms are not supposed to be discussed in chat, as that would ruin the adventure for others.
Shops
Description
The shop and trade booths at /spawn features many commonly used items to help players quickly grab items for their projects.
About The Shops
This area can be visit with /warp shops. These shops are run by the server. They never run out of stock. New items are occasionally added to the shops as the game updates. Most items can be purchased with emeralds, although a few items require diamonds.
Current Shops
- Wood
- All current Overworld logs (as of 1.21.7)
- Dirt & Stone
- Dirt
- Rooted Dirt
- Coarse Dirt
- Grass
- Sand
- Gravel
- Podzol
- Mud
- Mycelium
- Clay Ball
- Cobblestone
- Diorite
- Andesite
- Granite
- Mossy Cobblestone
- Sandstone
- Wool
- White Wool
- White Banners
- Flowers
- All in-game flowers except Wither Rose
- Large Fern
- Dead Bush
- Bushes & Saplings
- Fern
- Large Fern
- All Overworld saplings (Mangrove does not have saplings)
- Horse Merchant
- Saddle
- Name Tag
- Iron, Gold, and Diamond horse armor
- Exchange Old Mob Heads
- Visit shop to see trade
- Ocean & Cold
- Snow Block
- Ice
- Packed Ice
- Prismarine Shards and Crystals
- Ink Sacs
- All forms of Coral
- Trident
- Sponge
- Nautilus Shell
- Sea Pickle
- Redstone
- Redstone Dust
- Repeater
- Comparator
- Brewing
- Dragon's Breath
- Magma Cream
- Rabbit's Foot
- Pufferfish
- Spider Eye
- Sugar
- Enchantments and End
- Bottle o' Enchanting
- Depth Strider III
- Frost Walker II
- Mending
- Soul Speed III
- Sweeping Edge III
- Swift Sneak III
- Chorus Flower
- Elytra
- End Rod
- End Stone
- Popped Chorus Fruit
Current Trades
- Bad to Good & Stone
- Seeds to Grass
- Ferns to Podzol
- Ice to Packed Ice
- Packed Ice to Blue Ice
- Ladder to Scaffolding
- Poisonous Potato to Potion of Weakness (1:30)
- Rotten Flesh to Leather
- Crimson Roots to Crimson Nylium
- Warped Roots to Warped Nylium
- Saddle to Leather
- Light and Shroom
- Glow Berries to Glowstone Dust
- Glowstone Dust and Ink Sacs to Glow Ink
- Glowstone Dust and Vines to Glow Lichen
- Glowstone Dust and Mushroom Stem to Shroomlight
- Brown and Red Mushroom to Mycelium
- Red or Brown Mushroom and glowstone powder to Shroomlight
- Brown Mushroom Block and Potion of Night Vision (3:00) to Shroomlight
- Red Mushroom Block and Potion of Night Vision (3:00) to Shroomlight
- Seeds and Dirt to Red or Brown Mushroom
- Uncraftables and Craft
- Nether star and Phantom membrane to Elytra
- Stick and Gold Ingots to Bell
- Chain to Chainmail Armor
- Ghast Tear and Obsidian to Crying Obsidian
- Paper and Crafting Table to Cartography Table
- Book and Crafting Table to Lecturn
- White Wool and Crafting Table to Loom
- Redstone Dust and Stone Axe to Stonecutter
- TNT and Furnace to Blast Furnace
- Stone and Crafting Table to Grindstone
- Campfire and Dispenser to Smoker
- Stone Axe and Barrel to Composter
- Regen and Swift
- Regeneration (0:45) and Dirt to Grass
- Regeneration (0:45) and Dirt to Podzol
- Regeneration (0:45) and Coarse Dirt to Dirt
- Regeneration (0:45) and Torches to Coal
- Regeneration (0:45) and Planks to Logs
- Potion of swiftness (3:00) and Rabbit Hide to Rabbit Foot
- Potion of swiftness (3:00) and Leather to Saddle
- Potion of swiftness (3:00) and Iron Ingots to Iron Horse Armor
- Potion of swiftness (3:00) and Gold Ingots to Gold Horse Armor
- Potion of swiftness (3:00) and Diamonds to Diamond Horse Armor
- Fire Resistance and Healing
- Fire Resistance (3:00) and Cobblestone to Netherrack
- Fire Resistance (3:00) and End Rods to Blaze Rods
- Potion of Healing and Feathers to Eggs
- Potion of Healing and Scutes to Turtle Eggs
- Potion of Healing and Dead Coral to live Coral
The Bank
This stone building can be found to the left of the path when you first visit /warp shops. Clicking on either of the two signs shown will allow you to trade in-game currency for emeralds. These emeralds may be used in the shops area, or for any other purpose the player chooses.
Spawn
Description
Spawn is the first place new players see when they log on to Autcraft. It is the central location for getting to every location on Autcraft and also functions as a meeting place for many events and activities.
Current Features
- Spawn Tower
- The current spawn has a large tower in the center of a valley. From this point, players can see many of the most important areas at spawn. Players can leave the tower via a suspension bridge, or a water elevator. The raw gold block in the center of the tower is known as "The Golden Beans." Inside of the tower can be found an enchanting room, a map of spawn, and a secret underground dance club.
- Secret Rooms
- There are many secret rooms hidden around spawn for players to discover. They are hidden and tricky to find, utilizing secret entrances tucked away in unexpected locations.
- Shiny Room
- The Shiny head room displays shiny heads that have been discovered. This room also features some of the mob heads from The Darkness, such as Cursed Admins and mob bosses.
- Transportation Station
- The portals room at Spawn 6 is known as The Transportation Station and contains portals and warp buttons to take players anywhere they want to go. World portals feature mini biomes to provide examples of what can be done in each world, such as building, collecting resources, or playing a minigame. The button wall has warp buttons to take players to the Birthday Board, Jobs Center, Calm Rooms, Spam Room, Enderman Farm, Mob Farm, Public Farm, TARDIS, and Shops area.
- T.A.R.D.I.S
- The TARDIS is a reference to Doctor Who in which the lead character flies around in a big blue phone box that is bigger on the inside. The TARDIS replaced the "wall of player heads" as the number of players we had with ranks grew beyond what the walls could hold. As AutismFather thought about it, he realized that an infinite number of wall spaces were required so it only made sense to have a building that was somehow "bigger on the inside." The TARDIS traveled through time and space to arrive in the mountains at Spawn 6.
- Jobs Centre
- In the Jobs Centre, you can join or leave jobs, check your job stats, and see the top workers in each job. This centre can be found from the Spawn Tower by following the path in front of the the Transportation Station to the left and walking down into the large cave. The Jobs area are at the bottom of the steps.
- Lost and Found
- Lost and Found is a service for players who have lost important items. From the Spawn Tower, follow the main path to the right. There is a sign pointing to a small set of stairs. See [[Lost and Found]]
- Lodge
- The first building ever made on Autcraft, the lodge was designed to be the central meeting place for players to gather and head off on adventures together. It was created with ender chests, anvils, and even a hidden enchantment table for players to do virtually anything they needed while there. The lodge was created before Autcraft even opened to the public and hasn't changed much since. The lodge can be found by following the path through the tunnel behind the campfire benches that are over the Transportation Station.
- Shops
- The Shops are located on the other side of the mountain and can be accessed through a tunnel past the Announcements Board. In this area players can exchange emeralds for many useful items. The Trade Merchants are also located in the Shops area now, where you can trade items you have for different materials.
- Bank
- You can find The Bank in the Shops area. Here, you can exchange your in-game money for emeralds, which can be used to buy items from shops at spawn or from players.
- Birthday Island
- This "island" is on the south end of spawn and can be accessed by a bridge at the edge of the forest. Upcoming birthdays are displayed. Players can request their birthday be added to the board, and be announced at Player of the Week, by submitting a modreq
Past Features
- Patreon Monument
- To have Autcraft actually generate some income, AutismFather signed up to Patreon where people anywhere in the world can pledge money to the server monthly. In exchange for pledges of $10 or more, a monument at spawn was created to hold and display the patron's name. For more information on Patreon, visit [[Patreon|its wiki page.]]
- Appreciation House
- In December 2020, to celebrate Patreon members, a new house was built and installed at spawn. It was open to only paying Patreon members. The name was later changed to the “Appreciation House”, and became open to everyone.
- Elytra Tower
- The First And only Tower Of its kind is at Spawn 4
Spawn History
In 2013, Autcraft launched with just one single world. At its center was Spawn, the gateway to all other places of interest on the server.
Since that time though, the server has gone through several changes and with it, several different versions of spawn.
Spawn 1
2013 - 2014
This spawn was the first and often regarded as the player's favorite spawn. When [[AutismFather|AutismFather]] first set up the server, this was the location where the very first blocks were placed. The premise was to have a warm, inviting feeling as though you were joining a friendly neighborhood. Villager stations were set up, a lodge was situated on top of a nearby mountain where players could gather and a large 'Welcome' sign was high in the sky in the very center.
Players were encouraged to build around this central location.
Other buildings were added over time including the original "Quartz Hotel", the original sandstone pyramid, a trading station, the Autcraft railway station, and an animal zoo.
You can TP to this spawn by doing /warp spawn1
Spawn 2
2014 - 2015
In 2014 Spawn wasn't just a new location but a whole new world.
The "Lobby" world was created to house all future Spawn builds with the idea that since players could not explore, the file size of the world would never grow so large as to become corrupted by data loss.
The neighborhood feel was replaced by a single massive building with intricate details throughout. The hope was to demonstrate to players the possibilities that could be done with walls and floors beyond a basic flat surface.
The warp room and warp buttons were replaced with water portals throughout the building that players could walk into and instantly be transported to the world or mini-games of their choice.
This building was a collaboration between many admins and even had input from visitors.
Features included walls throughout displaying various ranks and top players, the addition of a birthday board, Redstone 'gate' examples, and a dragon head featuring the Dragon Eggs from past Ender Dragon Fights.
You can TP to this spawn by doing /warp spawn2
Spawn 3
2015 - 2016
Still, in the Lobby world, this new spawn returned to the village feel of the original.
Returning to this Spawn was the lodge on the mountain, the floating Welcome sign floating high in the center of the village, and the warp room.
Many new builds were carried over from the new Peaceful World into this new spawn, including the bank, post office, party room, and giant new Quartz Hotel.
Additions added since then include the library, Patreon Monument and T.A.R.D.I.S. which is now the home to our player headwalls where our ranks and P.O.T.W.
You can TP to this spawn by doing /warp spawn3
Spawn 4
Spawn of Autcraft from 2016 - 2019
With the upgrade to 1.9 and the addition of several new block types as well as the Elytra, a new spawn was introduced to feature these changes as well as to correct some issues that we had with the previous spawn.
This spawn's key feature is a reduced overall size especially directly around the primary /spawn area so that players with a render distance of 4 could find the important areas immediately.
Another key feature is the inclusion of launching platforms from several key areas allowing for players to "spread their wings" and soar around with the use of their Elytra wings.
Also, areas were consolidated, meaning that the world portals were no longer spread out in four different places. Now all world portals are in one place, all mini-games in one place, the bank and shops are in one place, and so forth.
Speaking of shops, the general store was replaced with a market in which the ShopKeeper plugin made it so that players could trade emeralds for items they wanted much as you do in vanilla Minecraft.
Buildings that returned from the previous spawn included The Lodge, The T.A.R.D.I.S., the Patreon Monument, and the Town Hall.
You can TP to the spawn by typing /warp spawn4
Spawn 5
Spawn of Autcraft from 2019 - 2022
When Autcraft updated to 1.14, the spawn was changed to fit with the underwater theme of 1.13, and with a pillager outpost to fit with 1.14. Most of the major things like the World Portals and Minigames were moved to underwater bubble-like structures. This new spawn also gave everyone the ability to use /fly, regardless of their rank.
The Lodge, Bank, Town Hall, and Shops were absent from this spawn, however returning buildings were The Patreon Monument, which was designed by MagicLentilSoup, and the mob heads building, which only contained shiny heads. The TARDIS was replaced by a portal, however, the inside remained the same. New builds included but were not limited to Patreon House, Lost and Found, a birthday island, and update-specific items (Think Pillager Outpost, Coral reefs underwater).
Throwing a trident outside of the spawn border is not recommended as sometimes they may not come back, even if it has Loyalty, resulting in you losing your trident.
In June 2020, to celebrate Pride Month, a rainbow version was created and had many different themes as you came and went.
Spawn 6
Spawn of Autcraft from 2022 - present day
Soon after Autcraft updated to 1.18, a new spawn was created to highlight many of the new features that had been added to the game since the previous spawn was built. A perfect location was found to showcase both the new caves and cliffs, with a beautiful valley in the center.
Spawn 6 is Autcraft's largest spawn to date, which allows room for more exciting builds. The spawn point is set on a large tower in the center of the valley, from where players can see the most commonly used locations. A brand new Transportation Station was built to house world portals and warp buttons to every world on Autcraft. The Info Center was created as a place to quickly find answers to common questions about gameplay. Lost and Found, TAO, the Jobs Centre, Birthday Island, and the Shiny Room are all located in the main area on this side of Spawn. The Shops and Trades area is on the other side of the mountain through a tunnel. Along the snowy peaks to the south of Spawn, the Lodge has returned, as well as the TARDIS, a boat skating rink, and other fun builds to discover.
A new feature at this spawn is The Tour Coaster. This ride was developed as a way to give new players an overview of Autcraft where there isn't anyone available to provide a personal tour.
T.A.R.D.I.S.
Description
The T.A.R.D.I.S (Time and relative dimension in space), also known as a time travelers box which was stolen by the doctor and he has been running ever since. The T.A.R.D.I.S may seem to have landed on the autcraft server, but this is just a mere shell. Inside the structure, the building is much bigger on the inside (Autcraft magic, yes!).
Autcraft's TARDIS
On the Autcraft server, the structure plays a role of being the Hall of fame, the hall not only holds the lists of people with the ranks of Admin, Helper or Buddy but is also the grounds in which players gather once a week, Saturday at 9 pm GMT/4 pm EST/7 am AEST/8 am AEDT to watch the unveiling of the new POTW (Player of the week.) The TARDIS can be found on the south end of Spawn, where it crash landed in the mountains. Players can also visit it with the command /warp tardis
What's inside the T.A.R.D.I.S Hall of Fame
- List of Admins
- List of SrHelpers
- List of Helpers
- List of Buddies
- Player of the Week
- AutismFather
- AutismFather Sword
Rank's + AF Sword's Description Inside T.A.R.D.I.S
- Admin
- Adults who ensure the safety of all who play Autcraft
- Compassionate, Patient, and Understanding
- Tasks such as modreqs, fixes builds, rules & decisions are all handled by admins who prove to be responsible and respectful to all who play on the server.
- Sr. Helper
- Adults who prove themselves to have patience, understanding and are calm and helpful towards all players may earn SrHelper Rank.
- Helper
- Players aged 13 and up who are capable of showing great patience, understanding, as well as helpfulness and kindness, may earn the Helper Rank.
- Buddy
- Players of all ages may receive this rank when they demonstrate acts of kindness or willingness to drop what they are doing to help players that feel lonely or bored even if it means doing something they don't like just to make the other person happy. These types of people qualify for the rank.
- The Autismfather Sword
- Put the community before yourself, Be Kind, Helpful, Positive, Friendly, Generous, Thoughtful, And Respectful.
Village of Boos
Description
A treat at Halloween and throughout the year, Village of Boos contains a haunted house, maze, cemetery, and jump scares, among other things. Once updated each year in October, you can expect fun, spooky happenings and treats from dispensers. Players are welcome to explore the village anytime, even when events aren't running.
Special Items
Each Year you can collect a special item placed in your Build World Inventory called Autcraft ___ pumpkin. The first time this was done was in Village Of Boos 2014 but in 2017 it came back and became a yearly special item. Originally the special item was a Jack o' Lantern named "Village of Boos 2014" with the lore Happy Halloween, since 2017, each pumpkin has been named ("Autcraft {0}", year) with the lore "Happy Halloween"
- Village of Boos 2014: Happy Halloween
- Autcraft 2017: Happy Halloween
- Autcraft 2018: Happy Halloween
- Autcraft 2019: Happy Halloween
- Autcraft 2020: Happy Halloween
- Autcraft 2022: Happy Halloween
2020 Updates
With the new 1.16 update and blocks, existing blocks were put out for newer spookier blocks from 1.16, Some blocks like Blackstone were used a lot and in main areas while some crimson trees were hidden in the shadows. Existing areas with paths were redone with new paths to correlate to what goes there. A New Strider race was added for players to run around a racing area against others. Ghost Busters was also added to shoot ghosts inside a haunted house. Other areas added were by the pumpkin roller coaster for the pumpkin contest.
2021 Updates
For this year's update, the VOB world area was expanded. A large Trevenant (Pokémon in the shape of a tree) was built, a Pac-Man maze created, and some new pixel art was added to the sky. The existing With Tower was also updated and now features a witch's brew area at the top.
2022 Updates
The center corn maze, which had been a staple for years at VOB, was replaced with a special dancefloor that changes with each disc played! A new Ancient City area was added, in addition to the Spectre Cafe, for some spooky role play. Existing builds were cleaned up for a fresh appearance.
Worlds
Description
Autcraft has a variety of worlds for building, exploring, and mining, as well as gaming and adventuring.
Current Worlds
- Lobby
- The "Lobby" world is where Spawn is located, and is the first world players enter when they join the server. Players can return at any time with the command /spawn.
- MiniGames
- When players head to /warp minigames, they are taken to a small lobby where they can choose which game they want to play.
- Map Art World
- The world to go to to make a map art! To make request a map art plot, submit a /modreq asking for a map art plot. Players may include a desired background color in either concrete or wool, or a color will be set for you.
- example: /modreq I would like a map art plot with black wool background
- To go to existing areas go to /rg teleport [name]_0[#]. A number will be added to each new map art. "Your map area is yours. Do what you want with it within AC rules. Admins will not grant you creative or World Edit.
- The world to go to to make a map art! To make request a map art plot, submit a /modreq asking for a map art plot. Players may include a desired background color in either concrete or wool, or a color will be set for you.
- RolePlay (RP) World
- Wither World
- This world contains the Wither Arenas, Tardis, Mob farm, and other projects. This world is set to Normal and is where players participate in Wither Fights.
- Creative
- On December 18th, 2017 Autcraft unveiled a creative world. This world uses a plot plugin that allows players to build on plots. Creative is on a different server than Autcraft's survival server. To access this this server type /server creative
- Build Worlds
- Peaceful Build
- Peaceful World
- Difficulty set to Peaceful
- Never get hungry
- No hostile mobs
- Peaceful Amplified Build World
- Difficulty set to Peaceful
- Never get hungry
- No hostile mobs
- Amplified terrain (huge mountains and lots of them)
- Hard Build World
- Hard World
- Difficulty set to Normal
- You get hungry but do not die from starvation
- All hostile mobs
- Hard Amplified Build World
- Difficulty set to Normal
- You get hungry but do not die from starvation
- All hostile mobs
- Amplified terrain (huge mountains and lots of them)
- Nether Build World
- Difficulty set to Normal
- You get hungry but do not die from starvation
- All hostile mobs
- The End Build World
- Difficulty set to Normal
- You get hungry but do not die from starvation
- All hostile mobs
- Peaceful Build
- Resource Worlds
- Peaceful Resource World
- Do NOT build here
- Reset Monthly
- No protections
- Difficulty set to Peaceful
- Never get hungry
- No hostile mobs
- Hard Resource World
- Do NOT build here
- Hostile mobs
- Difficulty set to Normal
- Get hungry
- Gets reset
- Keep Inventory is still on, just like the rest of the server. So if you die, you do not lose your stuff.
- Mob griefing is off so creepers won't do any harm to the resources that players try to gather.
- The initial spawn location of the resource world has player invincibility. That means that once you enter the place, you are safe, nothing can hurt you. But once you venture out from that point... be careful!
- Nether Resource
- Do NOT build here
- Reset Monthly
- No protections
- Difficulty set to Normal
- You get hungry but do not die from starvation
- All hostile mobs
- The End Resource
- Do NOT build here
- Reset Monthly
- No protections
- Difficulty set to Normal
- You get hungry but do not die from starvation
- All hostile mobs
- Peaceful Resource World
History
2013
Autcraft initially began with just one world (including the Nether and The End). This world had a region of space surrounding the spawn point where 2000 blocks in any direction (making it a 4,000 x 4,000 area) would be unable to spawn any hostile mobs.
The perimeter of this area had a brick wall that would keep hostile mobs out. On the other side of this wall, however, would and could spawn any mobs that regular Hard mode Minecraft could create. This quickly caused problems as the server filled up with players, most of whom desired space within the peaceful, walled, non-hostile mob spawning area. Space ran out fast.
Also, it created problems within the mob spawning mechanics of Minecraft as the game tried desperately to spawn mobs around all of the players on the server but couldn't due to the peaceful region. The resulting effect was that the game would spawn unbelievable amounts of mobs around those few players outside of the wall. Sometimes the screen would be filled with literally hundreds and hundreds of mobs.
As the end of 2013 came to an end, we began to run into data corruption issues. The server struggled to save the changes that players made to the server fast enough and thus, data was lost. This created corrupt chunks, lost items, random glitches, and more. The problem continued to worsen over time causing Autcraft to make the fateful decision to close the world forever and start anew in 2014 with the creation of two new worlds.
2014
Near the end of 2013, Autcraft announced that the single world would be closing and in January 2014, 2 brand new worlds were opened.
- The Peaceful World were only passive mobs could spawn and hunger was not an issue
- The Hard World where the difficulty was set to "Easy" and hostile mobs could spawn and you had to eat but would not die of starvation.
In addition to the creation of these worlds, a 3rd world was created called "Lobby" in which the main spawn building as well as the server's "jails" were placed. This world was locked such that no player could explore or travel beyond the building's borders in an attempt to keep the file sizes on the server as minimal as possible, reducing the chances for data corruption.
In mid 2014, yet another world was added called Resource World where players could mine for resources, chop trees, dig the ground and do as much damage to the terrain and world as they pleased. This world would be reset at the beginning of each month, replenishing the resources and providing all of the players with virtually limitless resources without having to destroy the worlds in which they lived.
Unfortunately, much like the first world, over time, there were so many players and so much activity that the server once again began to fail to save the data quickly enough, leading to data corruption. Entire areas on the server became so corrupt that simply entering those areas would crash your client, causing you to have to close the game entirely. Upon signing back in, you would appear in that area and your game would attempt to load the corrupted data and crash again, keeping your player stuck in that area until manually placed outside of that area by an administrator.
2016
Towards the end of 2015, Autcraft formulated the plan for 2016 in which there would be 4 new worlds to live in. These were:
- Peaceful World - Difficulty is set to Peaceful, you do not get hungry, no hostile mobs
- Peaceful Amplified World - Difficulty is set to Peaceful, you do not get hungry, no hostile mobs, the terrain is amplified
- Hard World - Difficulty set to Easy, hunger is affected, hostile mobs spawn
- Hard Amplified World - Difficulty set to Easy, hunger is affected, hostile mobs spawn, the terrain is amplified
Players were given 4 months in which to move everything they have/wish to one of these new worlds and then, the 2 old worlds would be closed on January 1st, 2016, leaving only the 4 new worlds in which to build.
Minigame Rules
Descriptio
To keep play fair for everyone on Autcraft, please follow these rules while playing minigames. Failure to do so may result in temporary or permanent loss of minigame privileges.
Rules applying to all minigames:
- Be respectful of others and play fair. Autcraft rules still apply while playing minigames. Do not call names, taunt or belittle other players. If you are getting upset by minigames, we urge you to take a break.
- Join a channel before joining a game. This will avoid confusing people with discussion of minigames in main chat. One may join a channel by typing /chan join <channel>.
- Do not use unapproved mods, macros, minimaps, hacks or hitboxes. Do not use mods that are not on the Approved Mods list. You may not use external programs to run macros while playing minigames. Minimap mods are not allowed in minigames. Please disable any minimaps before playing. Hacked clients are prohibited on Autcraft, especially in minigames. Please do not enable hitboxes while playing mingames.
- Remember to empty your inventory before joining games. There is a small chance that minigames will clear your inventory after playing, so we require that you empty it. This also prevents exploits.
- If you find any glitches or exploits in a minigame, please report it with /modreq. Do not abuse a glitch or exploit. Do not tell other players if you have found a glitch or exploit. In your modreq, please explain what the glitch was and what you did that triggered it.
- Do not accuse other players of cheating or hacking. If you suspect that a player is hacking, please message an online staff member. Do not confront the player about it.
- Do not cross team. Please do not team with players who are not on your assigned team.
- Please do not combat-log. Leaving the game in combat to prevent statistic decreases is prohibited.
- Do not target specific players. Do not target a single player over multiple rounds of a minigame.
- Follow all Autcraft Rules. Autcraft rules still apply while playing minigames. If needed, please review the Rules.
- Do not drag-click. The clicking technique of "drag clicking" is only possible on specific mouses, so to be fair to everyone, it is not allowed.
- Have fun!! Minigames are here for fun, so enjoy your time playing them!
If you have any comments or questions about these rules, please contact a staff member.
Droppers
Description:
Dropper maps are quite simple in how they are played, however they can range in difficulty from very easy to extremely difficult. The goal of each map is to reach the water at the bottom without taking any fall damage. Hit something on the way down? You will immediately be sent back to the top of the map to try again.
Available Maps
- Easy
- Solar System
- Fall past the International Space Station and avoid the planets to reach the bottom.
- Lush Cave
- Zoom through a cave and into the water below. Pass through the axolotl's mouth and avoid hitting the air bubbles!
- Sky Diving
- Jump off the sun and around a sky full of clouds as you make your way to the bottom.
- Pink Sweetness
- It's pink. It's sweet. Can you make it to the bottom?
- Desserts
- Dive into hot chocolate and take a trip to the bakery with some ice cream!
- Solar System
- Medium
- Geode
- Fall thought a crystal cave to safely reach the water below
- Games
- What games do you recognize as you fall through this dropper? Hint: there are 10 recognizable sections!
- Redstone
- Fly past actual redstone builds and blocks!
- Desert
- Journey though the sand and discover what lies beneath the pyramid!
- Geode
- Hard
- From the End
- Travel through the world of Minecraft, one biome at a time.
- Glass Tower
- Randomly placed and hard to see glass blocks, in shades of white, light gray, gray, and black.
- Into the Void
- A mysterious portal appears, and quickly vanishes, as you fall through the void. But where is the water?
- From the End
Frequently Asked Questions:
- How do I stop playing if I haven't finished a map?
- You can stop at any time with /acd leave. This will take you back to the minigame lobby.
- What can I do about the Minecraft clouds blocking my view?
- Turn off clouds in your game settings. Go to Settings, Options, Video Settings, Quality, then set Clouds to "Off."
Hide and Seek
Description
Hide And Seek (Also Known as HAS) Is a minigame that is played on Autcraft.
Roles
There are 2 roles in hide and seek but multiple ways to play the role.
- Seeker
- Search around the hide and seek maps to find the hiders and win, the hiders are disguised as a block so check around local blocks to find them, there are 3 powerups to assist you so make sure to check below for powerups.
- Hider
- Hide in unique spots around the several maps of hide and seek and don't get caught by the seeker.
Strategy
There are unique ways to play each role and some strategies are pointed out in this section.
- Hiding Strategy
- The Risky Strategy: Change spots often and collect powerups knocking seekers away from other players.
- The Hiding Strategy: Hide from the seeker and move in the shadows by finding a unique spot other would not suspect.
- The Random Strategy: Play as a random block every round to pick more unique spots and not have everyone know specific spots.
- The Attack Strategy: Attack the seeker and defend other blocks from attacks, group up and protect each other.
- Seeker Strategy
- The Camping Strategy: Not often used but sometimes a seeker stays at the powerup location for hiders to come to them.
- The Call Out Strategy: With other seekers playing one may have a compass to show what blocks people are, they shout it out who has what block so the others know
- The Chaser Strategy: Chase after players but suddenly predict where they go.
- The Active Hunt Strategy: Actively look for players and check places multiple times to make sure you didn't miss a hider.
Shop
Purchase Powerups in the shops, This includes using Karma to get coins, Coins are gotten in-game or by karma when you say gg at the end of a game.
There are 3 types of powerups for both ranks and a chance changer, which can increase or decrease the chance of being a seeker or hider depending on which you choose.
- Hider Powerups
- Disguise Selector: Buy this and be able to select whatever block you want to hide as
- Disguise Changer: Change disguises in-game to stay mobile and to not get detected.
- Instant Solid: Become solid instantly to hide quicker.
- Special Blocks: Buy Special Blocks that work on all maps, The Selector has blocks specific to the map you play plus your special blocks that are in every map.
- Seeker Powerups
- Disguise Detector: Detects what block a player is using and around how far they are from where you click it, has a long cooldown.
- Infinite Speed 2: Run fast, catch the hiders!
- Throwable TNT: Damage hiders with throwable TNT or give them a scare.
- Free Powerups:
- Launching Axe: to move fast and catch up
- Damage Potions
- Bow And Arrow
Maps
There are currently 7 maps for Hide And Seek
- Xmas
- A Christmas-themed map with a big Christmas Tree in the middle, a cozy Gingerbread house, an ice rink, a snowbank, and some other smaller points of interest, Hide inside the tree, on the tree, or around the other areas of the map. Powerups are located under the tree at the cross-section of the road.
- Village Of Boos
- The Halloween-themed map called Village Of Boos with spooky decorations and Halloween-themed areas. Hide on the ground or in some houses, Powerups are in the middle area.
- Dry Gulch
- This map is a wild west-themed map with unique hiding spots in every building and outside area, look around to get a cool wild west feel.
- Castle
- This medieval castle has insides and outsides with a surrounding wall for places to hide.
- Autquatic
- An ocean monument-themed map with different blocks to hide around. With an upstairs and downstairs area, there is a variety of places to hide like the library, the rich room, the piano room, and the mesa room.
- Playground
- The playground map is decorated with doors, bricks, trees, a floating platform, and some bookcases for many places to hide. Run around, and discover new spots to hide with this unique map.
- City
- The tall buildings of the city and the lowest of sewers to which you can hide as many different blocks in this versatile city landscape. Powerups located on the surface mainly near the road.
Old Maps
These maps are no longer in use
- Wool Hunt
- This small map consisted of a very small amount of wool placed on the ground where hiders had to run for most of the time, this map was discontinued due to the seekers easily winning as they could find every block fairly fast as it was an open and flat map.
- Village 1
- The Village 1 map was an old 1.12 village where players had to jump across rooftops and hide in unique places. This map was a favorite to many and its discontinuation is unknown with the only fact of it being an old village could have been the cause, and due to how basic the hiding spots were.
- Gas Station
- A Very very old version of Hide And Seek was a small quartz gas station. Not much is know except it was show off in an old AutismFather video here
- Interior Houses
- Another Very Very old version of Hide And Seek inside an oak house with many spots to hide in and multiple floors. This was also shown off in the video here
- A3
- Old Village, the Village 1 being an updated design of a3 as it was made in a flat world while the A3 was in a glass box. This along with the last 2 was shown off in the video here
NHIE
Description
Never Have I Ever is a mini-game played on Autcraft where players jump across platforms to reach the end. NHIE Questions Must Be Family Friendly
How To Play
How you play on Autcraft is you go to the mini-game lobby, go to the pink island and select an NHIE map, and follow these directions:
- Get a group together, and create a channel with /chan create NHIE.
- Take turns to ask questions starting with... "Never Have I Ever..."
- If you have never done what has been asked you move ahead one block, if you have done what is asked you stay where you are. If you fall you go to the first block and start over.
- First Player to the end wins!
House Rules
Some players play the game a bit differently and may want to make the game different, A player who wants to do so must tell the other players before doing so. Some house rules are:
- If You Fall, You Continue Where You Fell
- Play Opposite (If you want to go forward only if you have done something)
- Swap (Each Player Gets one swap turn where they can swap with another player instead of asking an "NHIE" Question. Once swapped you have no more swaps and you must move to where the person is you swapped/got swapped with.)
- You Choose! All Rules Must Follow AC Rules
Maps
Beach NHIE: A String of Ores placed down to an end platform of Granite, Water below
Rainbow NHIE: A Rainbow line on each dot lining up to a cloud at the end. Obsidian, Crying Obsidian, and Black Concrete below with bubble columns to get back up.
King of the Ladder
Description
King Of The Ladder is a minigame where players compete to be at the top of the ladder by having powerups like snowballs and a sword. First-person to the top wins/person who stays the longest wins, house's rules.
Powerups/Items
In all 3 maps, there is a certain parkour point where you have to do tough parkour to reach the special item area, this area is located mostly centrally but some vary. These items are renewed to get every 10 mins
- The item you get from KOTL Map 1 is: A Knockback 2 Wood Sword
- The Items you get from KOTL Map 2 are: 16 Snowballs
- The Item you get from KOTL Map 3 is: A Knockback 1 Fishing rod.
- These items are useable on all maps but Keep Inventory in KOTL is not on
Maps
- Map 1
- More vertical map where players are challenged with swapping off ladders from broken ladders.
- Map 2
- A mix of Horizontal Parkour and Vertical movement where players are challenged to make hard jumps and fend off opponents.
- Map 3
- Map-based around the Jump boost 2 effect and allows players to make steeper harder jumps with the boost effect.
Mob Arena
Description
Mob Arena is a single-player or multiple player minigame where you all team up and survives again the mob attacks. At each stage, the mobs get harder and harder and you are tasked with killing them and surviving with special kits.
Kits
These kits give you specific items to help you defeat/survive the mobs, Not all the maps have the same kits so prepare for a different kit
- Knight - Iron Armor, A Diamond Sword, Bow, 64 Arrows, and 3 Healing Potions.
- Mage - Flint and Steel, Wood Sword, Leather Armor, 5 Healing Potions, 160 damaging potions, 32 weakness, 48 poison potions, and a stick.
- Tank - Diamond Armor, Iron Sword, 2 Healing Potions
- Zerker - Diamond Armor, Stone Sword, 3 Regeneration Potions, 3 Speed potions, 1 Fire Resistance Potion, 5 Healing, 1 Strength 2, 3 strength 1 potion
- Archer - Leather Armor, A wood Sword, A bow and 4 Stacks of Arrows, 3 Healing Potions, and a bone
- Cleric - Gold Armor. 5 Healing Drink potions, 96 Healing Splash, 32 Fire Resistance, 32 Regeneration Splash, 16 Strength 2, 16 speed, 32 strength, 16 poison, Iron Sword.
- Hunter - Chainmail Armor, 2 bones, a Bow and 4 Stacks Of Arrows, A stone Sword, 5 Healing Potions, 3 Swiftness potions.
- Hermes, Athlete - Leather Armor, Iron Sword, Bow and 2 Stacks of Arrows, 16 Speed Potions, 16 Jump Potions, 16 Regen Potions.
- Hercules, Strength - Iron Legs And Boots, Gold Chestplate, an iron sword, a Sheild, 32 Strength 2 Potions, 32 Regeneration Potions
- Aceso, Healing - Gold Armor, A Stick, 32 Healing Potions, 32 Regeneration Potions, 16 Regeneration Potions Drinkable
- Ares, War - Diamond Armor, Diamond Sword, Bow, 64 Arrow, A Shield
- Artemis, Hunting - Chainmail Armor, Iron Sword, Bow, 2 stacks of arrows, 16 Damage 2 Potions, 16 Weakness Potions
- NetherKnight - Iron Armor, Diamond Sword, Bow, 2 Stacks Of Arrows, a Milk Bucket
- NetherTank - Diamond Armor, Diamond Sword, Bow, 2 Stacks Of Arrows, a Milk Bucket
- NetherArcher - Leather Armor, Iron Sword, Bow, 4 Stacks Of Arrows, 3 healing Potions, Milk
- NetherHealer - Leather Armor, A Stick, Milk Bucket, 6 Regeneration Potions, 16 Healing, 16 Fire resistance, 16 Regeneration Splash.
- Fire Type - Chainmail Armor, Iron Sword, Flint and Steel, Fire resistance, Lava
- Poison Type - 32 Poison Potions, 8 Damage, 8 Weakness Leather Armor, Stone Sword
- Fighting Type - Diamond Armor, Diamond Sword, Bow, 64 Arrows, Shield
- Flying Type - Iron Sword, Bow Arrow, Elytra, Leather Armor, 64 Fireworks
Maps
Maps are the places you fight mobs and try not to die to the stages
- Classic1
- Classic1 is a map of an arena with a big fighting arena, you fend off mobs and protect yourself from being defeated in a big stone arena.This arena has the following kits:
- Knight
- Hunter
- Tank
- Zerker
- Archer
- Classic1 is a map of an arena with a big fighting arena, you fend off mobs and protect yourself from being defeated in a big stone arena.This arena has the following kits:
- Classic2
- Classic2 is an oval-shaped arena with many barriers in the middle to hide behind and protect yourself again mobs. This arena has the following kits:
- Knight
- Mage
- Tank
- Zerker
- Archer
- Cleric
- Classic2 is an oval-shaped arena with many barriers in the middle to hide behind and protect yourself again mobs. This arena has the following kits:
- Mythical1
- Mythical is the arena of Gods from Greek mythology in a very stretched Gladiator arena oval feel with sandstone floors and thrones on the side.This Arena has the following kits:
- Hermes, Athlete
- Hercules, Strength
- Aceso, Healing
- Ares, War
- Artemis, Hunting
- Mythical is the arena of Gods from Greek mythology in a very stretched Gladiator arena oval feel with sandstone floors and thrones on the side.This Arena has the following kits:
- Nether
- Themed on the Nether this uses nether blocks in the arena, nether mobs for the effect, and unique kits. The kits in this arena are the following:
- NetherKnight
- NetherTank
- NetherArcher
- NetherHealer
- Themed on the Nether this uses nether blocks in the arena, nether mobs for the effect, and unique kits. The kits in this arena are the following:
- Pokemon
- Stylized around Pokemon, small creatures like Silverfish and baby zombies are spawned, along with that unique kits are located here, the follow are kits in this arena:
- Fire Type
- Poison Type
- Fighting Type
- Flying Type But this minigame isnt working right now
- Stylized around Pokemon, small creatures like Silverfish and baby zombies are spawned, along with that unique kits are located here, the follow are kits in this arena:
Paintball
Description
Paintball is a face-paced game mode with snowballs (Paintballs) and powerups like the airstrike.
Maps
Maps are locations where players can play and have fun in the game of paintball.
- A1
- A neon-colored themed map, this map has colored glass with multiple barriers and running paths. Run around the darkly lit room with neon lights and don't get hit by a paintball!
- A2
- The circular arena with red and blue towers hide in the towers from paintballs or sneakily snipe, hide behind barriers. Colored red and blue with the team colors.
- A3
- The Square arena with cuboid hiding areas and platforms and in each corner a hiding spot for snipers. Jump up top for a unique shooting platform and a contested shooting platform on the other side
- A4
- A Cylindrical map where players jump on super jump pads, shoot in the air or shoot on the ground testing their aim to the best.
Happy Hour
Happy hour is an hour when every powerup item is free, usually, it is chaotic with exploding snowballs, snowball launchers, and airstrikes. When a happy hour is started an admin will broadcast the start of it and a timer in the minigame will show when it ends.
How to Play
First you either type /spawn or do /warp minigame and go to the mini-game room, go down into the room, and click the button called Paintball, Once in, type /pb join and wait 5 seconds. Then you are ready to play.
Cash
In Paintball you gain a currency used to buy paintballs, powerups, and other abilities such as turrets, you gain cash by playing, eliminating players, and winning games.
Ranks
In paintball there are multiple ranks, the top rank is master chief, you can see the ranks in the lobby by the armor on each player, the top rank having Lime and Green Leather Armor. Do /pb ranks in the lobby to see how many points till your next rank.
Points
Used to gather up and rank up you can check your points by looking on the right of your screen and looking at points. The top-ranked player (IceAngels) is at 86017 points! That's a lot of points! Earn points by defeating enemies and by winning. Similar to cash but permanent and not spendable for powerups.
Teams
There are 3 teams in paintball, one of them is the Blue Team, one is the Red Team, and one is the Spectating team, you can specifically join any of these teams by doing: /pb red /pb blue /pb spec.
Powerups
- 10x Paintballs (10$)
- 50x Paintballs (50$)
- 100x Paintballs (100$)
- 1x Grenade Mark 2 (15$)
- 1x Grenade (20$)
- 1x Concussion Nade (15$)
- 1x Flashbang (15$)
- 1x Mine (10$)
- 1x Pumpgun (20$)
- 1x Speed (20$)
- 1x Shotgun (20$)
- 1x Airstrike (80$)
- 1x Orbitalstrike (80$)
- 1x Turret (180$)
- 1x Sniper (80$)
Parkour
Description
Parkour in Minecraft is defined as jumping from block to block to reach the end goal, this may be a final block, a land of riches, or just the top of a mountain.
Autcraft's Parkour
Autcraft currently has three parkour options. Dungeon, 3 Levels, and Four Elements.
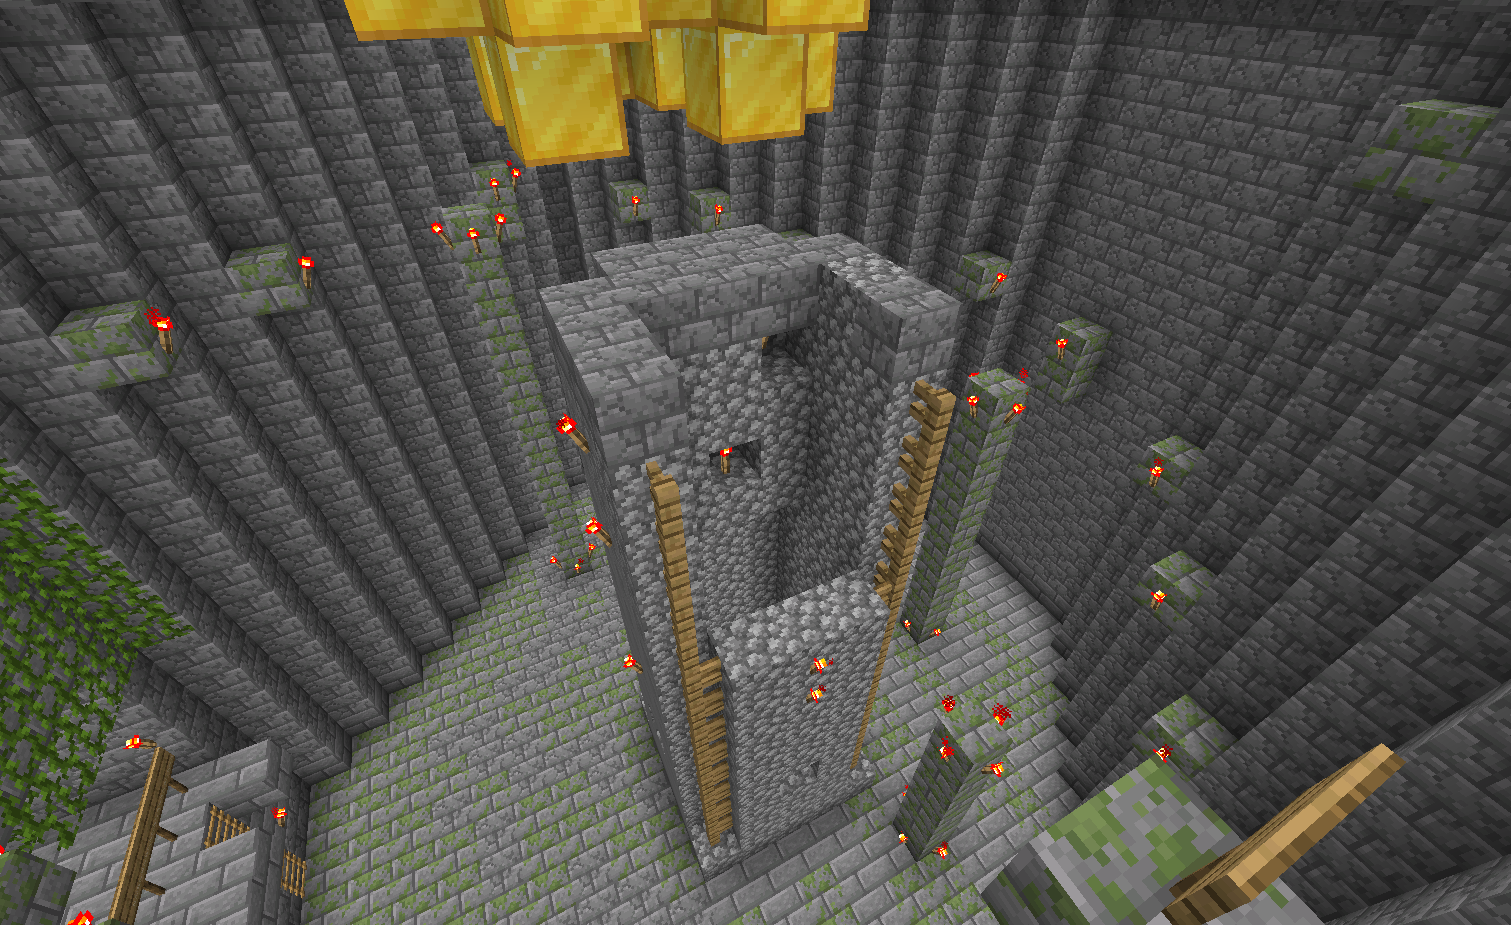
Pictured: Challenge 3 in Dungeon Parkour
- Dungeon Parkour
- Built by Farockz, our dungeon parkour has 9 levels of maddening challenges. However, it's not impossible! Once you finish the entire course, post a screenshot of yourself at the end and post it to our forum. There are checkpoints placed at Each Challenge so be sure to click it to return at later points. The prize for completing Dungeon Parkour is the Parkour Sword. The sword is enchanted with Sharpness IV and Looting III. It displays the lore "Defeated the Toughest Parkour."
- Challenge 1
- The Bridge Has Fallen! Find a way through this tightly jumped level with falling points!
- Challenge 2
- The Bridge has ended! Jump for safety vines on the other side.
- Challenge 3
- Woah... The Treasure Room! You See those gold blocks up on the tower? Go and get them by making diagonal jumps.
- Challenge 4
- Wait... That wasn't the treasure room? But you fell down? Well From Here is a sewer area to jump across with iron bar jumps and momentum jumps.
- Challenge 5
- Broken pipe debris scattered around, jump across and locate the exit of this level.
- Challenge 6
- The Rest of the tunnels are blocked! Find a way around the tunnels by slowly parkouring above the walls.
- Challenge 7
- Finally out of some sewers and into... a Basement? Climb against the walls and find the exit, It may not appear as the first sign!
- Challenge 8
- Wow just got out of that basement and suck here trying lock pick, turn around and look for another exit!
- Challenge 9
- Look! There is an exit with some gaps at the top! Parkour on the sides, jump from platform to platform and gain momentum at the top parkour. Once here, Screenshot it and post it to the forum.
- Challenge 1
- Built by Farockz, our dungeon parkour has 9 levels of maddening challenges. However, it's not impossible! Once you finish the entire course, post a screenshot of yourself at the end and post it to our forum. There are checkpoints placed at Each Challenge so be sure to click it to return at later points. The prize for completing Dungeon Parkour is the Parkour Sword. The sword is enchanted with Sharpness IV and Looting III. It displays the lore "Defeated the Toughest Parkour."
Pictured: 3 Levels Parkour: Hard
- 3 Level Parkour
- There are 3 different levels to defeat, Beginner Level, Intermediate Level, And Advanced Level. Parkour Made By JOSHYY, A4_Papers, and Fluify.
- Beginner
- Beginner jumps with the most complicated parts being basic ladders.
- Intermediate
- Mild Parkour jumps with the most complicated parts being basic ladders and fences.
- Advanced
- The hardest of the 3 parkours with the most complicated parts being hard ladders and fences.
- Beginner
- There are 3 different levels to defeat, Beginner Level, Intermediate Level, And Advanced Level. Parkour Made By JOSHYY, A4_Papers, and Fluify.
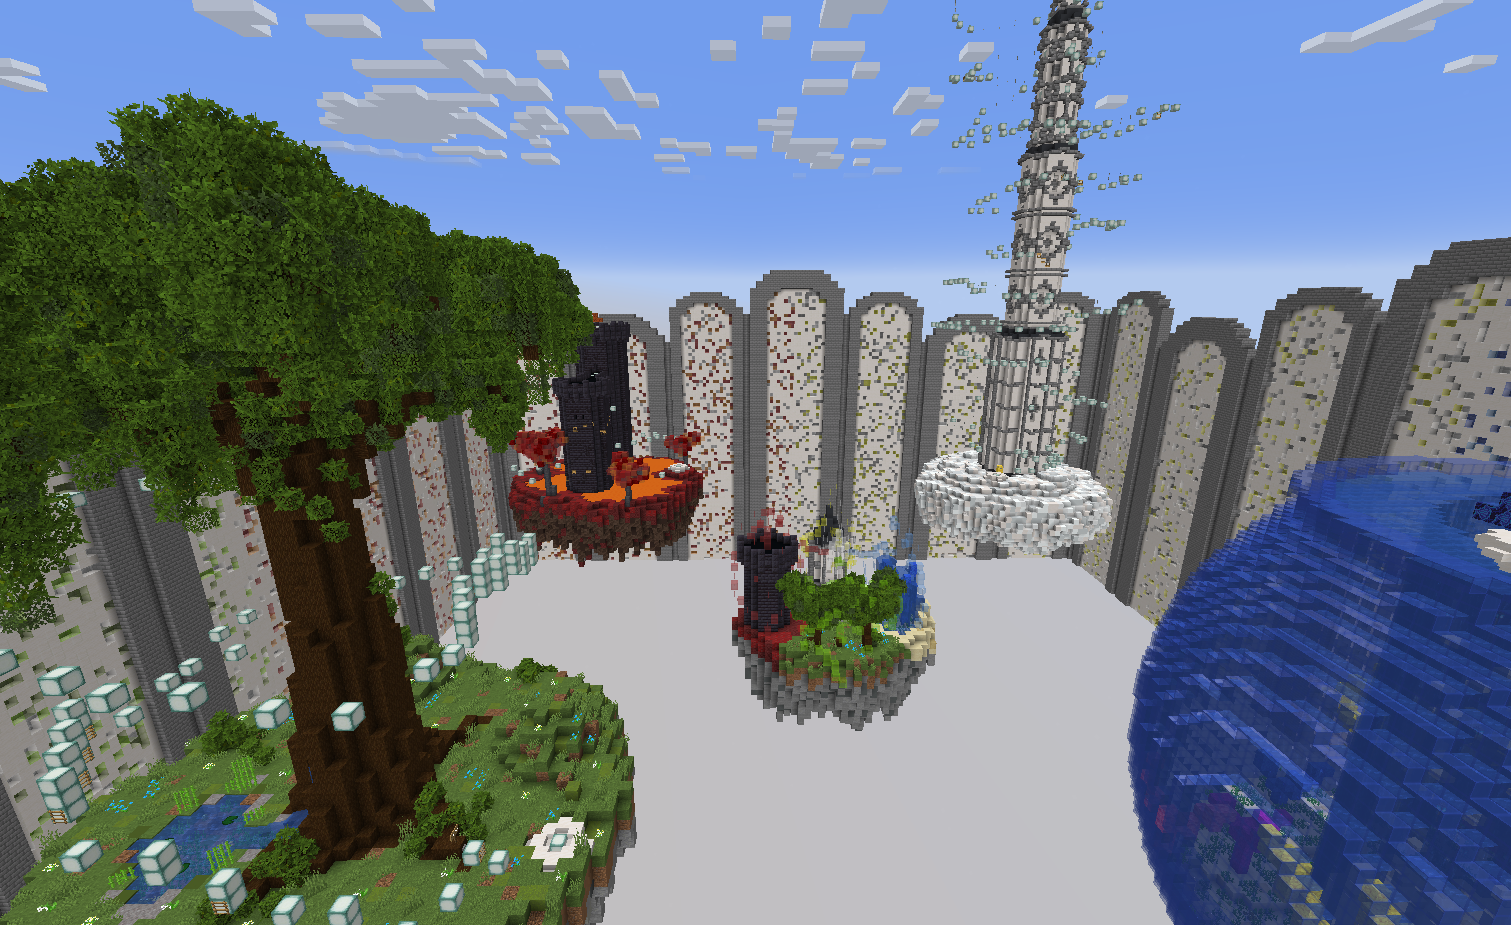
Pictured: Four Elements Parkour Arena
- Four Elements Parkour
- Autcraft's Newest Parkour! Take a screenshot at the top of each level and post on the forum to receive the Parkour Shovel. This diamond shovel is enchanted with Efficiency IV, Silk Touch, Unbreaking III, and the lore "Defeated the Four Elements of Parkour."
- Nature (Easy)
- Jump across sea lanterns and ladders as you circle a giant tree and climb up above the topmost branches.
- Fire (Medium)
- Parkour over a lava sea, around and inside of a blackstone castle, and up to the top of the tallest tower to defeat this level.
- Water (Hard)
- Jump across sandstone slabs and over floating lanterns to reach the top of an aquarium full of fish and coral.
- Air (Very Difficult)
- Climb higher and higher into the sky. Due to the difficulty of this level, there are two checkpoints.
- Nature (Easy)
- Autcraft's Newest Parkour! Take a screenshot at the top of each level and post on the forum to receive the Parkour Shovel. This diamond shovel is enchanted with Efficiency IV, Silk Touch, Unbreaking III, and the lore "Defeated the Four Elements of Parkour."
Accessibility
Description
Accessibility settings allow players to customize aspects of the game to make it easier to work with their specific wants and needs. These can range from visual and audio changes, to specific gameplay features.
How to get there
These settings can be found in the Minecraft game menu. Click escape, the choose Options, then Accessibility Settings, as shown below
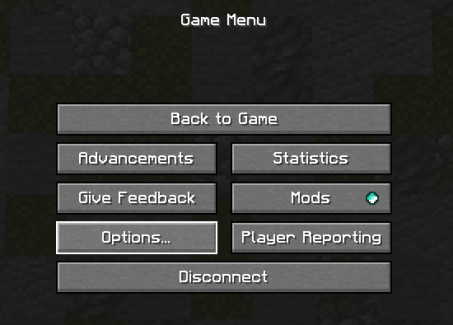
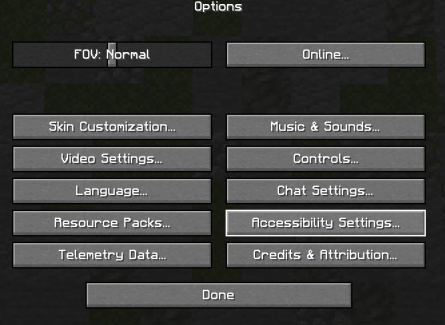
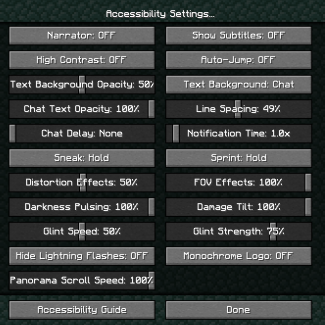
Accessibility settings
- Narrator - Reads chat and/or system messages. Available options are:
- All - Everything will be read.
- Chat - Only chat messages sent by other players will be read.
- System - Only system messages such as commands and notifications will be read.
- Show Subtitles - Displays sounds that are being produced in game, as well as arrows to show which directions the sounds are coming from.
- Colorful Subtitles is an approved mod that can help quickly organize each sound.
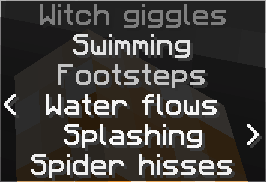
- High Contrast - Changes the contrast in UI windows.
On  Off
Off 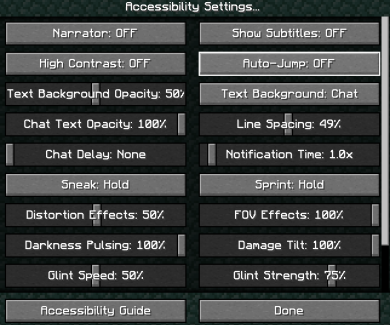
- Auto-Jump - Enables your character to automatically jump up a block whenever they walk or run towards a single block height difference.
- Text Background Opacity - Affects the level of the background in your chat window. A higher level will be more black, providing good contrast for reading. A lower level will fade to gray and eventually disappear, allowing you to see through chat to the rest of the game.
![]()
![]()
- Text Background - Choose which text will have a background added. Options are just the chat messages, or everywhere.
- Chat Text Opacity - This will adjust how your chat and system messages appear on the screen. A higher level will be solid and easier to read. A lower level will allow you to see through the text to the game.
![]()
![]()
- Line Spacing - Adjust the space between each line of chat. Larger spacing can help with readability. Smaller spacing allows more chat messages to be displayed on the screen.
![]()
![]()
- Chat Delay -This setting allows you to set a slight delay between messages appearing on the screen, however it is not functioning on Autcraft due to our chat plugins.
- Notification Time - This setting affects how long a chat message will stay on the screen before fading away.
- Sneak - Allows your character to walk in a crouched position.
- Hold - Character will crouch while the key is pressed.
- Toggle - Press the key once and your character will crouch until the key is pressed again.
- Sprint - Allows your character to travel at a quicker pace.
- Hold - Character will sprint while the key is pressed.
- Toggle - Press the key once and your character will sprint until the key is pressed again.
- Distortion Effects - This affects the rippling of the screen during Nether Portal or other nausea effects. The lowest values replace the distortion with a green border overlay.
Green overlay
- FOV Effects - Changes how much your Field of Vision will be affected by gameplay effects. Reducing this value will lower the change in your FOV when sprinting, flying, or riding ice boats.
- Darkness Pulsing - Adjusts how much darkness pulses on your screen when you are near a warden or sculk shrieker.
- Damage Tilt - Controls how much shake your screen will show when your character receives damage.
- Glint Speed - Glint is the shimmer on enchanted items. This slider affects how quickly the shimmer moves across each item.
- Glint Strength -Affects the transparency of the glint on enchanted items.
High Low
A value of zero will have no glint
Autcraft AI
Autcraft AI
NOTE: The AI is for entertainment purposes only. It will get some information wrong. This AI uses information it finds online and it is not always accurate. Just have fun!
Description
Artificial intelligence, or AI, is the ability of a computer to complete tasks that are usually done by humans. Our AI has the ability to converse with players through a question and answer format.
How it Works
AutismFather has integrated the OpenAI API into our chat plugin. Each time a player joins the AI channel, it silently sends a greeting to the OpenAI system, along with a set of instructions, such as the current Minecraft version of the server, the server address, the year it was started, the ranks we offer, and more. This tells the AI to believe that it is the Autcraft Minecraft server and that the server is talking with the player. All questions will be answered from the perspective of the actual server.
To begin, simply type /chan join AI
Each time a question is asked, the AI will almost instantaneously return an answer.
Is the AI Safe?
Our AI is instructed to keep responses safe for children of all ages. All messages are sent from "Player." In other words, the OpenAI system never knows which player it is talking to or receives any data about those players. Once a conversation is closed, all of that information is destroyed. The AI will not remember any of that conversation the next time the player joins the channel.
Each player's conversation is private between the player and the AI. Even if multiple players are in the channel at the same time, each player will only see their questions and answers and not that of any other channel member.
Finally, these conversations, like all of Autcraft, are monitored in real time and logged by Autcraft staff to make sure nothing inappropriate or dangerous is ever presented to the players.
Limitations
Due to the fact that the OpenAI system only knows what it has been told by the team that created it, its information is limited and often wrong. This is especially true when it comes to questions about Autcraft. It has heard of our server and knows some basic information, but it does not know our server rules or commands. The AI will respond with general Minecraft server information, but it does not have any command, plug-in, or other information specific to Autcraft. Please continue to ask staff any questions about the server. The AI is meant to be entertainment, not a source of information.
It is for this reason that we've added a disclaimer to the start of each conversation reminding players that this is for entertainment purposes and not to be taken seriously. This is a toy.
OpenAI is not a free system. It costs real money. Players are limited to 20 interactions per restart period (12 hours). This is to help keep costs down, but also ensure that players aren't spending all of their time interacting with the AI instead of real people on the server.
Frequently Asked Questions
These are questions are based on interactions we have seen with the Autcraft AI:
- Does the AI know who I am?
- No, the AI does not receive any personal information about you. You can tell it things during your conversation and it will remember it while you are in the channel. As soon as you leave the channel, everything it learned about you will be erased. The next time you join it will not know anything about you.
- Can I asked when my friend was last online?
- The AI does not have this information. It does not know who any players are or have any data about them. It will answer your question, but it will not be accurate.
- Does it know what plug-ins or commands the server uses?
- No it does not have this information. It will answer with information about general Minecraft servers. Sometimes the plugins listed will be the same as what we used on Autcraft, but usually not. It does not know anything about our in-house custom plugins or commands.
- Can I ask what the server rules are?
- Sure, but it won't answer correctly and should never be used as a reliable source of information. For accurate information, please ask a staff member or visit out rules page.
- Why does it keep repeating itself?
- The AI knows it is answering as the Autcraft server, and for that reason it will frequently direct you to speak with a staff member for assistance.
- I would like the AI to send a message to my friend.
- Since the AI does not know who you or your friend are, it us unable to do this. It will say that it is sending the message, but nothing will happen. Please /msg or /mail your friend directly.
- Are you spying on me in this channel?
- The AI channel, like all aspects of Autcraft, is monitored by staff 24 hours a day. We are not spying on anyone, but yes the channel is being watched to keep players safe.
- Someone joined the channel while I am in it. Will they see my questions?
- No. Even when multiple players are in the AI channel, it will be like you are in your own private channel. Each player will only see their conversation with the AI and no one else.
- Why did the AI stop responding?
- Players are limited to 20 questions during each 12 hour period. Your questions will refresh at each server restart. This question limit it to ensure the cost of running the AI is kept at a reasonable level.
- But I only asked a couple of questions before it stopped?
- By "question" we mean anything sent to the AI. If you say "hello" then you have sent a question. To simplify, you can send 20 messages to the AI.
Bessie
Bessie
Description
"Bessie" is the name affectionately given to the actual hardware on which the Minecraft server is operating.
About
Although Autcraft has transitioned through several hosting companies and even multiple servers within the same hosting companies, the personification of Bessie never changes.
When lag gets too bad or something simply goes wrong without explanation, players will often start talking to Bessie, as if pleading to behave or to work properly.
Bessie is considered to be a her.
Currently '''Bessie''' is hosted at EZP.
Bored
Are you bored? Try one of these!
Description
This is a list of things to try in Minecraft when you are bored and need something to do.
- Spawn: Explore /spawn, find the hidden rooms and spaces, can you find Bessie?
- Elytra Course: Build a cluster of hoops in the air and fly through them with style.
- Bonfire: Build an area for a bonfire. Make it look like burning by adding some burning netherrack and campfires. Add some benches and chairs for your friends to toast their marshmallows.
- Head hunting: Fight a wither, respawn the Ender Dragon or search the resource world for mobs. Will you get a rare shiny mob head?
- All aboard: Build a bridge or minecart track from one end of your base to the other. See how quickly you can get between the two areas.
- Go camping: Add some tents to a wooded area and build a clubhouse, some hiking paths, and a play area. Then, add some villagers to guard the place.
- Let it snow: Build a huge glass snow globe. You can also build a tiny house or decorate it for a snowman.
- Vacation: Build a resort in a warm biome. You can add pools, restaurants, a beach and many other things to make like your dream vacation destination.
- Party time: You can try creating an event space like a birthday party, a pool party or a disco area.
- Everybody dance now: Turn on some music and watch your parrots dance. Buy some allay spawn eggs and breed them with an amethyst shard.
- Animal farm: Round up some farm animals, create pens and barns for them to line in and invent names for your new pets.
- Self-Portrait: Make your personal Mount Rushmore by carving your Minecraft face, the faces of famous YouTubers or invent your own!
- Lets-a-go!: Create a world for Mario and Luigi. Make parkour courses, obstacles, tunnels and more.
- Desert Island: Make an oasis in the desert area by adding a small lake, some tropical trees, bushes, and a hammock.
- Coaster: Cover a mountain with twisted paths around it. Lay tracks on it and then travel with a minecart.
- What's up there?: Go to the highest point of your base and build a tower there. Turn it into an observatory and look around the world through it. Craft a spyglass to watch out for visitors.
- Jungle farming: Build a town underneath the massive jungle trees by removing all the small trees and bushes. Ocelots will spawn here.
- Tree house: Build some tree houses in the jungle and connect them with rope bridges to make a bigger structure.
- Under the sea: Go to the ocean and build the forgotten city of Atlantis. Collect the items needed to make a conduit. Search for ocean ruins, don't forget to brush the suspicious sand!
- Something fishy: Build a house only using fish tanks. Add coral, sea pickles and seagrass for detail.
- Explosive: Create an active volcano by using obsidian, black terracotta, magma blocks and lava.
- Custom trees: Build a lush green forest using custom trees to make it look like the Amazon Rainforest. Don't forget to add a river.
- Fossils: Add large skeletons of dinosaurs or mobs into a desert biome base.
- Ooh! Ahh!: Make some fireworks and have a firework display for your friends.
- Learn to loom: Design and make custom banners and nameplates for all the houses in your village.
- Mob arena: Build a dark and haunting mob arena in hard build.
- Big build: Craft a whale or a giant squid floating in an ocean.
- Sponges: Dig up tunnels below the river. Can you find a trail ruins?
- Land ahoy!: Build two pirate ships. Ah-ha me hearties!
- Sculptures: Build statues around your base.
- 3, 2, 1: Build a race track for your farm animals like horses or pigs.
- Sky high: Build a sky base.
- Storage: Craft a massive chest room.
- Books: Build a huge library having many shelves, a librarian, tables, chairs and an area dedicated to reading.
- Horses: Make a horse stable with many horses and a care-taker.
- Light up your life: Use creative lighting in your base and remove all the torches. Can you make hidden lighting? Create a redstone circuit?
- Pyramid: Search for a desert pyramid. Can you make a home there? Find a pet camel.
- Big Mac: Build your own McDonald's store in the game.
- Jungle Book: Build an ancient temple filled with treasures and books of lore from all around the jungle.
- Candy canes: Convert a witch hut into the candy house inspired by Hansel and Gretel.
- Bring a bucket: Convert a desert well into a detailed fountain. What blocks will you use? A water fountain or a lava fountain?
- Abracadabra: Turn an end city into a wizard's tower. You won't have a tough time doing this as it is already purple and tower-shaped.
- Underground: Build a sustainable living environment underground. How much light do potatoes need to grow?
- Redstone: Have a light show by combining minecarts, detector rails, and redstone lamps.
- Smell the roses: Craft a beautiful garden in an unusual spot. Within a ravine, in a cave or in an ancient city. Do Sniffers live there too?
- Sunrise, sunset: Craft a big floating island above the ocean and then sit on it to watch the sunset.
- Zoo: Build a zoo. Add all the types of mobs in it and also build different habitats for them.
- Mob farm: Create your own mob farm and shape it like a giant sword.
- Iron farm: Build an iron farm and make it look like the iron golems are smelting into molten metal inside. Remember the mob limit of 15 villagers per loaded area.
- Dig down: Build a secret base inside the well of a village.
- Transformation: Take a nether fortress to the overworld. Mine the nether bricks and rebuild at your base.
- Terracotta: Dig up a giant quarry in a mesa biome in the resource world.
- Let's Play: Ask someone to play a mini game with you.
- Archaeology: Grab your brush and head to the resource worlds to uncover suspicious sand and gravel.
- Map reading: Trade with a villager for a Woodland or Ocean map and follow it till you find the structure.
Broadcast
Broadcast
Description
Broadcast is a command on the server which creates a bold, light green message into chat that no player can ignore. These are often used for making announcements but sometimes used to deliver important reminders or to disrupt/derail inappropriate conversations taking place at the time.
Who is Broadcast?
The /broadcast command is only accessible to players with the rank of Admin. No other ranks have access.
Many of the players like to try and guess which admin is issuing the commands once they see Broadcast appear.
Some players even like to pretend that Broadcast is "alive" or "sentient," much like Bessie, the actual server itself. Some players imagine that Broadcast and Bessie are one and the same while others believe that they are separate beings. Some players call broadcast different names such as Breadcatz or Baconcast.
Cursed Admins
The Cursed Admins
Description
The Cursed Admins were introduced on Autcraft's 7th birthday, June 23, 2020. Teasers leading up to the day included darkened screenshots of the Cursed Admins with the number 7, the letters AC and then a mirror image of the number and letters beside it. The 7, meaning the 7th birthday as well as the 7 Cursed Admins, and the AC meaning Autcraft while the CA meaning Cursed Admins. Included was a new logo that was flipped horizontally, along with the 7 over it, and glitched or distorted.
Introduction
Earlier in the week, the Do Not Press button at Spawn asked the question "Have you ever wondered who has been sending the Wither armies?"
As three Wither Fights took place on the 7th birthday, broadcast told the story of how the armies came, then the kings, then the stronger kings, who were the generals, and finally the bosses who sent them, the Cursed Admins. These Cursed Admins are from another dimension, admins of another server, mirrored to Autcraft, who have crossed over to take over Autcraft. Autcraft's only protection being the players.
The Cursed Admins
The Cursed Admins, being server admins, each have a unique particle effect, base health and strength, and admin-like special ability.
- Cursed AutismFather
- Added June 23rd, 2020
- Cursed AutismFather is surrounded by the "Angry Villager" particles, holds a Diamond Block, has 550 health, and casts smite/lightning on any player that gets too close.
- Cursed Farockz
- Added June 23, 2020
- Cursed Farockz is surrounded by the "Item Snowball" particles, holds a snowball, has 450 health, and drops explosive snowballs on any player that gets too close.
- Cursed LadyCath
- Added ?
- Cursed LadyCath is surrounded by "Purple" Particles, hold a cake in her left hand, and an enchanted diamond sword (unknown enchantments) in her right, has 450 health, and summons cake-eating metal things to bite any player that gets too close.
- player that gets too close to her and traps them there for 5 seconds.
- Cursed ZEDDY1977
- Added January 11, 2022
- Cursed ZEDDY1977 is surrounded by red "Dust" particles, holds an exposed copper block, has 450 health and spawns in 4 phantoms that are glowing, speed boosted and half size, every 6 seconds
- Cursed FunMummy
- Enchanted axe
- Holds suspicious sand
- Spawns baby sniffers with cherry blossom particles
- Gives Slowness VIII to nearby players
Drops
Each Cursed Admin drops its Cursed Head, some rotten flesh, and occasionally their sword, or boots, or the item in their off-hand. Not getting the head? The heads dropping arent a 100% and sometimes you may not get them, along with that some admins like Cursed Farockz have explosive damage attached to their abilities and may destroy the item. Subsequently, after it drops, a wither might also blow up the Cursed Admin Head.
Cursed Admin Heads
Cursed Admin Heads are mob heads dropped from Cursed Admins. To date, there have been only 12 available Cursed Admin heads.
- Cursed Jasdin Head
- Cursed Farockz Head
- Cursed AutismFather Head
- Cursed AutismPastaLover Head
- Cursed bb1201 Head
- Cursed Jasdin Head
- Cursed JustBlue333 Head
- Cursed Buddy4999 Head
- Cursed LadyCath Head
- Cursed ZEDDY1977 Head
- Cursed Crankles_ Head
- Cursed Solphire Head
- Cursed FunMummy Head
History
The Cursed Admins were Released on June 23rd, 2020 as said above. The addition was first met with the regular admin heads for June (PRIDE Heads) and later added the special Cursed Admin Heads. The original admins released with the cursed admins were: Saidy, JustBlue333, Jasdin, bb1201, AutismFather, Farockz, and AutismPastaLover. The first Cursed Admin Removed was AutismPastaLover for a short break between summer and fall and returning to a cursed admin boss around October-November 2020. The First New Cursed Admin was Buddy4999 around December 2020. Cursed AutismPastaLover, Cursed bb1201, Cursed Buddy4999, Cursed Jasdin, and Cursed JustBlue last appeared on 4/17/2021.
HOTM
Head Of The Month
Description
The Head Of The Month is a monthly perk to being a Patreon supporter for the server at the $10/month level. Each month a special head is selected and given to players with the Patreon rank on the server. These heads are exclusive to members with the Patreon Rank.
How to get the HOTM
- Sign onto the server any time that month.
- Make sure that you have at least one empty inventory slot.
- Make sure that when you sign in, you are in the spawn area or in a regular build/resource world where you have your normal inventory. (ie. not mini-games)
History
- September 2019 - Logdotzip
- October 2019 - Stampylongnose
- November 2019 - Paulsoaresjr
- December 2019 - SantaCreeper
- January 2020 - Grian
- February 2020 - Etho
- March 2020 - Docm77
- April 2020 - Ash Ketchum
- May 2020 - Potted Flowers
- June 2020 - Pride Creeper
- July 2020 - Tom Nook
- August 2020 - Scattered Rainbow
- September 2020 - Sqaishey
- October 2020 - Pumpkin Demon
- November 2020 - Turkey Dinner
- December 2020 - Advent Wreath with Snowflakes
- January 2021 - realThinknoodles
- February 2021 - Pikachu
- March 2021 - Pot of Gold
- April 2021 - Autism Acceptance Month
- May 2021 - R2D2
- June 2021 - Pride Plushie
- July 2021 - Nintendo Switch
- August 2021 - Air Conditioner
- September 2021 - Gaming PC
- October 2021 - Sans
- November 2021 - Glare
- December 2021 - Iceologer
- January 2022 - Spiderman
- February 2022 - Rick Astley
- March 2022 - Leprechaun
- April 2022 - Bunny
- May 2022 - Disco Ball
- June 2022 - Sculk Creeper
- July 2022 - The Lorax
- August 2022 - elybeatmaker
- September 2022 - Xisuma
- October 2022 - Pumpkin Bucket
- November 2022 - Do Not Enter
- December 2022 - Snowy Owl
- January 2023 - 2023 Present
- February 2023 - Pink Heart
- March 2023 - Flower Chest
- April 2023 - Mobbo
- May 2023 - Obi-Wan Kenobi
- June 2023 - Rainbow Ice Cream
- July 2023 - Xilefian
- August 2023 - Spiderman (Miles Morales)
- September 2023 - Happy Potato
- October 2023 - Death
- November 2023 - Armadillo
- December 2023 - Snowy Creeper
- January 2024 - 2024
- February 2024 - Mouse
- March 2024 - Spring Zombie
- April 2024 - Adorable Sunflower
- May 2024 - Traffic Light
- June 2024 - Rainbow Mushroom
- July 2024 - Ice Cream Sandwich
- August 2024 - Perry The Platypus
- September 2024 - Pepsi
- October 2024 - Pirate Pillager
- November 2024 - Steve In Ice
- December 2024 - Snowman
- January 2025 - Hedgehog
- February 2025 - Creaking Heart
- March 2025 - Elephant Plushie
- April 2025 - Open Sign
- May 2025 - Stitch
- June 2025 - Rainbow Heart
- July 2025 - Steve from A Minecraft Movie
- August 2025 - Galactus
- September 2025 - Bing Bong from PEAK
- October 2025 - Pumpkin Pi
- November 2025 - Kirby
- December 2025 - Polar Bear in a Dragon Costume
- January 2026 - Knight Steve
- February 2026 - Best Friends
Hotlines
Hotlines
Description
Sometimes players feel overwhelmed, sad, angry, depressed, afraid and even suicidal. In these situations, we'll always do our best to be available to talk. But sometimes more help is required.
Compiled below is a list of phone numbers and people to contact around the world that are available at any time.
If you feel like you really need to talk to someone and it has to be right now, please look through this page and talk to someone right away.
Australia
- Beyond Blue
- Phone 1300 22 4636
- Website
- Lifeline
- Phone: 1300 659 467 (call back service)
- Website
- Kids Help Line
- Kids Help Line also has online counseling available if required, visit their website for more details. All calls to Kids Help Line are free, and can be made from any landline, mobile phone or phone box.
- Phone: 1800 55 1800
- Website
Belgium
- 24 Hour Community Help Service
- Phone: +32 (0) 2 648 40 14
- Website
- Centre de Prèvention de Suicide
- Phone: 0800 32 123
- Website
Canada
- Distress Centres Ontario
- Cambridge
- Phone 519-658-6805
- Website
- Durham Region
- Phone 905-430-2522 / 1-800-452-0688
- Website http://www.distresscentredurham.com/
- Grey Bruce County
- Phone 1-877-470-5200
- Kingston
- Phone 613-544-1771
- Website
- Lanark, Leeds and Grenville Counties
- Phone 1-800-465-4442
- Website
- London & District
- Phone 519-667-6711
- Website
- Niagara Region
- Phone 905-688-3711; 905-734-1212; 905-563-6674; 905-382-0689
- Website
- North Halton
- Phone 905-877-1211
- Website
- Oakville
- Phone 905-849-4541
- Website
- Ottawa & Region
- Phone 613-238-3311
- Website
- Peel Region
- Phone 905-278-7208
- Website
- Sarnia & Lambton County
- Phone 519-336-3000 or 1-888-347-8737
- Website
- Toronto
- Phone 416-408-4357
- Website
- Waterloo Region
- Phone (Distress) 519-745-1166 - (Crisis) 519-744-1813 or 1-866-366-4566
- Website
- Wellington and Dufferin Counties
- Phone (Distress) 519-821-3760 or 1-888-821-3760 - (Crisis) 519-821-0140
- Website
- Windsor & Essex County
- Phone 519-256-5000
- Website
- Suicide Action Montreal
- Phone (514) 723 4000
- Website
- New Brunswick
- Phone 1-800-667-5005
- Alberta
- Phone 403 327 7905
China
- Police
- Phone: 110
- Health Hotline
- Phone: 12320
- National Adolescent Psychological Counseling Hotline
- Phone: 12355
- National Psychological Counseling Hotline for Women and Children
- Phone :12338
- Beijing Psychological Assistance Hotline
- Phone: 010-82951332
- Guangdong Psychological Aid Public Welfare
- Phone: 020-81777652
- Guangzhou Psychological Assistance Hotline:020-81899120
- Phone: 020-81777652
Germany
- Telefonseelsorge
- 24 Stunden täglich - anonym, vertraulich, geb¸hrenfrei.
- Phone: 08001110111
- Phone: 08001110222
- Website
- Nummer gegen Kummer
- für Kinder und Jugendliche, Montag-Samstag 14:00-20:00
- Phone: 08001110333
- Website
- TelefonSeelsorge Hannover
Hong Kong Special Adminstrative Region, China
- The Samaritans HK
- Phone: +852 28960 000
Northern Ireland
- Lifeline
- Phone: 0808 808 8000
- Textphone: 18001 0808 808 8000
- Website
- The Samaritans
- Phone: 08 457 90 90 90
- Website
Republic of Ireland
- The Samaritans
- Phone: 116 123
- Email: [email protected]
- Website
- Write: Freepost RSRB-KKBY-CYJK, PO Box 9090, STIRLING, FK8 2SA
- Console
- Phone: 01 6102638
- Email: [email protected]
- 1 life
- Freephone: 1800 247 100
- Text: HELP to 51444
Japan
- Osaka Suicide Prevention
- Phone: +81 (0) 6 4395 4343
- Website
- Tell (English language option)
- Phone: 03 5774 0992
- Website
New Zealand
- Lifeline
- Phone: 0800 543 354
- Website
Papua New Guinea
- Port Moresby Lifeline
- Phone: 675 326 0011
Samoa
- Faataua Le Ola
- Phone: 800 5433
Tonga
- Lifeline
- Phone: 23000 25144
United Kingdom
- Samaritans UK & ROI
- Hotline: +44 (0) 8457 90 90 90 (UK - local rate)
- Hotline: +44 (0) 8457 90 91 92 (UK minicom)
- Hotline: 1850 60 90 90 (ROI - local rate)
- Hotline: 1850 60 90 91 (ROI minicom)
- Website
- E-Mail [email protected]
- ChildLine
- 0800 1111
- ChildLine runs a helpline for children and young people in the UK. Calls are free and the number won't show up on your phone bill.
- Papyrus
- ïPAPYRUS (0800 068 41 41) is a voluntary organisation supporting teenagers and young adults who are feeling suicidal.
United States of America
- Hotlines available 24 hours a day, 7 days a week
- National Suicide Prevention Lifeline
- Phone: 988
- Website
- National Mental Health Association Hotline
- Phone: 1-800-273-TALK (8255)
- Website
- National Youth Crisis Hotline
- Phone: 1-800-442-HOPE (4673)
- Website
- National US Child Abuse Hotline
- Phone: 1-800-4-A-CHILD (422-4453)
- Website
- National Teen Dating Abuse Helpline
- Phone: 1-866-331-9474
- Website
- National SPEAK UP Hotline
- Students can safely and anonymously report weapon threats in their school or community.
- Phone: 1-866-SPEAK-UP (773-2587)
- Website
Lag
Lag
Description
Lag is usually considered to be choppiness or stuttering or when items don't break/appear when they should in game. This is generally an over simplification of many possible factors and symptoms.
Types of Lag
- TPS, or Ticks Per Second
- The time interval by which Minecraft schedules events. An optimally running server will run at or around 20 TPS.
- A server that drops below 15 TPS will begin to visually "stutter," most noticeably in the sun and moon as they literally bounce backwards a few pixels every few seconds.
- When a server drops below 10 TPS, you will begin to see mobs freeze in their tracks and then randomly appear elsewhere, making for some tragic creeper encounters. This can also cause chunks to not load for some time.
- The TPS can drop when a lot is happening on the server, whether it be a lot of players on, a lot of mobs being loaded into memory, redstone circuits running continuously in several locations, a high number of particles or entities being loaded at once and many other instances where basically higher than average numbers of events happen on the server than normal. Another reason is that the java edition is single threaded.
- Ping
- A term for the amount of time that it takes to send and receive a signal from your computer to the server. It is named after the Sonar Ping in which submarines send out a "ping" sound into the water to gather information about other objects in the water.
- A high server ping, meaning it takes a longer time to send and receiver data, can result in "Internet Lag." This is quite literally where the server is doing work that you aren't seeing for quite some time because it takes a while for it to get to your computer to show you what happened.
- A high ping is usually caused by a slow Internet connection. This can be between you and your ISP, you and the server or the connection from the server to your computer (yes, the data can take a different path back sometimes). Sometimes it can even be as simple as your computer's connection to your router, in which case, restarting your router may be all you need to do to fix it.
- FPS, or Frames Per Second
- The measurement of the number of individual frames of video motion that you see for ever second of time. The more frames you see each second, the more "smooth" transitions will appear.
- At around 60 FPS, most video or game motion will look smooth and crisp. Below that, 24 to 32, it still looks presentable but not as crisp. Anything below 24 FPS and movements begin to look choppy and jagged.
- A low FPS is usually caused by the player's computer either running too many applications or not having enough power, such as ram, CPU or graphics card power. The java edition will get 1/4-1/8 the FPS of bedrock editions most of the time.
What can I do?
Log out, close your game completely, then re-open it and log back into Autcraft, as this may help. Also, restart your router (if applicable.)
For the future, install the Optifine mod to choose Minecraft settings that will help reduce the resources your computer needs to run your game. Optifine should only be downloaded at Optifine.net and includes a self-installer for Windows and Mac. No mod loader is needed to use Optifine, at this time.
Shiny Heads
Shiny Heads
Description
Shiny Heads, based on Shiny Pokemon, are heads with a different color. When they are dropped, you will hear a firework, see Villager Happy particles, and you will get an in-game message. They were released on August 21st, 2017, the original being Shiny Creeper.
Discovery
Shinies are either discovered by players or released for events, such as our Christmas event.
Many shinies were discovered during 2020's Shiny Month In May!
Shinies are very hard to get, but you can increase your luck by adding Looting III to your sword.
Spawn Shiny Room
To see the complete list of shinies discovered, head to the shiny room at spawn
Shiny Collections
Many players on Autcraft have collections of their shiny heads, some like to store them all in one spot and show it off to others on their achievement and great time spent collecting their shinies.
Shiny Chances
Currently, Shiny Chances are not publicly available but do make it known that some mobs have a higher percentage on the shiny.
The way shinies work is the mob gets the random chance to drop ahead, if it does it rolls a second chance to see if it gets a shiny, if it lands on a normal head, it gets a normal head, if it lands on a shiny, you get a shiny, No one knows the exact values so it is quite hard to predict.
Shiny Chances Increase
There have been several instances where shiny chances were increased, some permanent, some were event-themed. These are Fun but Rare events and asking for more will lead to less of them happening. Most notably:
- October 15th - Nov 1st, 2018 Shiny Skeleton Increased For Halloween
- Around August 16th, 2019 - Now, Shinies Increased Chances in the wild.
- The Month Of May 2020, Shinies All around increased significantly for a month.
- June 23rd, 2020 - June 23rd, 2020, Autcraft's Birthday Shiny Increased by a ton.
- December 19th, 2020 - January 1st, 2021, Shinies Increased for holidays.
- May 2021- Shiny odds were increased exponentially for the month of May.
- Small Few Day Events here and there.
- January 2022- Shiny odds were Slightly Increased due to the Head Plugin Rewrite as looting now works as intended.
The List Of Current Shinies
Note: This list is not kept up to date often and may be incorrect, it is in chronological order with possible minor errors
- Shiny Creeper
- Shiny Cow
- Shiny Zombie
- Shiny Slime
- Shiny Snowman
- Shiny Enderman
- Shiny Ghast
- Shiny Wither Skeleton
- Shiny Spider
- Shiny Skeleton
- Shiny Guardian
- Shiny Magma Cube
- Shiny Polar Bear
- Shiny Bat
- Shiny Zombie Pigman (Not Zombified Piglin)
- Shiny Iron Golem
- Shiny Husk
- Shiny Pig
- Shiny jeb_Sheep
- Shiny Stray
- Shiny Villager (1.12)
- Shiny Wolf
- Shiny Brown Llama
- Shiny Gray Llama
- Shiny Cream Llama
- Shiny White Llama
- Shiny Squid
- Shiny Turtle
- Shiny Phantom
- Shiny Chicken
- Shiny Charged Creeper
- Shiny Wandering Trader
- Shiny Drowned
- Shiny Skeleton Horse
- Shiny Pufferfish
- Shiny Dolphin
- Shiny Blaze
- Shiny Illusioner
- Shiny Weak Panda
- Shiny Panda
- Shiny Lazy Panda
- Shiny Worried Panda
- Shiny Playful Panda
- Shiny Brown Panda
- Shiny Aggressive Panda
- Shiny Vex
- Shiny Ravenger
- Shiny Bee
- Shiny Salmon
- Shiny Witch
- Shiny jeb_ Panda
- Shiny Red Mooshroom
- Shiny Fox
- Shiny Cod
- Shiny Evoker
- Shiny Brown Mooshroom
- Shiny Arctic Fox
- Shiny Killer Bunny
- Shiny Zombie Horse
- Shiny Strider
- Shiny Ragdoll Cat
- Shiny Black Cat
- Shiny British Short Hair Cat
- Shiny Persian Cat
- Shiny White Cat
- Shiny Siamese Cat
- Shiny Tabby Cat
- Shiny Jellie Cat
- Shiny Calico Colors
- Shiny Red Cat
- Shiny Tuxedo Cat
- Shiny Ocelot
- Shiny Zoglin
- Shiny Yellow Sheep
- Shiny White Sheep
- Shiny Red Sheep
- Shiny Blue Sheep
- Shiny Purple Sheep
- Shiny Black Sheep
- Shiny Light Blue Sheep
- Shiny Orange Sheep
- Shiny Zombified Piglin
- Shiny Silverfish
- Shiny Giant
- Shiny Piglin Brute
- Shiny Piglin
- Shiny Green Parrot
- Shiny Blue Parrot
- Shiny Goat
- Shiny Cave Spider
- Shiny Glow Squid
- Shiny Leucistic/Pink Axolotl
- Shiny Gold Axolotl
- Shiny Cyan Axolotl
- Shiny Wild/Brown Axolotl
- Shiny Blue Axolotl
- Shiny Elder Guardian
- Shiny Goat Screaming
- Shiny Red Parrot
- Shiny Endermite
- Shiny Cold Strider
- Shiny Hoglin
- Shiny Angry Bee
- Shiny Gray Sheep
- Shiny Green Sheep
- Shiny Pink Sheep
- Shiny Lime Sheep
- Shiny Cyan Sheep
- Shiny Light Gray Sheep
- Shiny Brown Sheep
- Shiny Magenta Sheep
- Shiny Creamy Trader Llama
- Shiny Pillager
- Shiny White Trader Llama
- Shiny Gray Horse
- Shiny White Horse
- Shiny Chestnut Horse
- Shiny Creamy Horse
- Shiny Black Horse
- Shiny Dark Brown Horse
- Shiny Brown Horse
- Shiny Charging Vex
- Shiny Brown Trader Llama
- Shiny Gray Trader Llama
- Shiny Black Rabbit
- Shiny Toast Rabbit
- Shiny Gold Rabbit
- Shiny White Rabbit
- Shiny Salt and Pepper Rabbit
- Shiny Brown Rabbit
- Shiny Black and White Rabbit
- Shiny Temperate Frog
- Shiny Verdant (Cold) Frog
- Shiny Pearlescent (Warm) Frog
- Shiny jeb_ Cat
- Shiny Allay
- Shiny Donkey
- Shiny Mule
- Shiny Fletcher Villager
- Shiny Farmer Villager
- Shiny Librarian Villager
- Shiny Cleric Villager
- Shiny Fisherman Villager
- Shiny Leatherworker Villager
- Shiny Weaponsmith Villager
- Shiny Shepherd Villager
- Shiny Nitwit Villager
- Shiny Cartographer Villager
- Shiny Armorer Villager
- Shiny Butcher Villager
- Shiny Toolsmith Villager
- Shiny Mason Villager
- Shiny Warden
- Shiny Angry Polar Bear
- Shiny Camel
- Shiny Wither Skull (4 types)
- Shiny Angry Wolf
- Shiny Blue Shulker
- Shiny Orange Shulker
- Shiny Magenta Shulker
- Shiny Purple Shulker
- Shiny Green Shulker
- Shiny Lime Shulker
- Shiny Gray Shulker
- Shiny White Shulker
- Shiny Red Shulker
- Shiny Black Shulker
- Shiny Yellow Shulker
- Shiny Light Blue Shulker
- Shiny Light Gray Shulker
- Shiny Pink Shulker
- Shiny Cyan Shulker
- Shiny Brown Shulker
- Shiny Vindicator
- Shiny jeb_Shulker
- Shiny Sniffer
- Shiny Breeze
- Shiny Striped Wolf
- Shiny Pale Wolf
- Shiny Rusty Wolf
- Shiny Spotted Wolf
- Shiny Woods Wolf
- Shiny Chestnut Wolf
- Shiny Snowy Wolf
- Shiny Black Wolf
- Shiny Ashen Wolf
- Shiny Creaking
- Shiny Armadillo
- Shiny Bogged
- More To Come!!
